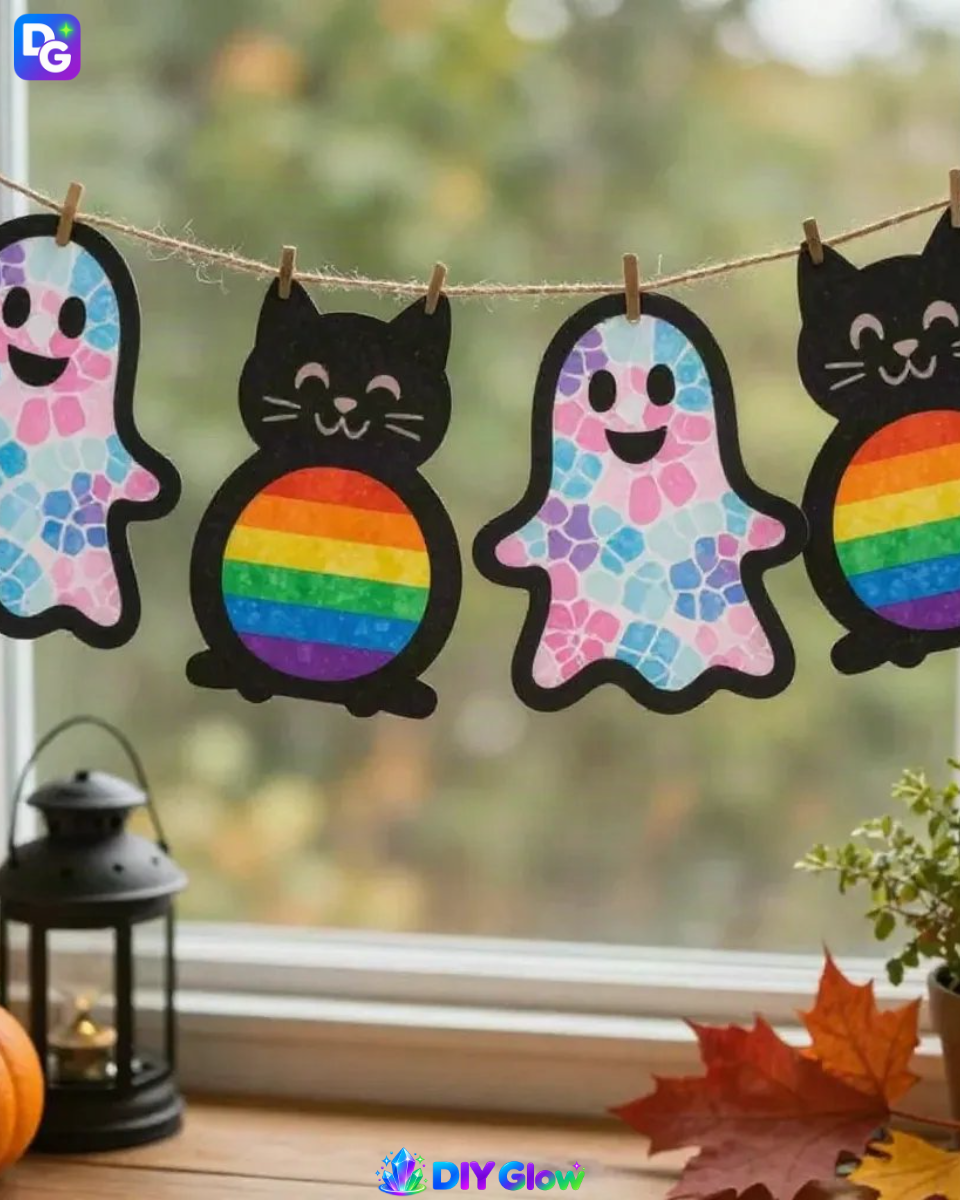
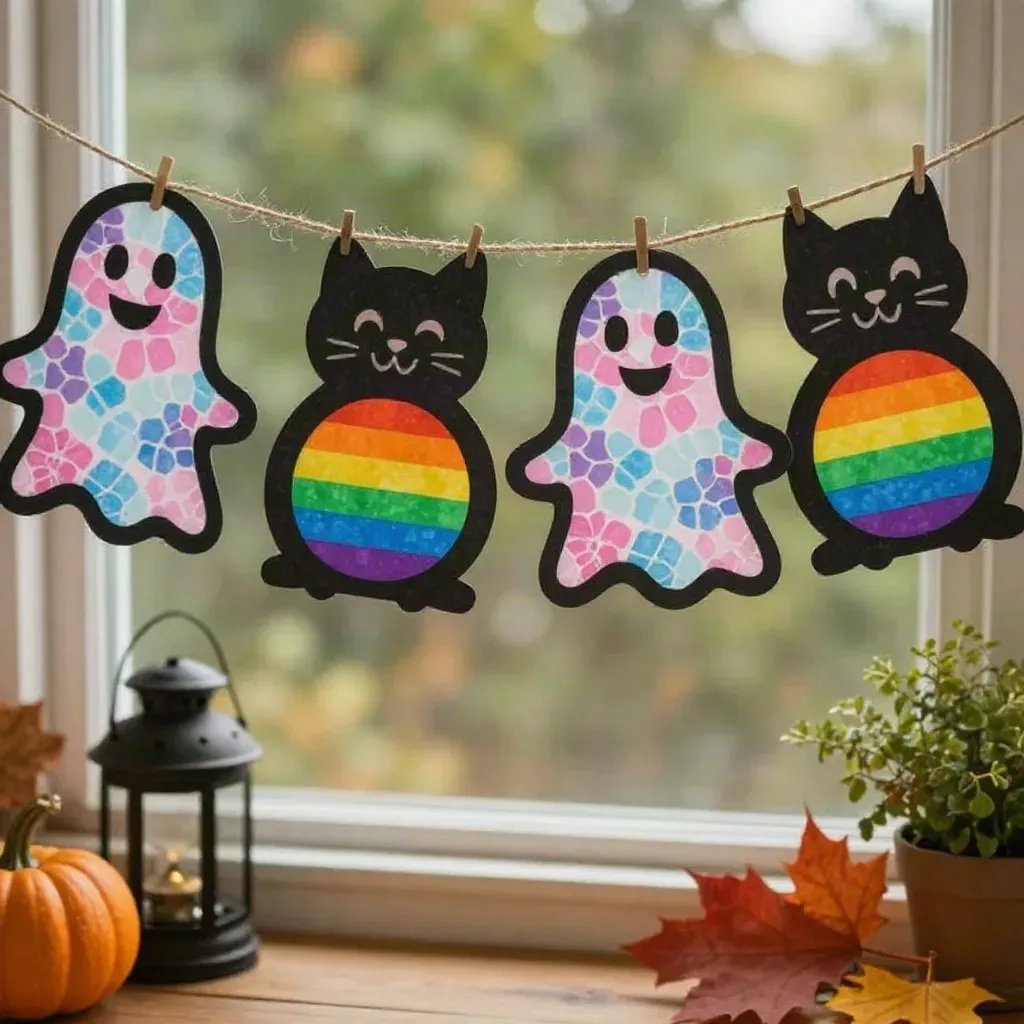
The Rainbow Ghost & Kitten Suncatcher Garland transforms a simple window into a vibrant display of color and creativity. As you fill the frames with brightly colored tissue paper, you will watch the colors come to life in the light. This project not only enhances your space but also provides a fun and artistic activity for everyone involved. You may also find Iridescent Rainbow Ghost Window Suncatcher useful.
What Makes This Work
The joy of this craft lies in the combination of materials that create a stunning play of light and color. The transparent qualities of the clear contact paper allow sunlight to filter through, illuminating the rainbow hues of the tissue paper. This suncatcher project is an engaging way to explore color mixing and the effects of light. You may also find Rainbow Crystal Flower Suncatcher Chain useful.
Materials
To make the Rainbow Ghost & Kitten Suncatcher Garland, gather the following supplies: You may also find Rainbow Crystal Spiderweb Suncatcher useful.
- Clear contact paper
- White tissue paper
- Rainbow tissue paper
- Clear pink cellophane
- Clear blue cellophane
- Black cardstock
- String
After cutting your black cardstock into frames, you’ll proceed with the filling and decorating steps that define your creations. You may also find Rainbow Prism Moon Suncatcher Crystal Glass Charm useful.
Steps
- Cut the frames of ghosts and kittens from black cardstock to your desired size. You will be left with a stark contrast against the colorful materials.
- Place the cut frames onto a piece of clear contact paper, ensuring even spacing. This step allows for easy filling without disturbing the frames.
- Cut white, pink, and blue tissue papers into small pieces and fill the ghost frames with them. This filling creates a soft, textured appearance, enhancing the visual interest.
- For kitten bellies, use rainbow tissue paper to fill the frames. The vivid colors represent the playful nature of kittens and add a bright pop to the display.
- Draw faces on each ghost and kitten with a black marker or pen, providing character to your creations. The sharp contrast of black against the bright colors will make the faces stand out.
- Seal the frames by placing another piece of clear contact paper over them, then trim excess paper. This seals in the colors and makes the frames durable. Always ensure that edges are pressed down well for a smooth finish.
- Cut a length of string and attach your decorated frames at even intervals to hang up. This final step will bring your suncatcher to life, allowing you to enjoy its beauty visible to the outside world.
You may also find Rainbow Prism Moon Suncatcher With Crystal Glass Charm useful.
What Goes Wrong and How to Fix It
If the tissue paper is not staying in place, you may need to check that the contact paper is fully pressed down. Bubbles and gaps can cause the contents to shift or not stick properly. If you find that a frame is not sealed correctly, you can simply reseal it by lifting and pressing down again.
Where to Display It
The Rainbow Ghost & Kitten Suncatcher Garland looks fantastic in any window where sunlight can shine through. Hang it in a playroom, child’s bedroom, or even in common areas. The interaction with light throughout the day will create different effects, making it a dynamic decoration that changes as the light shifts.
Variations
You can vary the designs by adding other creatures like pumpkins or stars for different seasons. Using various cellophane colors will also yield unique effects. Experiment with different shapes and sizes to see how the light interacts with the various designs.
FAQs
Can I use other colors of tissue paper?
Yes, you can certainly substitute other colors of tissue paper. Different colors will bring unique vibes to the suncatchers.
How do I keep the suncatcher from falling apart?
Make sure to seal edges well with contact paper. If the frames appear loose, consider reinforcing those areas by pressing down firmly.
How long does this project take?
The project typically takes a couple of hours from start to finish. Allow extra time for drying and settling after sealing.
Can kids help with this craft?
Absolutely! Kids can help with filling the frames and drawing faces. However, supervise them with cutting and sealing.
What should I do if my suncatcher looks messy?
If your suncatcher has excess glue or material, carefully trim or peel back the components. Keeping the edges clean will enhance your design.
Can I use other materials for the frames?
Yes, consider using sturdier materials like cardboard or wood for a more permanent installation.
The Rainbow Ghost & Kitten Suncatcher Garland is a delightful project that merges creativity with learning about light and color.
Conclusion
Creating colorful decorations can be even more enriching with the right tools. Consider purchasing a stained glass window hanging string to enhance your display. If you’re looking for more art pieces, you can explore options like the Black Bombay Cat Sleeping in Angel Wing for inspiration.
Follow us on social for more DIY ideas & inspiration!
Rainbow Ghost & Kitten Suncatcher Garland
Would you like to save this project?
By submitting you agree to receive this project and occasional emails. Unsubscribe anytime.
Materials
Materials
- 1 roll Clear contact paper Used to seal the frames.
- 3 sheets White tissue paper Cut into small pieces for filling.
- 1 sheet Rainbow tissue paper Used for filling kitten bellies.
- 1 roll Clear pink cellophane Add color and transparency.
- 1 roll Clear blue cellophane Add color and transparency.
- 2 sheets Black cardstock Cut into frames.
- 1 string String For hanging the suncatcher.
Directions
Preparation
- Cut the frames of ghosts and kittens from black cardstock to your desired size.
- Place the cut frames onto a piece of clear contact paper, ensuring even spacing.
Filling
- Cut white, pink, and blue tissue papers into small pieces and fill the ghost frames with them.
- For kitten bellies, use rainbow tissue paper to fill the frames.
Decoration
- Draw faces on each ghost and kitten with a black marker or pen.
- Seal the frames by placing another piece of clear contact paper over them, then trim excess paper.
Assembly
- Cut a length of string and attach your decorated frames at even intervals to hang up.
Last Step: Don’t forget to leave a rating and comment below! It helps other readers find the best DIY projects — and it helps us too!