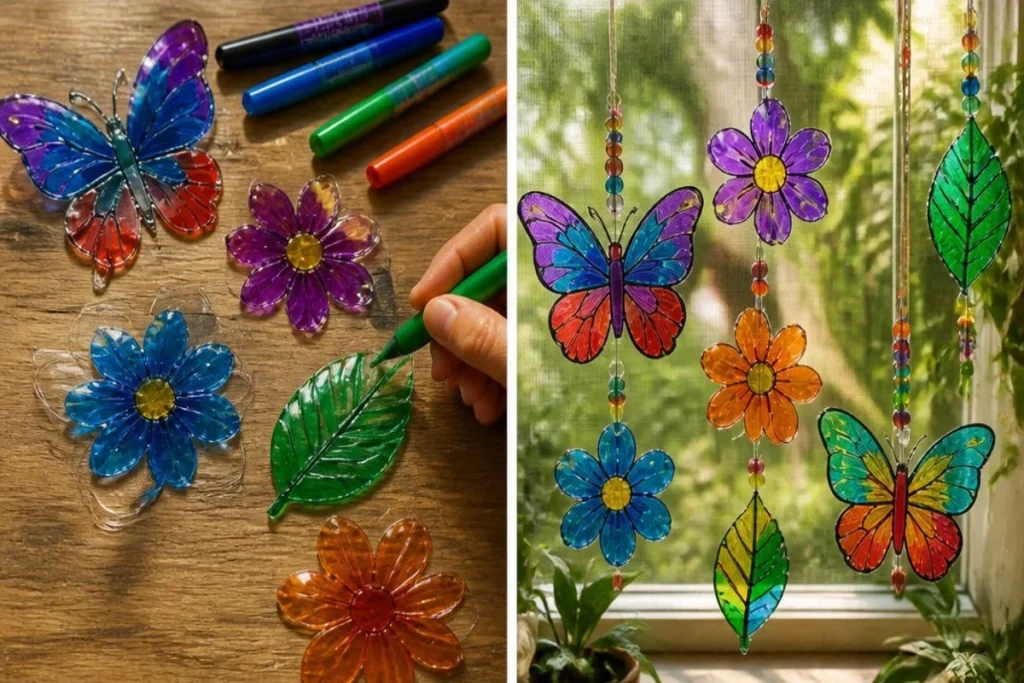
Recycled Bottle Window Art brings joy into any space, instantly transforming a window into a time of color and light. As the sunlight dances through your creations, they illuminate the room, filling it with glowing hues. This project is easy and fun, making it perfect for families wanting to explore their creative sides. You may also find Baking Soda Crystal Heart Growth useful.
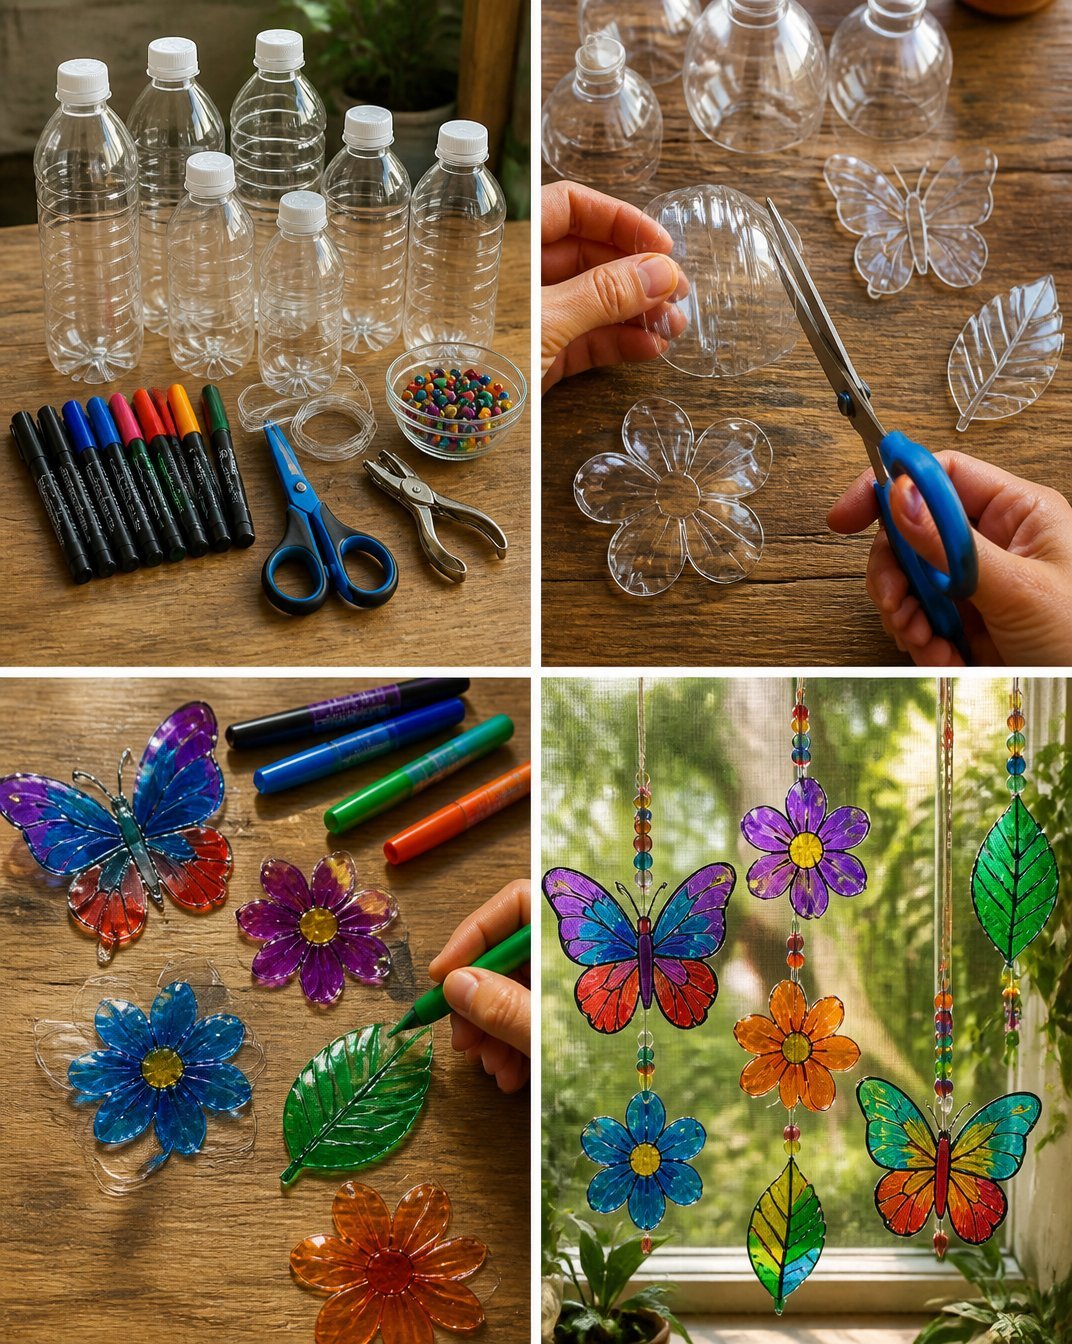
First, gather your materials. You will need clear plastic bottles, permanent markers, scissors, a hole punch, string or fishing line, and optional beads. These supplies are straightforward and readily available at home or in craft stores. If you’re looking for more creative inspirations, check out DIY bioplastic suncatchers for another exciting project.
Steps for Creating Recycled Bottle Window Art
Wash and Dry the Plastic Bottles
Start by washing and drying your plastic bottles thoroughly. This step ensures that any residue doesn’t affect the final look of your artwork. Proper cleaning allows the permanent markers to apply smoothly.Cut the Bottles
Carefully cut flat panels or create fun shapes from the bottles. Pay attention to your cuts, ensuring clean edges. What you are looking for here is smooth surfaces which will later allow your designs to pop with color.Color Your Pieces
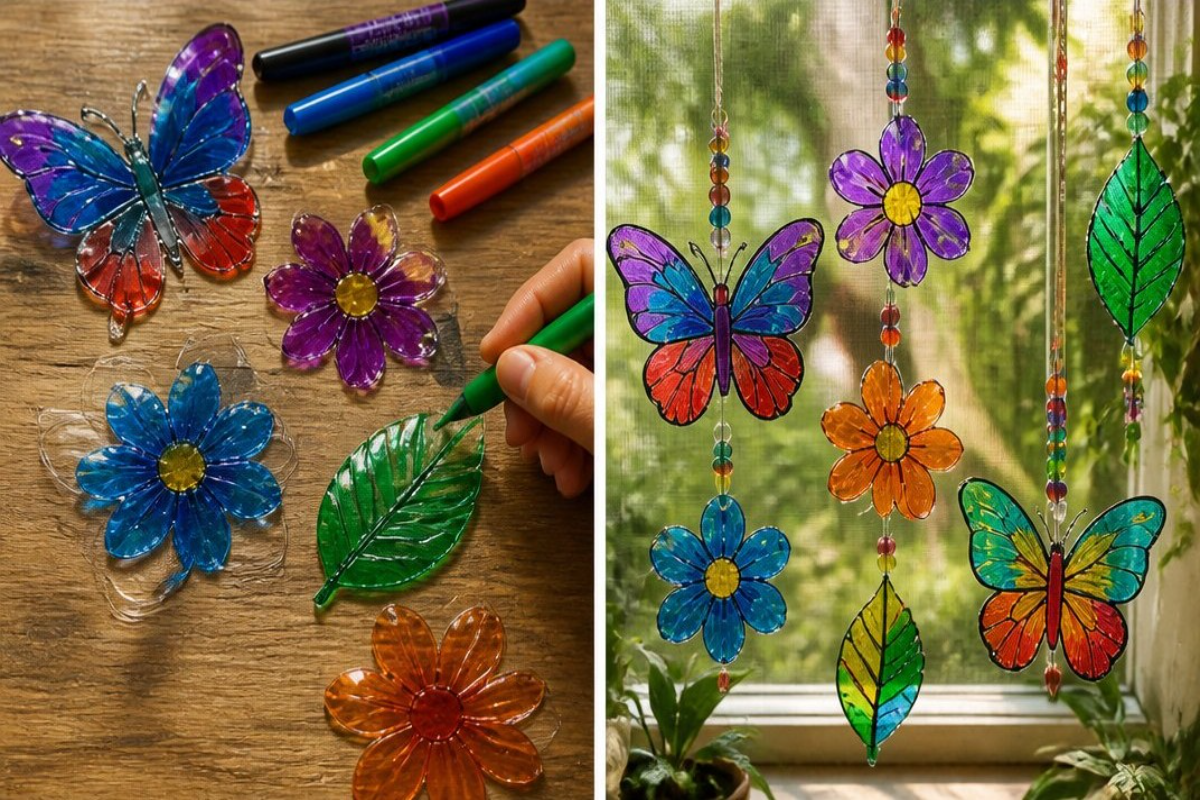
Color these pieces joyfully with the permanent markers. You can experiment with different colors, patterns, and textures. As you work, you’ll notice how the markers brighten each piece, bringing them to life. Consider using techniques like blending colors or creating stripes for an added flair. For similar projects, take a look at rainbow butterfly stakes.Punch Holes and Add Beads
Using the hole punch, make a hole at the top of each piece. If you want to add some extra charm, you can string beads onto your fishing line or string before attaching your artwork. This little detail will provide a colorful touch whenever the pieces sway in the light.Hang Them Up
Finally, hang them up in a bright window. Make sure there’s enough light to shine through, as this will highlight the vibrant colors you’ve created. The best placements are near sunny spots, where the windows become galleries of colorful reflections.
What Goes Wrong and How to Fix It
Sometimes, despite enthusiasm, things may not turn out as expected. If the colors smudge, it could be due to the markers not drying adequately. Let the artwork sit for a longer period to ensure everything sets well. If shapes do not seem sturdy, reinforcing the edges with additional layers may help. Always check if your creations are safely displayed and can withstand everyday sunlight and movement.
Where to Display Your Crafted Art
The beauty of this project is its versatility. You can place your art pieces on any bright window, allowing sunlight to filter through. Consider higher locations in your home, such as above kitchen sinks or living room windows. Hanging them near entryways or bedrooms can also uplift those spaces. If you’d like to explore decorative ideas, you can check out the stained glass glue window art for further inspiration.
Variations
Feel free to experiment with different designs and themes. You might want to try abstract shapes, or even seasonal decorations, like snowflakes for winter or flowers for spring. You can include themes or colors based on holidays you celebrate, adding a personalized touch to each piece. Look into creating themed displays in a series, with small variations for each segment, to keep things fresh and exciting. For additional creative ideas, the aurora bottle lantern project could be an exciting follow-up.
FAQs
How long does it take to make recycled bottle window art?
Making recycled bottle window art can take approximately one to two hours, depending on your design and drying time.
Can kids help with this project?
Yes! Children can participate in coloring and choosing designs, but adults should handle the cutting and hole-punching for safety.
What if my colors don’t show up brightly?
This could occur if the permanent markers you’re using aren’t vivid enough. Consider trying different brands or layering colors for more intensity.
How do I clean my plastic bottles?
Rinse them out thoroughly with soap and warm water, ensuring no soap residue remains. For best results, dry them completely before starting your project.
Can I use other types of paint instead of markers?
Absolutely! Just ensure any paint you use is suitable for plastic and dries clear or bright.
What should I do if I didn’t cut perfectly?
Don’t worry! It’s easy to touch up your cuts or even redesign the shape if necessary. Keep your shapes fun and freeform to allow for creative freedom.
Conclusion
Creating Recycled Bottle Window Art can be a delightful craft project for families, allowing your creativity to shine through. Not only does it brighten up your living spaces, but it also contributes to eco-friendly practices in crafting. For more unique inspirations in using plastic for art, check out the innovative Plastic Bottle Cap Art or explore decorative options with a Bottle Bottom Glass Window on Etsy. Enjoy your crafting!
Follow us on social for more DIY ideas & inspiration!
Recycled Bottle Window Art
Would you like to save this project?
By submitting you agree to receive this project and occasional emails. Unsubscribe anytime.
Materials
Materials
- 5 clear plastic bottles Ensure the bottles are clean and rinsed.
- 1 pack of permanent markers Use vivid colors for best results.
- 1 scissors For cutting the bottles into shapes.
- 1 hole punch To create holes for hanging.
- 1 string or fishing line For hanging the artwork.
- optional beads For adding extra charm.
Directions
Preparation
- Wash and dry the plastic bottles thoroughly to remove any residue.
- Carefully cut the bottles into flat panels or fun shapes, ensuring clean edges.
Coloring
- Color the pieces joyfully with permanent markers, experimenting with different colors and patterns.
Assembly
- Use the hole punch to make a hole at the top of each piece.
- If desired, string beads onto your fishing line or string before attaching the artwork.
- Hang the finished pieces in a bright window for the best light display.
Last Step: Don’t forget to leave a rating and comment below! It helps other readers find the best DIY projects — and it helps us too!