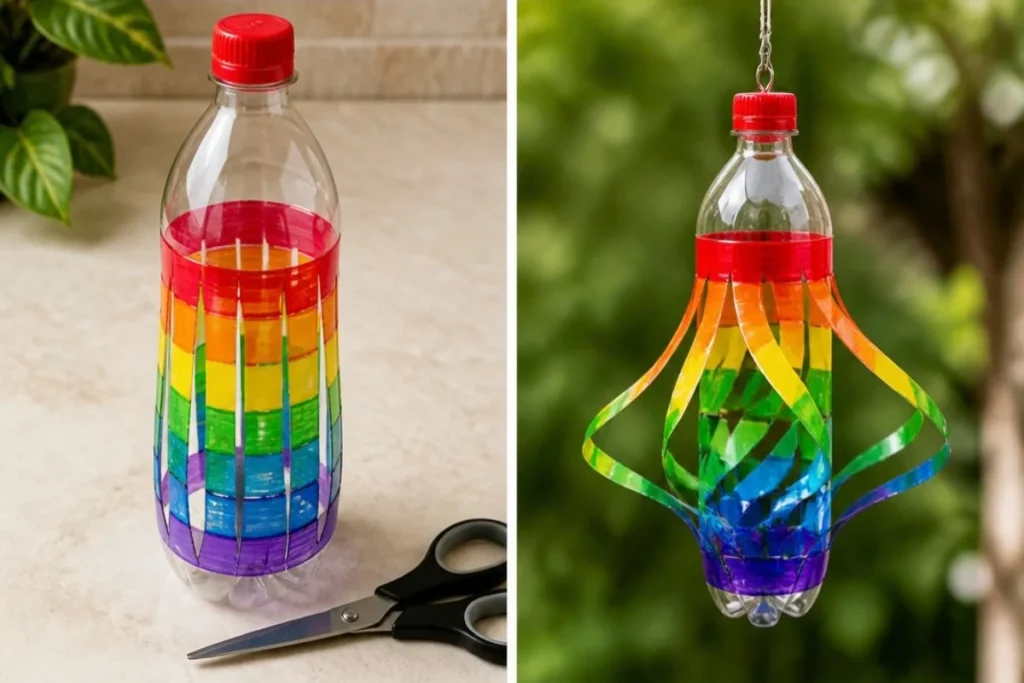
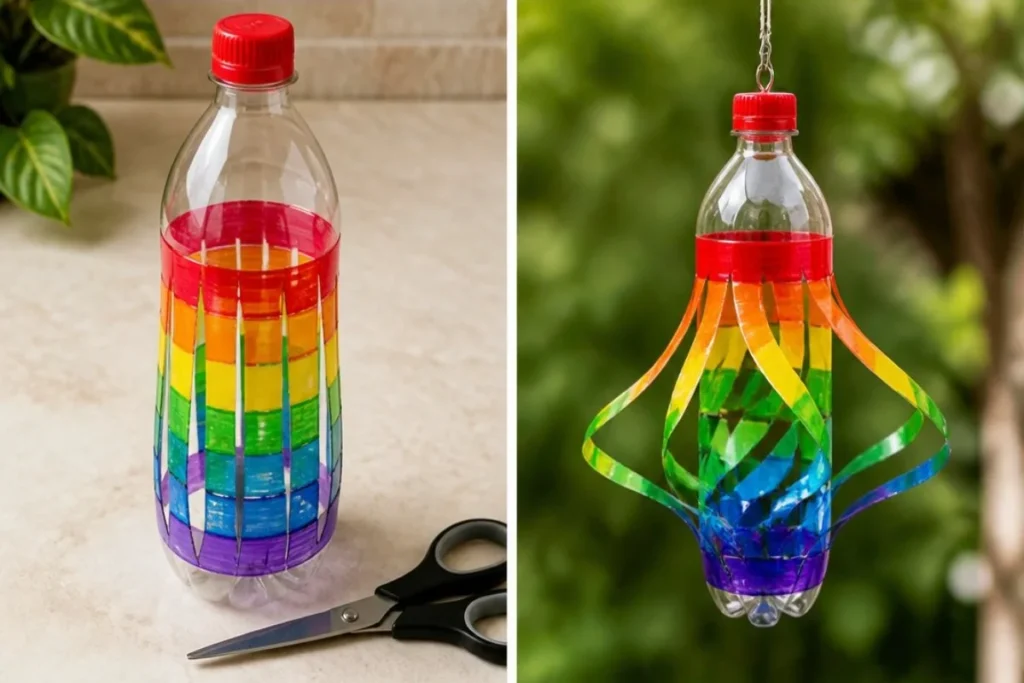
The Recycled Bottle Rainbow Wind Spinner is a brilliant way to transform an ordinary clear plastic bottle into a colorful display that dances in the wind. When hung in a sunny location, its vibrant colors and playful movement will catch the eye of anyone nearby. This simple project not only brings a splash of color to your outdoor space but also serves as a fun activity to engage in as a family. You may also find Rainbow Butterfly Stakes Recycled Bottles useful.
To begin creating your own wind spinner, you will need: You may also find Iridescent Rainbow Ghost Window Suncatcher useful.
- Clear plastic bottle
- Permanent markers
- Scissors
- String
- Swivel hook
Once you have gathered all your materials, set up a clean workspace. This ensures that you have enough room to take your time as you work on your project and keeps everything organized.
The first step involves using the permanent markers to color horizontal rainbow bands around the bottle. Choose bright colors to make the spinner stand out. You will notice the vivid difference in color as you layer the markers onto the smooth surface. Make sure to fill in each band with a generous amount of ink for a more striking effect.
Next, carefully cut vertical strips around the body of the bottle, leaving both ends attached. This creates the structure of the spinner, and you’ll see how the light plays with the newly formed strips, giving it a unique texture. When cutting, be cautious, especially when using scissors; this step is best done by an adult to ensure safety.
After cutting, bend the strips outward. This bending creates a wide-open effect that allows the wind to catch the spinner. It is essential to monitor your progress and see how the shape starts to transform. Once satisfied with the form, the next step is to attach the string and a swivel hook. Now your spinner is ready to hang outdoors to enjoy the colorful movement that will brighten your garden or patio.
When displaying your Recycled Bottle Rainbow Wind Spinner, consider locations where light can hit it directly. Hanging it near a window or in a spot where the sun shines through will enhance its visual appeal, as the colors will shimmer beautifully. You may also want to explore other creative projects, such as colorful suncatchers that can complement your wind spinner.
What Goes Wrong and How to Fix It
Sometimes your wind spinner may not turn out as expected. Here are a few common issues and solutions. If the colors smear or look dull, make sure you are using high-quality permanent markers. If cuts end up uneven, simply trim the strips to even them out. If the strips are too stiff, try gently bending them again until they flow more naturally. Keeping these tips in mind will help you achieve the best results with your wind spinner.
Variations
You can personalize your wind spinner in various ways. Experiment with different colors or patterns. For a more sparkling touch, consider adding some glitter to the strips before cutting them. Another fun idea is to make a collection of spinners in various shapes and sizes. If you like exploring different types of decorations, check out the geode rainbow crystal window ornaments for additional inspiration!
FAQs
How long does it take to make a wind spinner?
The wind spinner can usually be completed within 30 to 45 minutes, depending on your coloring speed and cutting precision.
Can children help with this project?
Absolutely! Children can help with coloring and bending the strips, but it is essential for an adult to handle the scissors.
What type of plastic bottle works best?
Any clear, lightweight plastic bottle will work well. Soft drink bottles are often ideal due to their manageable size.
My wind spinner isn’t spinning well. What should I do?
Ensure that the strings are attached correctly and that there is enough space for the spinner to move freely in the wind. Adjusting the length of the string could also help.
Can I use other types of markers?
While permanent markers are recommended for their vibrant colors, you can also use acrylic paint or other waterproof options for a different finish.
What should I do if the colors fade over time?
If the colors begin to fade, consider using more permanent options like paint or reinforcing the colors with a clear sealer that protects against UV rays.
By following these instructions, you can enjoy creating and displaying your Recycled Bottle Rainbow Wind Spinner. With its bright colors and charming movement, this project brings joy to any outdoor setting.
Conclusion
Making a recycled bottle wind spinner is a creative way to reuse materials while bringing color to your garden. For more ideas on using recycled materials in craft projects, visit Crafts by Amanda for a fantastic resource. You can also check out Happy Hooligans for additional inspiration on crafting with bottles.
Follow us on social for more DIY ideas & inspiration!
Recycled Bottle Rainbow Wind Spinner
Would you like to save this project?
By submitting you agree to receive this project and occasional emails. Unsubscribe anytime.
Materials
For the wind spinner
- 1 bottle Clear plastic bottle Any clear, lightweight plastic bottle will work well. Soft drink bottles are ideal due to their manageable size.
- 2 pieces Permanent markers Use high-quality markers for vibrant colors.
- 1 piece Scissors Best used by an adult for safety.
- 1 piece String For hanging the spinner.
- 1 piece Swivel hook Used to attach the spinner for hanging.
Directions
Preparation
- Set up a clean workspace to keep everything organized.
Coloring
- Use permanent markers to color horizontal rainbow bands around the bottle. Choose bright colors and fill in each band generously.
Cutting
- Carefully cut vertical strips around the body of the bottle, leaving both ends attached.
- Bend the strips outward to create a wide-open effect for the wind.
Assembly
- Attach the string and swivel hook to your spinner.
- Hang it outdoors where light can hit it directly.
Last Step: Don’t forget to leave a rating and comment below! It helps other readers find the best DIY projects — and it helps us too!