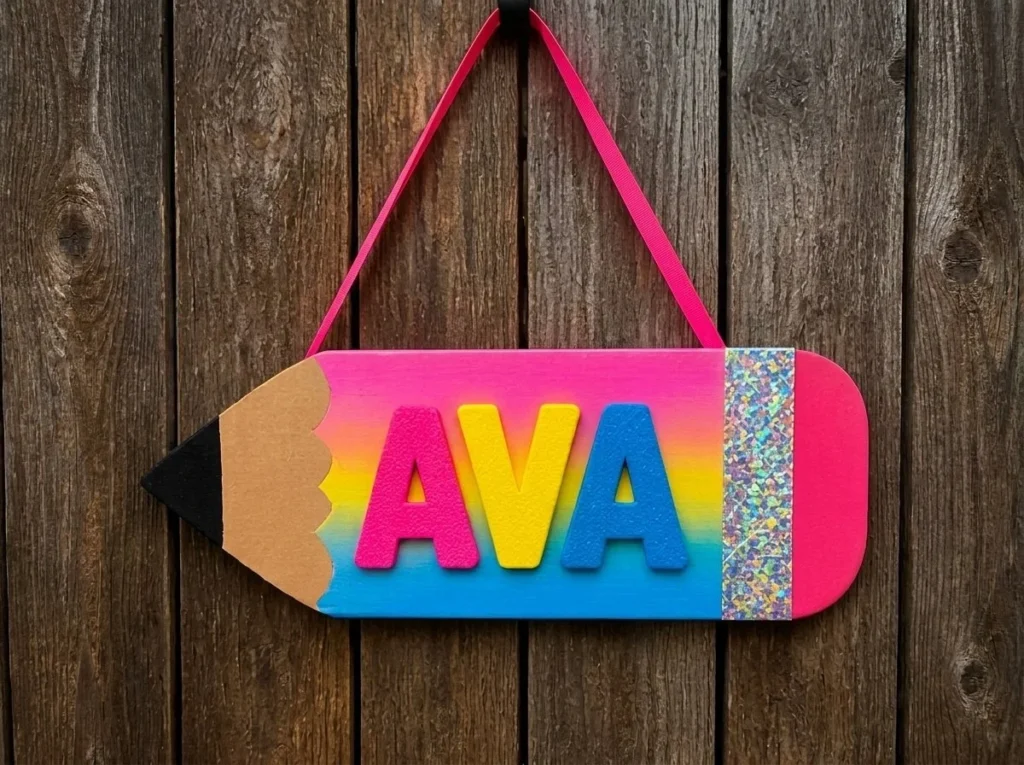
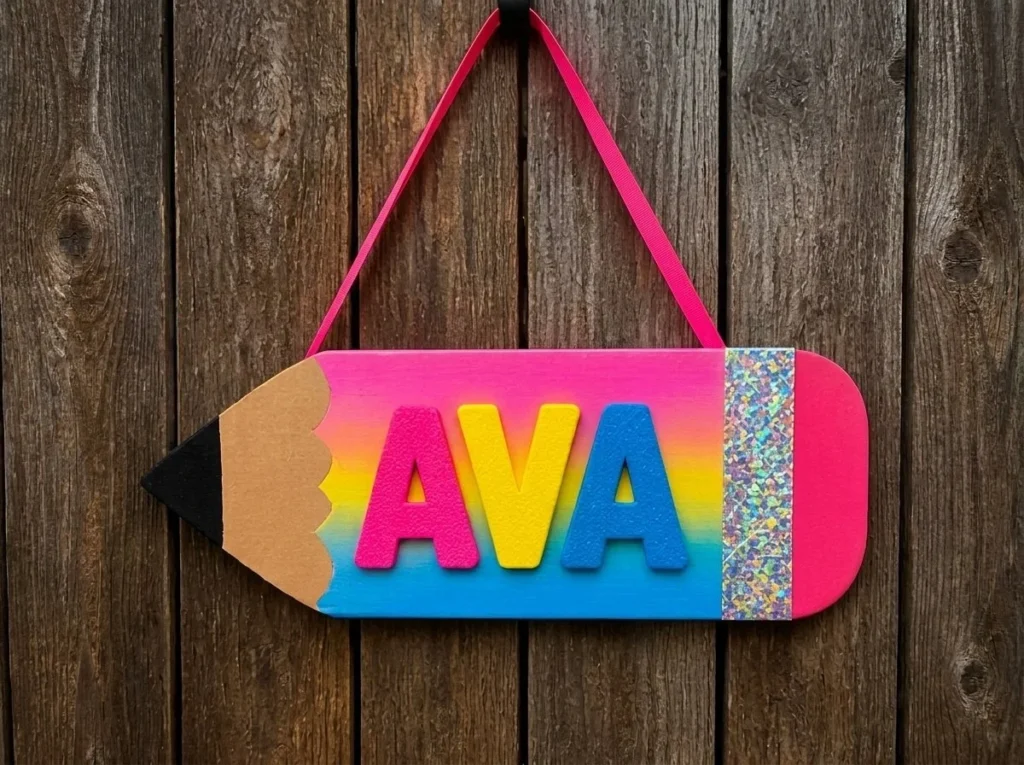
The Giant Rainbow Pencil Name Sign for First Day of School is a colorful and exciting addition to any child’s back-to-school experience. As you create this vibrant decoration, the mixture of colors will instantly catch your eye, especially once the rainbow sections are painted. This project not only offers a fun hands-on experience but also provides a valuable keepsake that highlights your child’s individuality. You may also find First Day Rainbow Pencil Butterfly Suncatcher useful.
What Makes This Work
Creating a Giant Rainbow Pencil Name Sign is rewarding for several reasons. First, the materials are straightforward and easy to find, making it accessible for everyone. Additionally, when you paint the rainbow sections, you’ll notice a satisfying transformation as the colors blend and brighten the cardboard. The texture of the painted surface becomes smooth and appealing, making it ideal for display.
Materials
To get started, gather your materials. You will need:
- Cardboard
- Rainbow/pink/blue paint
- Holographic cardstock
- Foam letters
- Ribbon
- Glue
Steps
1. Cut Giant Pencil
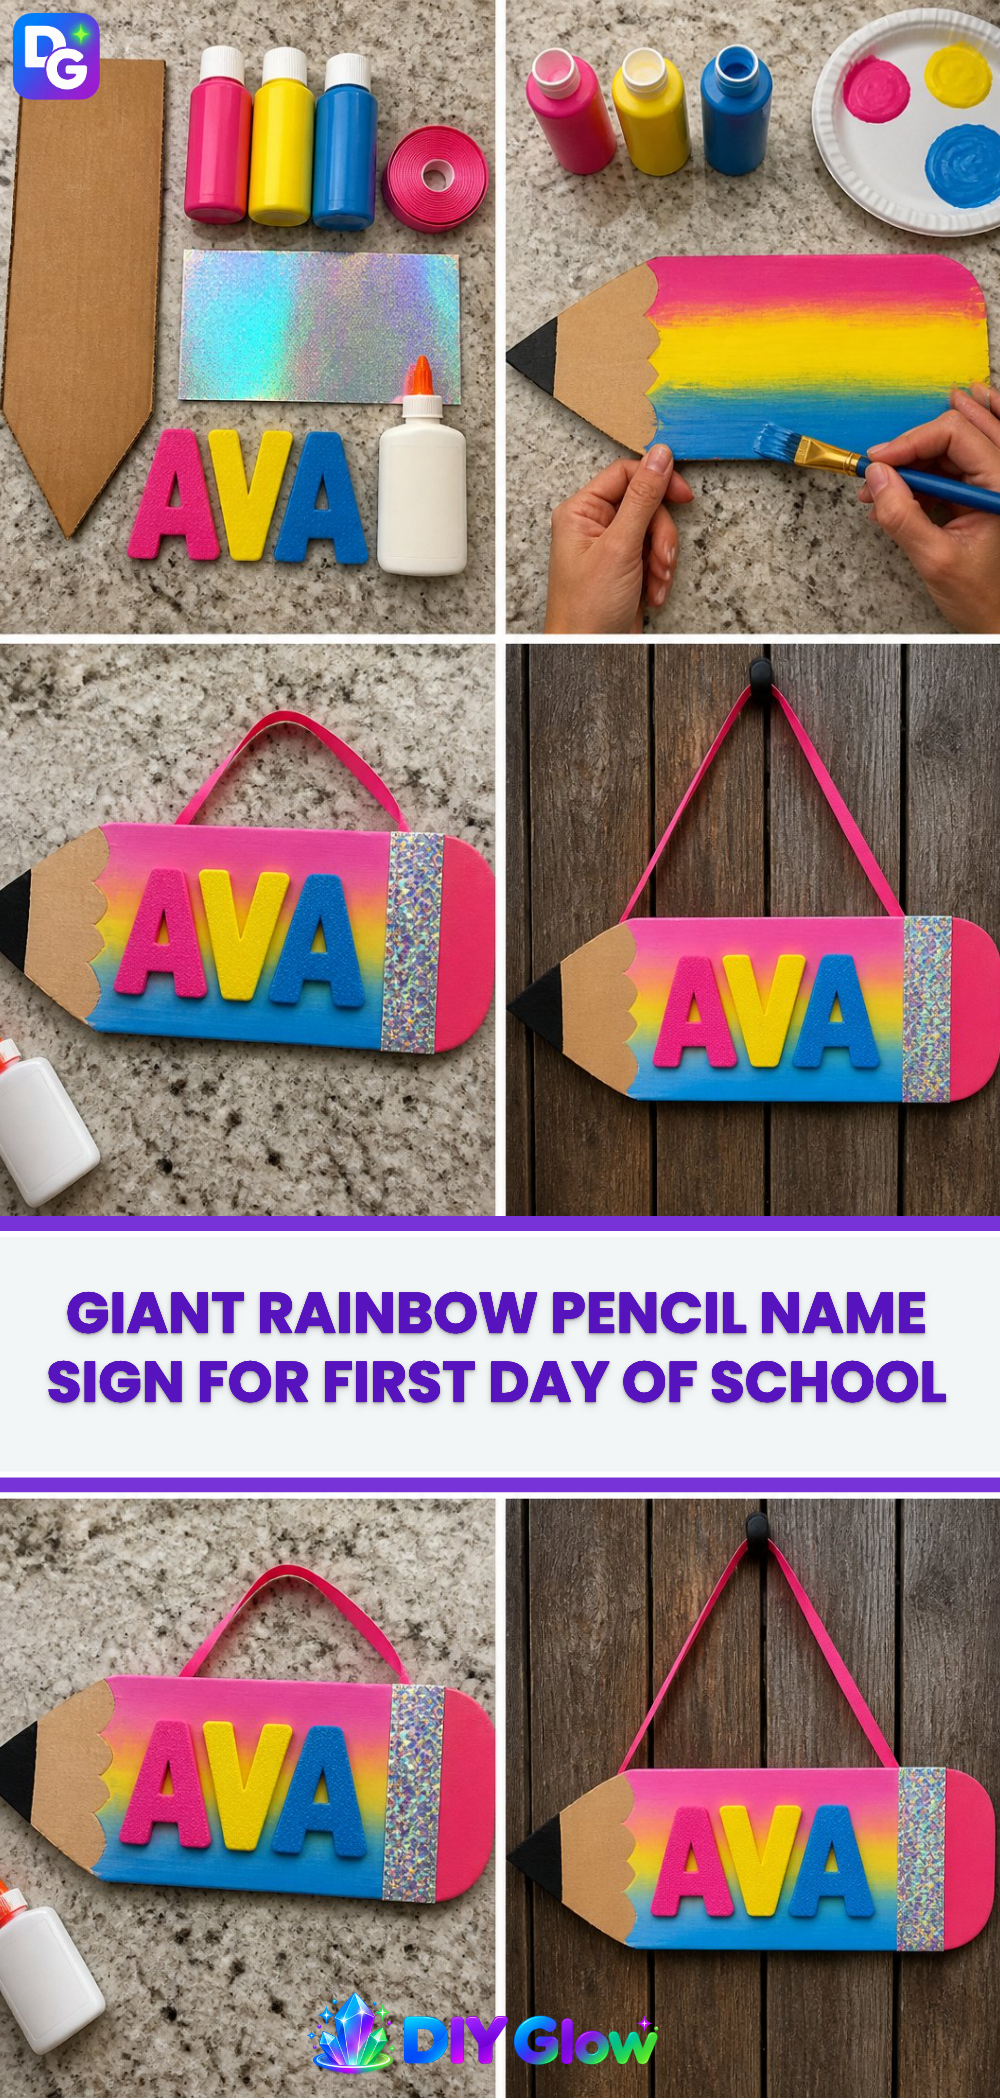
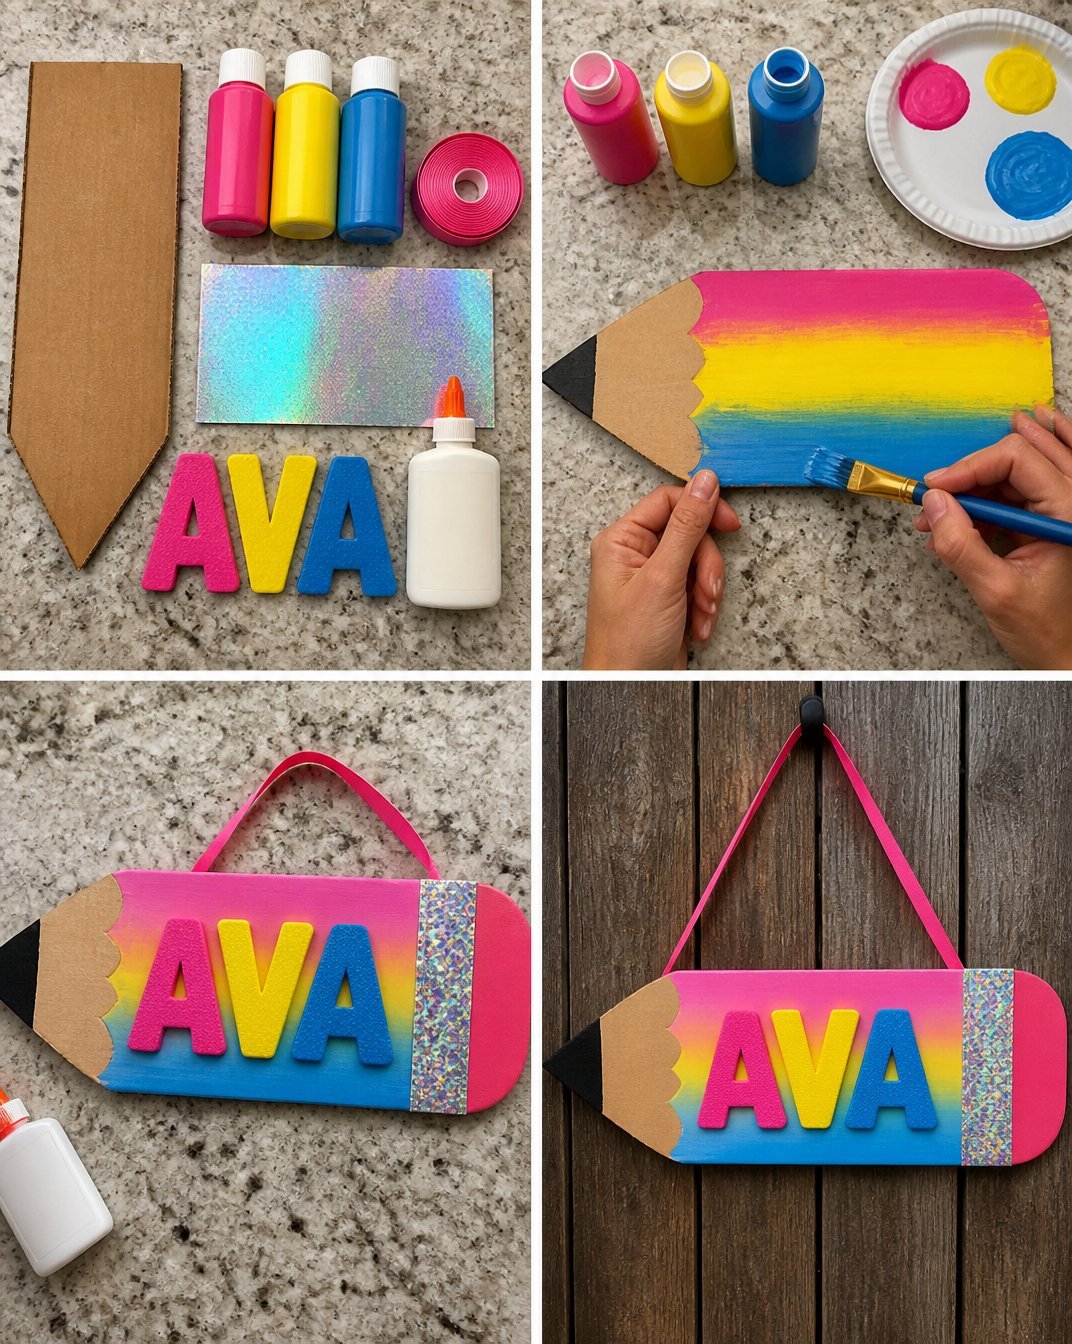
Begin by cutting the cardboard into the shape of a giant pencil. The size will depend on your personal preference. Aim for a scale that fits well in your desired display area. You’ll want the edges to be smooth, so make sure to use scissors carefully. Safety is key; if you’re using an X-Acto knife, have an adult assist you. Once cut, you’ll see the silhouette of a pencil that will soon come to life with color.
2. Paint Rainbow Sections
Next, it’s time to paint. Start with the color on your cardboard pencil, focusing on the sections meant to represent the rainbow. You’ll want to apply even strokes, watching as each color layer enhances the vibrant effect. As the paint dries, check for a uniform finish; the surface should feel smooth and not tacky to the touch. For those interested in incorporating other rainbow-themed creations, you might explore ideas like a baking soda rainbow crystal forest which could pair well with your sign.
3. Add Name and Holographic Details
Once the paint is dry, it’s time to personalize your pencil. Use foam letters to spell out your child’s name, adhering each letter carefully with glue. Additionally, adding holographic details will make the sign sparkle and shine. This step is crucial, as the holographic accents will catch the light beautifully, creating an inviting visual effect.
4. Hang
After completing the decoration, you can hang your Giant Rainbow Pencil Name Sign. To do this, use a sturdy ribbon, tying it to the top of the pencil. This allows for easy hanging on walls, doors, or even in windows where sunlight can enhance its colorful appearance.
What Goes Wrong and How to Fix It
Sometimes, projects may not turn out as expected. If the paint peels or doesn’t adhere well, make sure you apply a thin layer and allow enough drying time. If the foam letters don’t stick, consider using a stronger glue designed for crafts. Additionally, if colors run or smear, be sure to use a set of brushes dedicated to your paint to avoid contamination from previous projects.
Where to Display It
The Giant Rainbow Pencil Name Sign is versatile in where it can be displayed. Whether hanging in a kid’s room, near a study area, or outside on the first day of school for a welcoming touch, it will bring cheer and color to any space. The addition of this sign can enhance the atmosphere, especially when paired with other craft projects like a Back to School Rainbow Pencil Bouquet.
Variations
To keep things interesting, consider creating themed variations of the sign. You could use different shapes, such as crayons or markers, and customize the paint colors based on seasonal themes. Integrating other materials like glitter or sequins can add texture and appeal, giving your child a unique decorative touch that reflects their personality.
FAQs
Can I use different types of paint?
Yes, you can use acrylic or tempera paint, whichever you prefer. Just ensure you follow drying instructions for each type.
How long will this project last?
If properly maintained, your sign can last for years. It will fade with time if exposed to direct sunlight for long periods, so consider displaying it in a location with indirect light.
Can kids help with this project?
Absolutely! This project is great for kids, allowing them to help with painting and gluing the letters. Just ensure an adult is present when using scissors or any sharp tools.
What if my pencil shape isn’t perfect?
Don’t worry! The uniqueness of your design adds to its charm. Each handmade sign has its own story and character.
Can I use other materials for hangers?
Yes, feel free to use string, twine, or even decorative hooks to hang your sign, based on your aesthetic preference.
How can I add more details?
Feel free to embellish your sign with stickers, more glitter, or other decorative items that align with your child’s interests!
Conclusion
Crafting a Giant Rainbow Pencil Name Sign not only brightens up a space but also adds a personal touch for your child’s return to school. For additional back-to-school ideas, consider visiting Kailo Chic, where you’ll find a variety of school-themed decorations. You can also explore functional elements like bulletin boards on Amazon, perfect for creating a vibrant learning environment.
Follow us on social for more DIY ideas & inspiration!
Giant Rainbow Pencil Name Sign
Would you like to save this project?
By submitting you agree to receive this project and occasional emails. Unsubscribe anytime.
Materials
Materials
- 1 piece Cardboard Base material for the pencil shape.
- various colors Rainbow/pink/blue paint Acrylic or tempera paint recommended.
- 1 sheet Holographic cardstock For adding sparkly details.
- multiple letters Foam letters Use for spelling out your child’s name.
- 1 piece Ribbon For hanging the finished sign.
- 1 tube Glue To adhere foam letters and holographic details.
Directions
Preparation
- Cut the cardboard into the shape of a giant pencil, ensuring smooth edges.
- Take care when using scissors or an X-Acto knife and have an adult assist if necessary.
Painting
- Paint the rainbow sections on the cardboard pencil using even strokes.
- Ensure each layer dries fully before application of additional colors for a smooth finish.
Personalization
- Once the paint is dry, use foam letters to spell out your child’s name and glue them onto the pencil.
- Add holographic details for a sparkling effect that catches the light.
Finishing Touch
- Attach a sturdy ribbon to the top for hanging.
- Hang the sign in a suitable location such as walls or windows.
Last Step: Don’t forget to leave a rating and comment below! It helps other readers find the best DIY projects — and it helps us too!