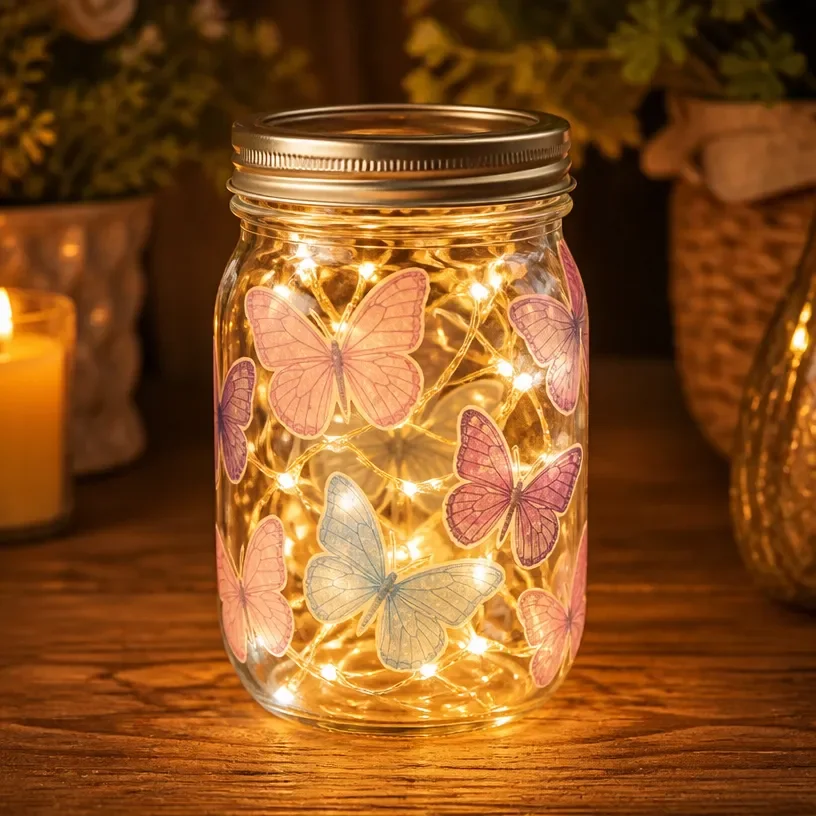
You’ll love how the Butterfly LED Lantern with Warm Glow transforms any space. It offers a soft glow, creating a dreamy ambiance suitable for outdoor decor or cozy indoor settings. This delightful project stands out on any shelf or in a window, showcasing your creativity and love for craft projects. You may also find Aurora Bottle Lantern Glowing Led Decor Light useful.
What Makes This Work
The Butterfly LED Lantern is not only visually appealing, but it also uses elements that enhance the aesthetic experience. When the lantern’s lights reflect off its surfaces, they create a mesmerizing, sparkling effect that draws in anyone who sees it. This is achieved by selecting the right materials and methods that allow light to shine beautifully. You may also find Colorful Crystal Mason Jar Lantern For Home Decor useful.
Materials
Gather the following materials to craft your butterfly lantern: You may also find Rainbow Butterfly Jar With Stained Glass Handcrafted Home Decor useful.
- Transparent plastic globe or jar
- LED tea lights
- Colorful tissue paper
- Mod Podge or craft glue
- Paintbrush
- Wire or string for hanging
- Scissors
- Optional: Glitter for added sparkle
Once you have your materials, you’re ready to start crafting. Ensure that you have an adequate workspace to keep everything organized. You may also find Colorful Crystal Mason Jar Lantern Home Decor useful.
Steps
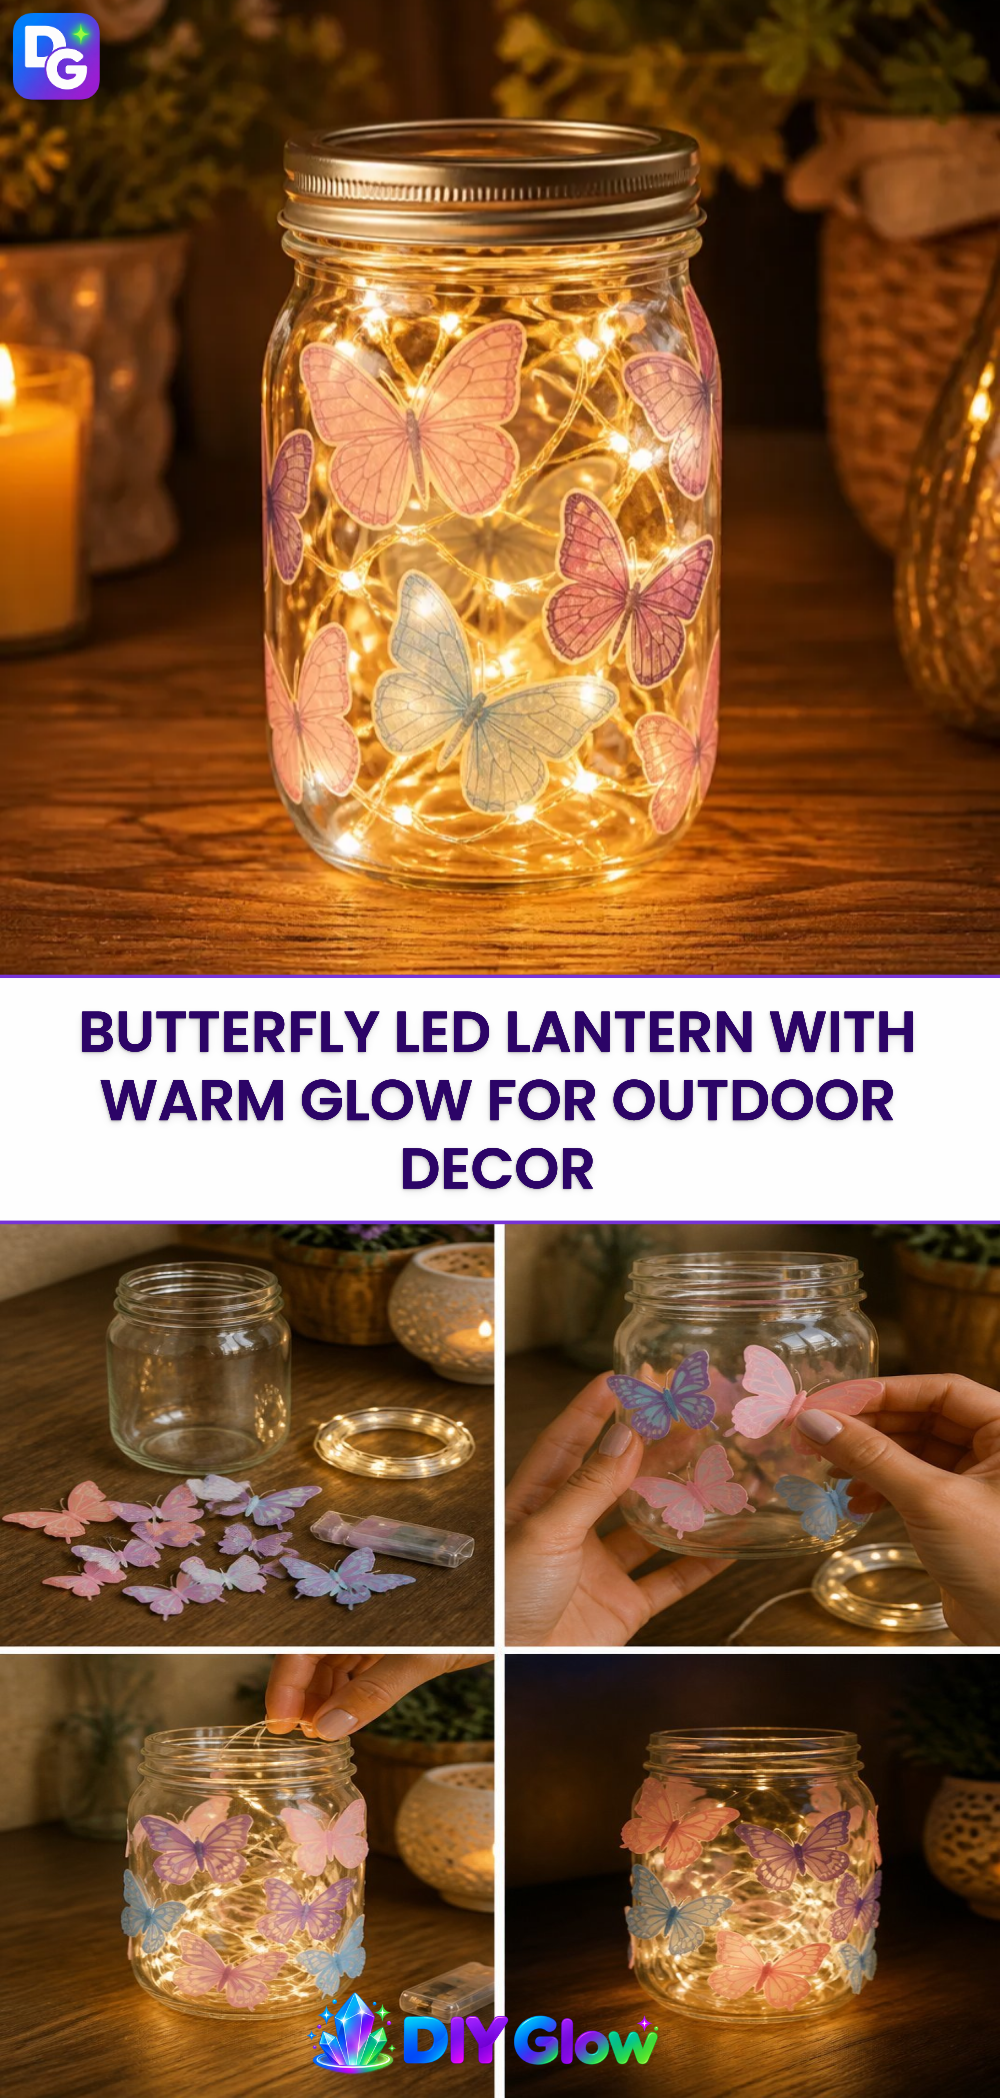
Prepare Your Base: Begin by cleaning your plastic globe or jar. This prepares the surface for the tissue paper, ensuring that it adheres well.
Cut the Tissue Paper: Cut various shapes of colorful tissue paper. Think about butterflies, flowers, or abstract designs. This step is crucial shapes you cut will help create the lantern’s overall look.
Apply Glue: Use your paintbrush to apply a thin layer of Mod Podge or craft glue to the plastic surface. Be sure to cover the area where you will stick your tissue paper.
Place the Tissue Paper: Carefully place the tissue paper shapes onto the glued surface. Press down firmly, but gently, to avoid tearing.
Seal It: After all pieces are applied, seal the entire surface with another layer of Mod Podge. This step helps to ensure the paper adheres well and protects it from moisture.
Insert LED Tea Lights: Once your lantern is dry, place an LED tea light inside. These lights are safe and provide the perfect warm glow.
Add Hanging Options: If you’d like to hang your lantern, attach wire or string to the top carefully.
Display Your Lantern: Find a nice spot for your butterfly lantern. Consider placing it in your garden for outdoor decor or on a shelf for indoor charm.
As you work, watch for the color changes and textures of the tissue paper and glue. These shifts indicate that the project is coming together beautifully.
What Goes Wrong and How to Fix It
If the glue bubbles, this can happen when too much is applied at once. To fix this, simply allow it to dry completely and then smooth it out with a bit of pressure. If the tissue paper tears, use additional shapes of paper to camouflage any imperfections. A little creativity goes a long way in a DIY project!
Where to Display It
This lantern is a versatile piece that can breathe life into various spaces. Consider placing it in your garden to enhance its flora, or hang it from a tree branch for a fairy tale vibe. Indoors, it works beautifully on a mantelpiece or as a centerpiece on a dining table.
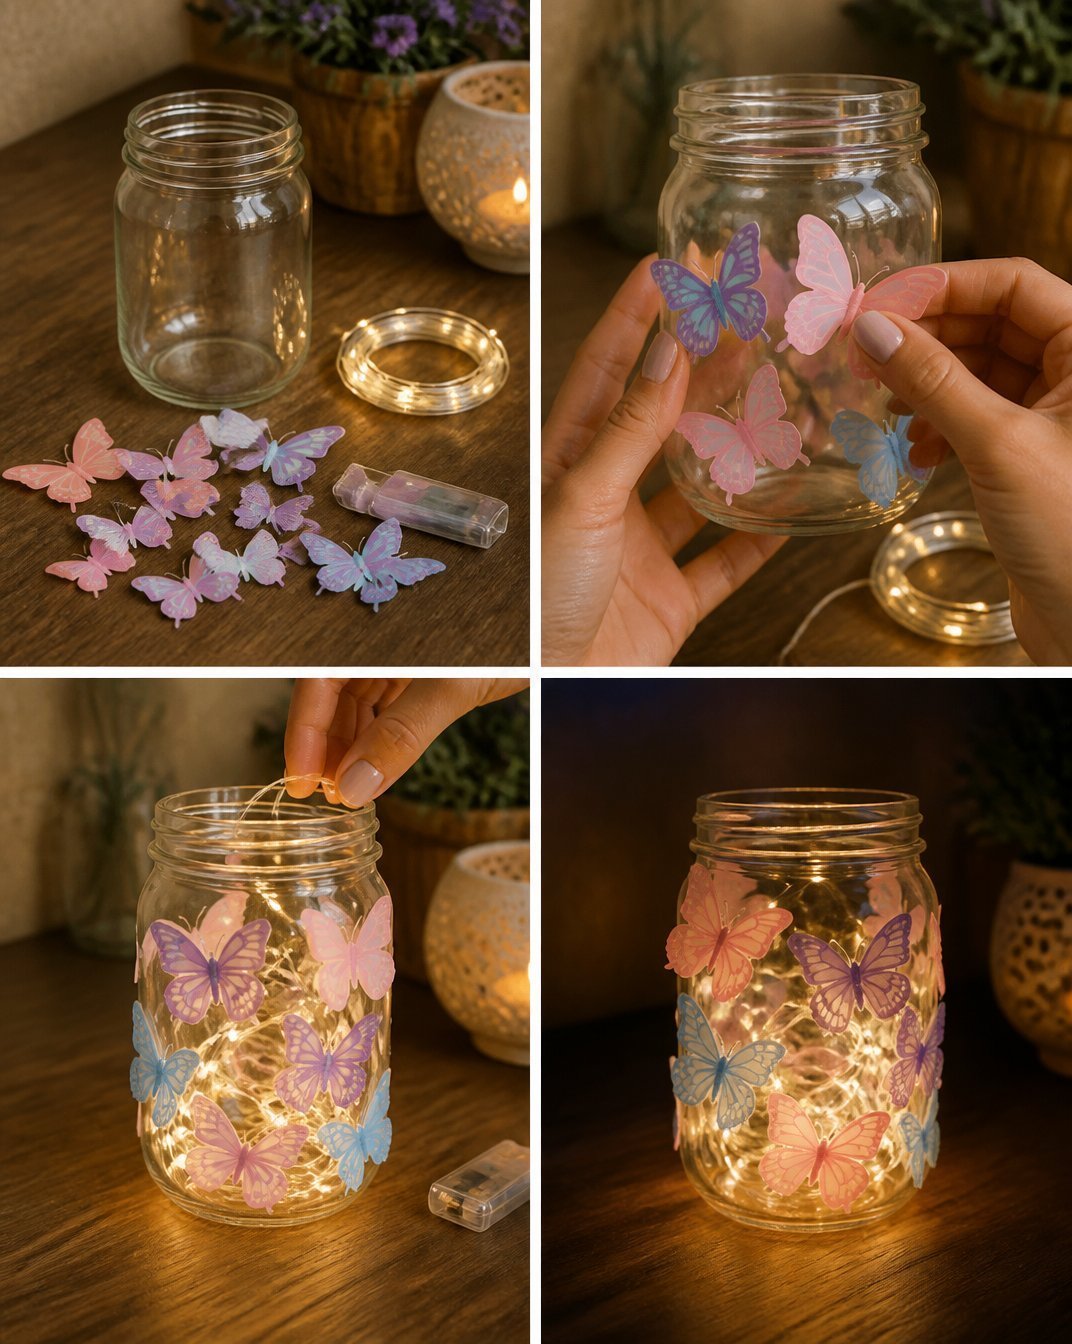
Variations
Feel free to experiment with different themes. For a cosmic touch, you could create a galaxy-themed lantern using darker colors blended with silver and white to mimic stars. Alternatively, you can opt for varying sizes of jars and create a collection that enhances your decor.
FAQs
Can I use regular candles instead of LED lights?
Using regular candles increases the risk of fire and damage to the materials. LED lights are safer and recommended for this project.
How long does it take for the glue to dry?
Typically, Mod Podge needs at least 2 hours to dry completely, but it varies depending on the thickness of the application and the room temperature.
What should I do if the lantern isn’t lighting correctly?
If the light is not shining as expected, double-check that the LED tea light is functioning properly. Make sure the lantern is clean and dry to ensure maximum glow.
Can I use other types of paper?
Yes, you can explore using colored paper or even fabric for different textures and looks. Just bear in mind how these materials react with the glue.
How do I care for it?
Keep it away from direct moisture to avoid damage. If it becomes dirty, gently wipe it with a dry cloth.
Can kids help with this project?
Absolutely! Kids can assist with cutting tissue paper or applying the glue. Just supervise them, especially during cutting and when handling glue.
Conclusion
Creating a Butterfly LED Lantern with Warm Glow offers a simple yet enchanting way to brighten up your space. For beautiful garden statues that complement your decor, consider the TOLIMI Groundhog Welcome Garden Statue with Solar Headlamp. Additionally, if you’re looking for other lighting options, check out the variety of lanterns available on Amazon for inspiration. Happy crafting!
Follow me on social for more recipe ideas & inspiration!
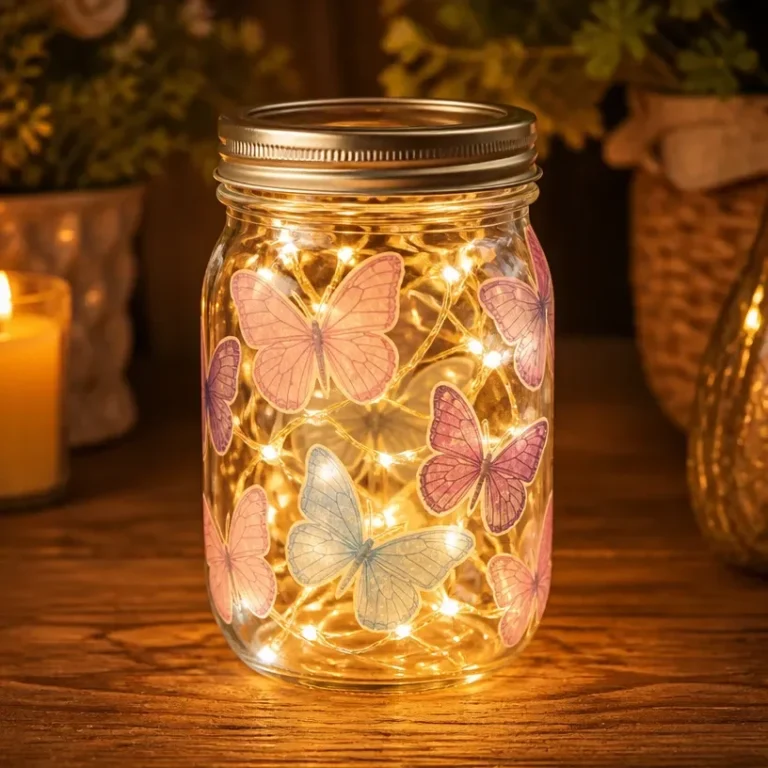
Butterfly LED Lantern
Would you like to save this recipe?
By submitting you agree to receive this recipe and occasional emails. Unsubscribe anytime.
Materials
Materials
- 1 pcs Transparent plastic globe or jar This will form the base of the lantern.
- 1 pcs LED tea lights Safe lighting source for the lantern.
- 1 pack Colorful tissue paper Choose various colors for a vibrant effect.
- 1 bottle Mod Podge or craft glue Used to adhere the tissue paper.
- 1 pcs Paintbrush For applying glue.
- 1 m Wire or string for hanging Optional for hanging the lantern.
- 1 pcs Scissors For cutting tissue paper.
- Optional pack Glitter For added sparkle.
Instructions
Preparation
- Begin by cleaning your plastic globe or jar. This prepares the surface for the tissue paper, ensuring that it adheres well.
- Cut various shapes of colorful tissue paper like butterflies, flowers, or abstract designs.
- Use your paintbrush to apply a thin layer of Mod Podge or craft glue to the plastic surface.
- Carefully place the tissue paper shapes onto the glued surface and press down firmly.
- After all pieces are applied, seal the entire surface with another layer of Mod Podge.
- Once your lantern is dry, place an LED tea light inside.
- If you’d like to hang your lantern, attach wire or string to the top carefully.
- Find a nice spot for your butterfly lantern to display it.
Last Step: Don’t forget to leave a rating and comment below! It helps other readers find the best recipes — and it helps us too!
Tips & Notes:
Nutrition Information: Serving: 1 | Calories: | Carbohydrates: | Protein: | Fat: | Sodium: | Fiber: | Sugar:
Nutritional information is provided as a courtesy and calculated automatically. Values can vary depending on the brands and ingredients you use, so if you’re tracking closely, I recommend calculating with your own preferred tool.