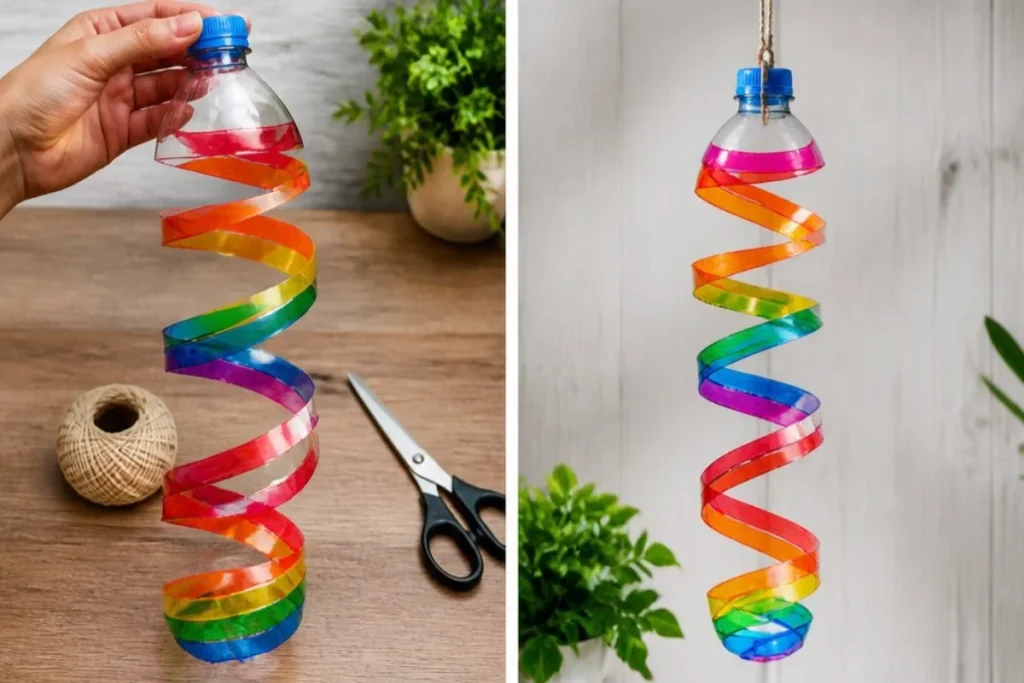
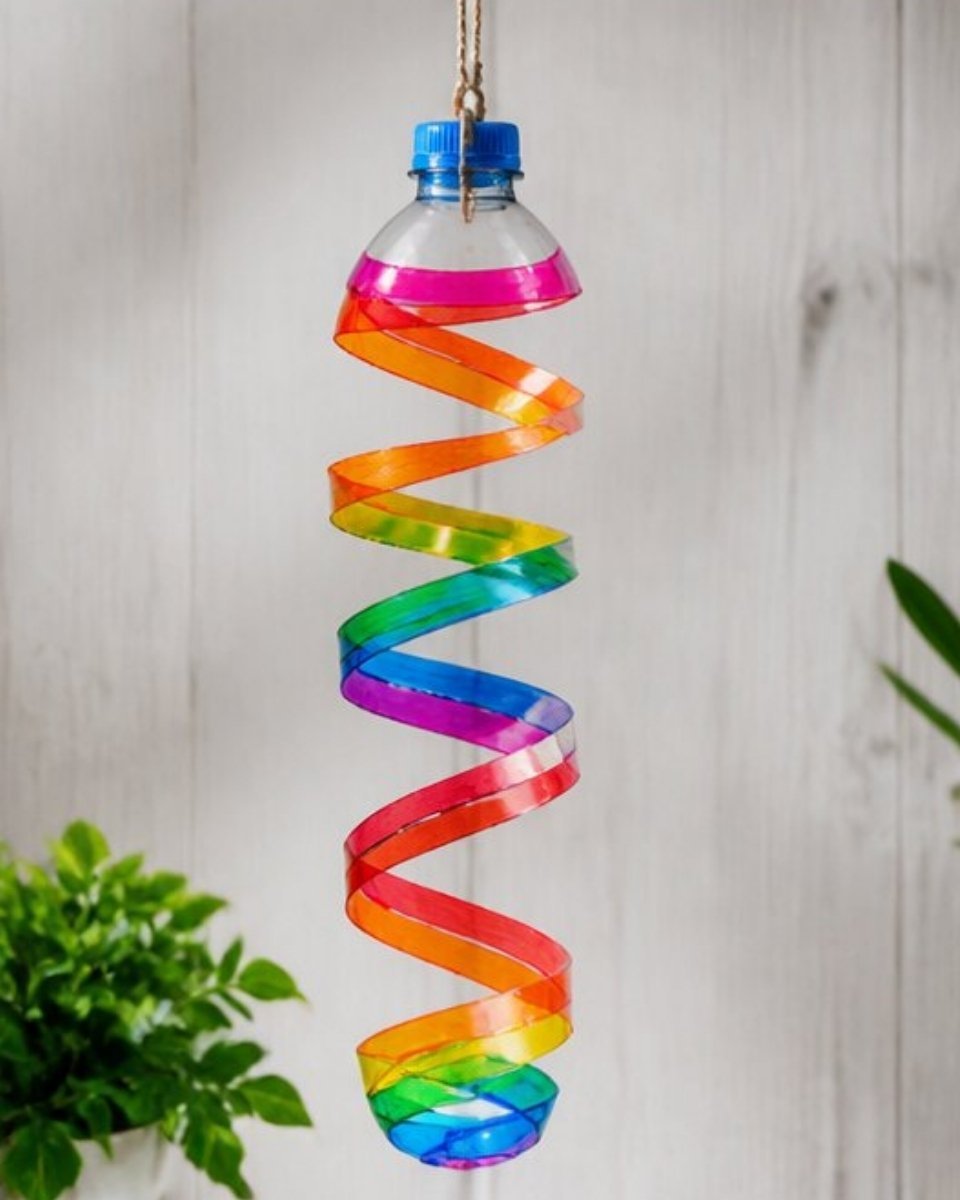
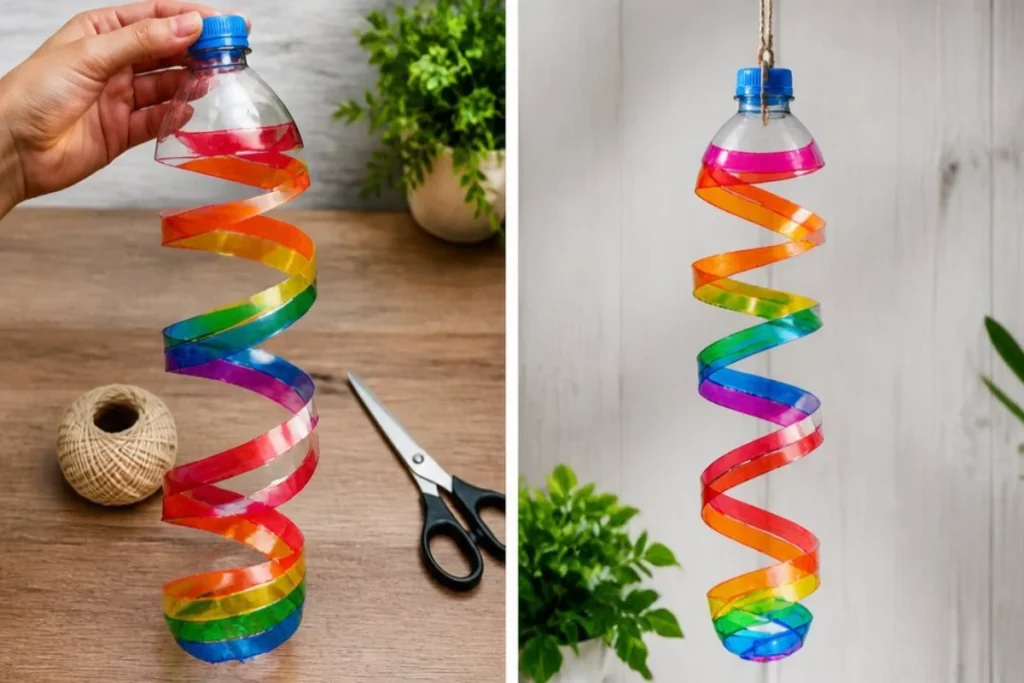
The Recycled Rainbow Spiral Bottle changes from a simple plastic bottle into a vibrant piece of art that dances in the breeze. This project allows the colors you choose to shine through, creating an eye-catching decoration. The finished piece is perfect for hanging in windows or on porches, providing a splash of color and movement wherever it dances. You may also find Baking Soda Rainbow Crystal Forest Rainbow Crystals useful.
Materials
To create your Recycled Rainbow Spiral Bottle, gather the following materials: You may also find Baking Soda Rainbow Crystal Forest useful.
- Empty plastic bottle
- Permanent markers
- Scissors
- String
Once you have all your materials, prepare a clean and protected workspace. It’s essential to keep things tidy while getting creative, ensuring the colors won’t mix unintendedly.
Steps
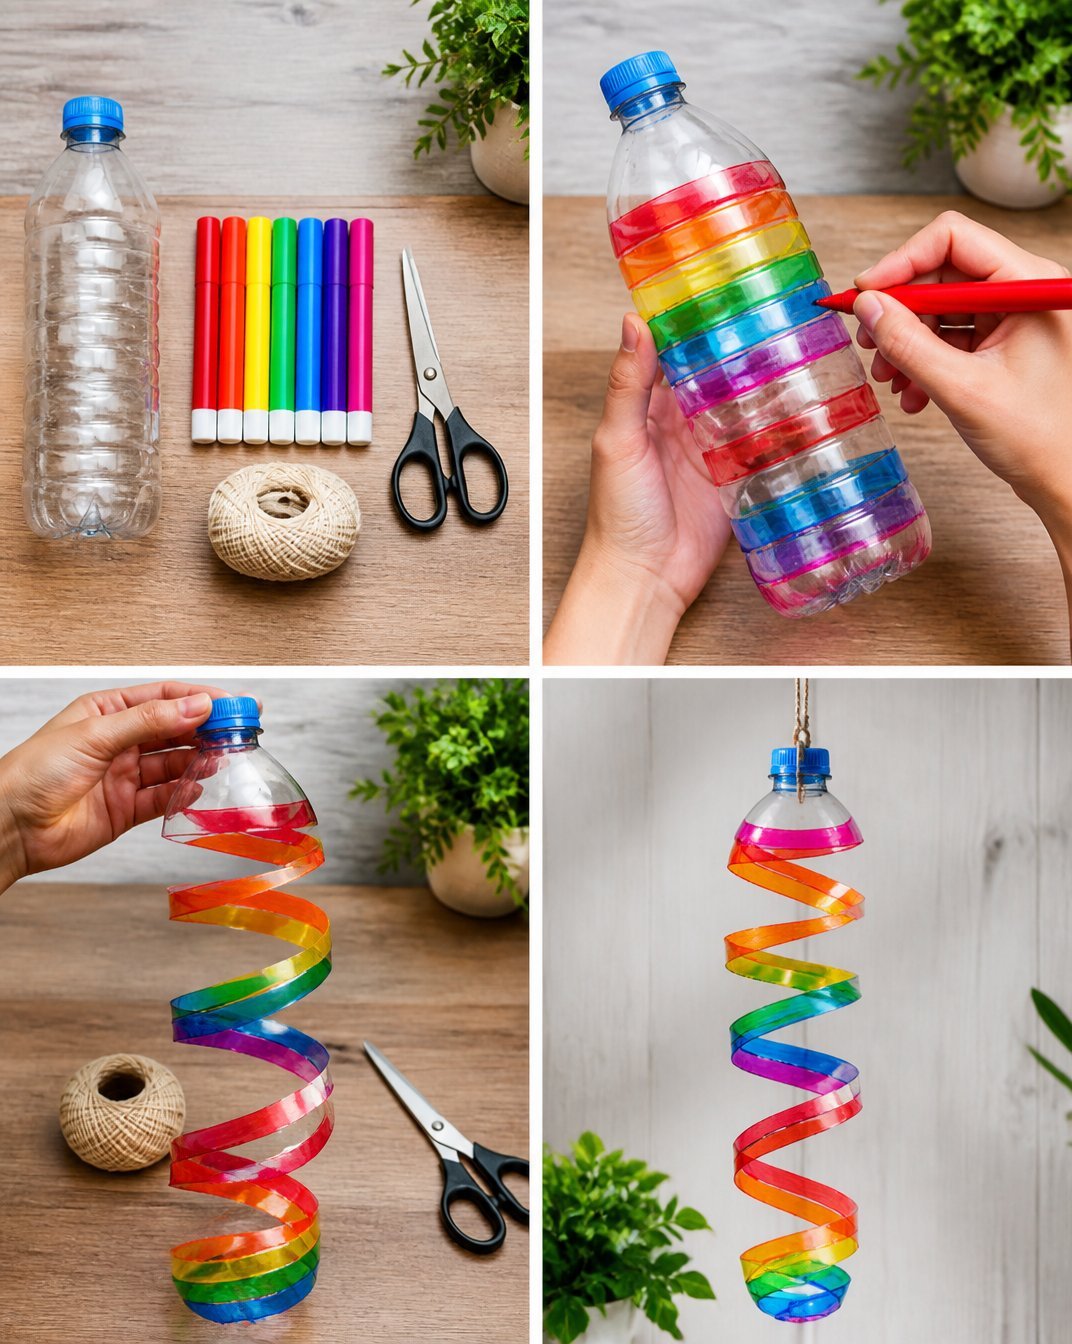
Step 1: Gather All Your Materials
Start your project by laying out all your materials. This helps you see what you have and aids in organizing your workspace. It can also spur creativity as you think about the colors you will use.
Step 2: Draw Colorful Bands
Using the permanent markers, draw colorful bands around the bottle. Focus on creating vibrant patterns use multiple colors to make the design more dynamic and engaging. The colors will become brighter and more vivid as they dry.
Step 3: Cut the Spiral Strip
Next, carefully cut one continuous spiral strip from the body of the bottle, ensuring you leave the top attached. As you cut, look for a smooth edge so the spiral flows beautifully. Watch the transformation; the bottle starts to become a colorful decoration instead of just a container.
Step 4: Stretch and Hang the Spiral
Gently stretch the spiral you’ve cut. You’ll notice how the shape changes, making it look more like a playful twirly decoration. Add a string at the top, then hang it up where it can twist and catch the wind. This movement adds a whole new life to your artwork.
Tips for Success
For a more polished appearance, take your time during the cutting step. A steady hand will help ensure the spiral is even and flows well. If the spiral seems too thin in some places, just stretch it further to get the desired effect. Additionally, if you want to explore more DIY projects using recycled materials, consider trying out the Rainbow Butterfly Stakes, where you can also use bottles to create whimsical decorations.
What Goes Wrong and How to Fix It
One common issue is that the colors may smudge if the markers are not allowed to dry completely. Make sure you give the drawn bands enough time to set before cutting. If your spiral doesn’t twist as expected, re-evaluate the stretching to ensure it’s done evenly.
Where to Display It
The Recycled Rainbow Spiral Bottle looks great hanging near windows or in outdoor areas where the wind can make it dance. It can also be a fun addition to garden spaces or as part of a festive decoration in events. Consider pairing it with other glowing decorations like the Aurora Bottle Lantern, to enhance the colorful ambiance.
Variations
To add a personal touch, try using different colors for different themes, such as seasonal changes or special occasions. You can also experiment with patterns, such as stripes or dots. Try using glitter or glow-in-the-dark markers for an additional sparkle. If you’re interested in other colorful DIY crafts, the Back to School Rainbow Pencil Bouquet might inspire another creative project.
FAQs
1. Can I use any type of bottle for this project?
Yes, you can use any type of clear plastic bottle. Just ensure that it’s sturdy enough to hold its shape when cut.
2. What if my colors mix while drawing?
To prevent colors from mixing, allow each layer to dry before adding the next. You could also use a paper towel to dab excess ink if it becomes too wet.
3. How can I make the spiral easier to cut?
If you’re having difficulty, try warming the bottle slightly in the sun or with a hairdryer to make it more pliable.
4. How long does the finished piece last?
The lifespan depends on the conditions it’s placed in. If hung outdoors, it may fade over time due to sun exposure, but you can always repaint or refresh it.
5. Can kids help with this project?
Absolutely! Kids can participate in drawing the colorful bands and stretching the spiral under adult supervision, especially during the cutting step.
6. What should I avoid when working with permanent markers?
Avoid pressing too hard when drawing, as this can cause the ink to bleed. Work carefully, especially around areas you’ll be cutting.
Conclusion
Creating a Recycled Rainbow Spiral Bottle not only gives you a fun craft project but also promotes recycling in an engaging way. Once finished, it becomes a joyful expression of creativity hanging in any space. For more environmentally friendly ideas, check out sustainable footwear options like sustainable boots for women or get inspired with new outdoor crafts at water bottle wind spirals.
Follow us on social for more DIY ideas & inspiration!
Recycled Rainbow Spiral Bottle
Would you like to save this project?
By submitting you agree to receive this project and occasional emails. Unsubscribe anytime.
Materials
Materials
- 1 each Empty plastic bottle
- 4 each Permanent markers Choose various colors for vibrant patterns.
- 1 each Scissors Ensure they are suitable for cutting plastic.
- 1 each String For hanging the finished decoration.
Directions
Preparation
- Start your project by laying out all your materials to organize your workspace.
Creating the Design
- Using the permanent markers, draw colorful bands around the bottle to create vibrant patterns.
Cutting the Spiral
- Carefully cut one continuous spiral strip from the body of the bottle, ensuring you leave the top attached.
Completing the Decoration
- Gently stretch the spiral cut, add a string at the top, and hang it up where it can twist in the wind.
Last Step: Don’t forget to leave a rating and comment below! It helps other readers find the best DIY projects — and it helps us too!