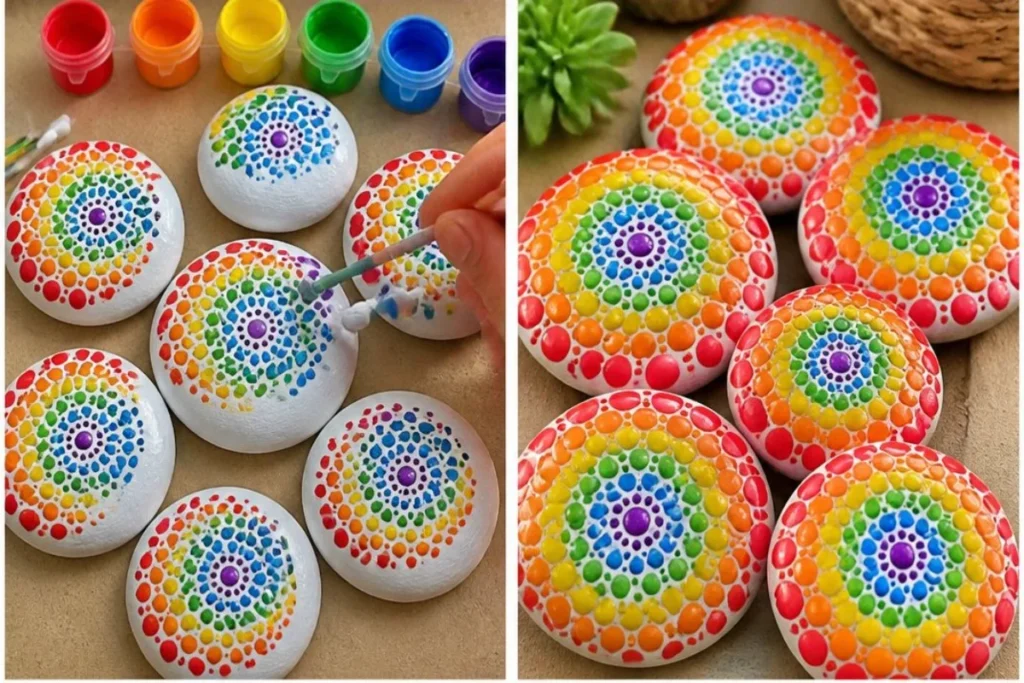
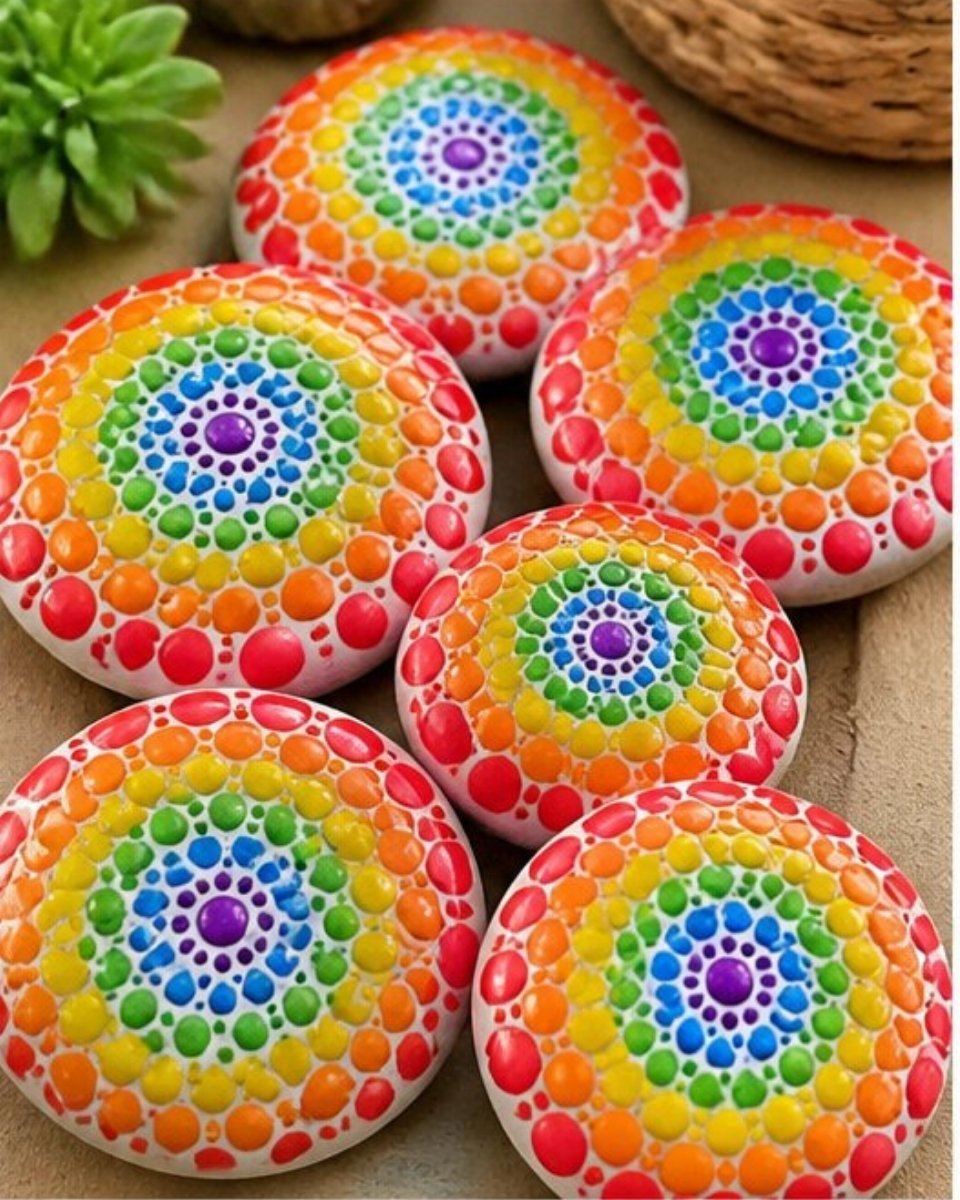
Rainbow Mandala Stones transform flat stones into vibrant pieces of art. When finished, they bring a splash of color and intrigue to any space, making them perfect for display on shelves or in windows. The project is as satisfying to create as it is beautiful to behold. You may also find Aromatic Room Stones useful.
To make these stunning stones, you will need several materials: flat stones, white acrylic paint, rainbow acrylic paints, dotting tools or cotton swabs, and a clear sealer. Creating these colorful mandalas is not only fun but also a wonderful way to explore color blending and design. You may also find Baking Soda Rainbow Crystal Forest Rainbow Crystals useful.
What Makes This Work
The process of painting mandala stones involves layering. Starting with a white base allows the rainbow colors to pop and ensures an even finish. White paint also helps the vibrant colors maintain their integrity, preventing them from appearing muted or washed out. This technique is similar to how artists use a primer, which expands the palette and enhances the final look. You may also find Baking Soda Rainbow Crystal Forest useful.
Materials
- Flat stones
- White acrylic paint
- Rainbow acrylic paints
- Dotting tools or cotton swabs
- Clear sealer
Steps
Gather all your materials and set up a clean workspace. Preparation is key. Find a flat surface that you can clean easily, protecting it with newspaper or an old tablecloth if needed.
Paint the stones white and let them dry completely. As you paint, check for an even coat. The opacity of the white should cover the natural stone completely. This step may take longer to dry in humid conditions.
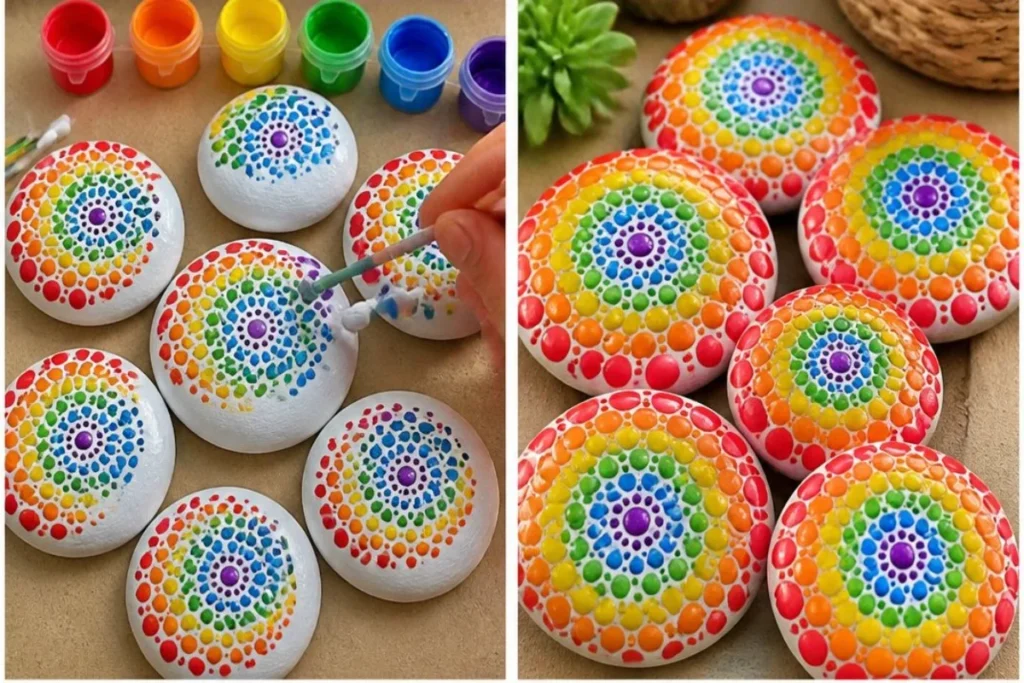
Begin in the center and use your dotting tools or cotton swabs to create rings of colored dots in rainbow order, making each dot larger as you move outward. Pay attention to how the colors mix at the edges; you may create gradients or choose to keep distinct rings of color.
Allow the stones to dry fully, then seal them with a clear sealer. This step will help to make your artwork durable and protect it from wear and tear. Once sealed, the colors will have a vibrant sheen that catches the light beautifully.
What Goes Wrong and How to Fix It
Sometimes the colors may not dry as you envisioned. If they seem dull, it could be that the white base coat wasn’t dry enough when applying the colors. If the surface appears tacky, give it more time to dry or apply another thin layer of sealer to fix inconsistencies.
To explore more creative projects, you might enjoy learning about these glowing rainbow flowers using old crayons. They are fun and eco-friendly, perfect for families to create together.
Where to Display It
Rainbow Mandala Stones make wonderful decorative pieces and can be displayed in various settings. Consider placing them in a sunny window where light can enhance their colors, or arrange them on a shelf to create a focal point in your room.
You can also create a beautiful centerpiece for a table by grouping several stones together. For a unique touch, use a decorative tray or a cake stand for added height and dimension.
Variations
To make your mandala stones unique, consider varying the color scheme. You can use pastel colors for a softer look or metallic shades for a glam effect.
Additionally, try different patterns, such as spirals or zigzags, instead of traditional rings. This variation can help each stone tell its own story while still fitting into the overall theme of the project. For further inspiration, check out this project on creating a rainbow pencil bouquet.
FAQs
How long do the stones last after sealing?
Once properly sealed, the mandala stones can last for years, but they should be kept indoors or in a sheltered outdoor area to avoid fading and weather damage.
Can children help with this project?
Absolutely! This project is wonderful for kids. They can assist in dotting colors and applying the clear sealant, but adult supervision is recommended during the sealing process to ensure safety.
Why did my colors blend too much?
If your colors blend too much, it may be due to applying them while the previous layer is still wet. Allow each dot to dry before adding the next layer to maintain distinct colors.
Can I use other paint types?
While acrylic paints work best for this project due to their vivid colors and durability, you could experiment with other paint types. Just ensure they can adhere to the stone and dry clear if necessary.
What if my stone feels sticky after sealing?
If your stone feels sticky after sealing, you may not have applied a thick enough layer or allowed the paint to dry completely. Reseal with a clear top coat after letting the stone dry thoroughly.
How do I clean the stones after making them?
When cleaning your mandala stones, avoid harsh chemicals. A damp cloth is usually enough, but if dirt builds up, a gentle soap solution can help. Make sure to dry them thoroughly afterward.
Conclusion
Creating Rainbow Mandala Stones is a vibrant and engaging craft that brings color to your spaces. Not only do they serve as eye-catching decorations, but they also allow for creative expression. For more colorful art supplies and ideas, check out this selection of colorful artistry, or find a complete mandala stone painting kit to get you started.
Follow us on social for more DIY ideas & inspiration!
Rainbow Mandala Stones
Would you like to save this project?
By submitting you agree to receive this project and occasional emails. Unsubscribe anytime.
Materials
Materials
- 6 pieces Flat stones Choose flat, smooth stones for the best results.
- 1 bottle White acrylic paint Used as a base coat.
- 5 colors Rainbow acrylic paints Choose your favorite vibrant colors.
- 1 set Dotting tools or cotton swabs For creating the mandala dots.
- 1 bottle Clear sealer To protect the finished stones.
Directions
Preparation
- Gather all your materials and set up a clean workspace. Protect your surface with newspaper or an old tablecloth.
- Paint the stones white and let them dry completely, ensuring an even coat.
Creating the Mandalas
- Using dotting tools or cotton swabs, start in the center and create rings of colored dots in rainbow order, making each dot larger as you move outward.
- Allow the stones to dry fully, then seal them with a clear sealer to make your artwork durable.
Last Step: Don’t forget to leave a rating and comment below! It helps other readers find the best DIY projects — and it helps us too!