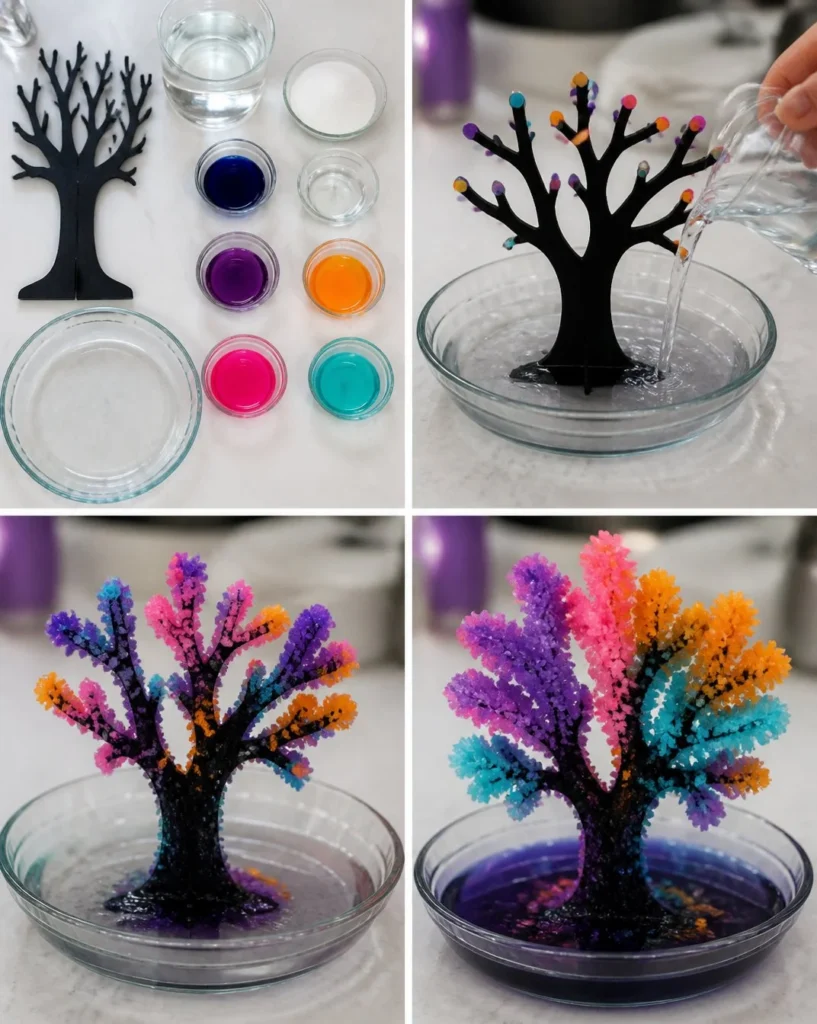
The Rainbow Crystal Haunted Tree is not just a craft project; it’s a magical experience that fills your space with vibrant color and wonder. Picture this: a sleek black tree standing tall while it transforms before your eyes, sprouting bright, shimmering crystals in all the colors of Halloween. As the crystals grow and catch the light, they create a dazzling display that invites curiosity and delight. This project is easy enough for kids to take part in, allowing families to revel in the simple joy of creation together.
Why Make This Rainbow Crystal Haunted Tree
Creating the Rainbow Crystal Haunted Tree delivers a powerful mix of fun, learning, and creativity. It delights both children and adults, sparking giggles of surprise and excitement. Kids revel in the process of watching how the ordinary turns into the extraordinary. You’ll witness each color bloom as the crystals form, adding a vivid touch to any space. Plus, it provides a fantastic opportunity to talk about science, making it a great educational moment disguised as a craft.
A Quick Look at How It Works
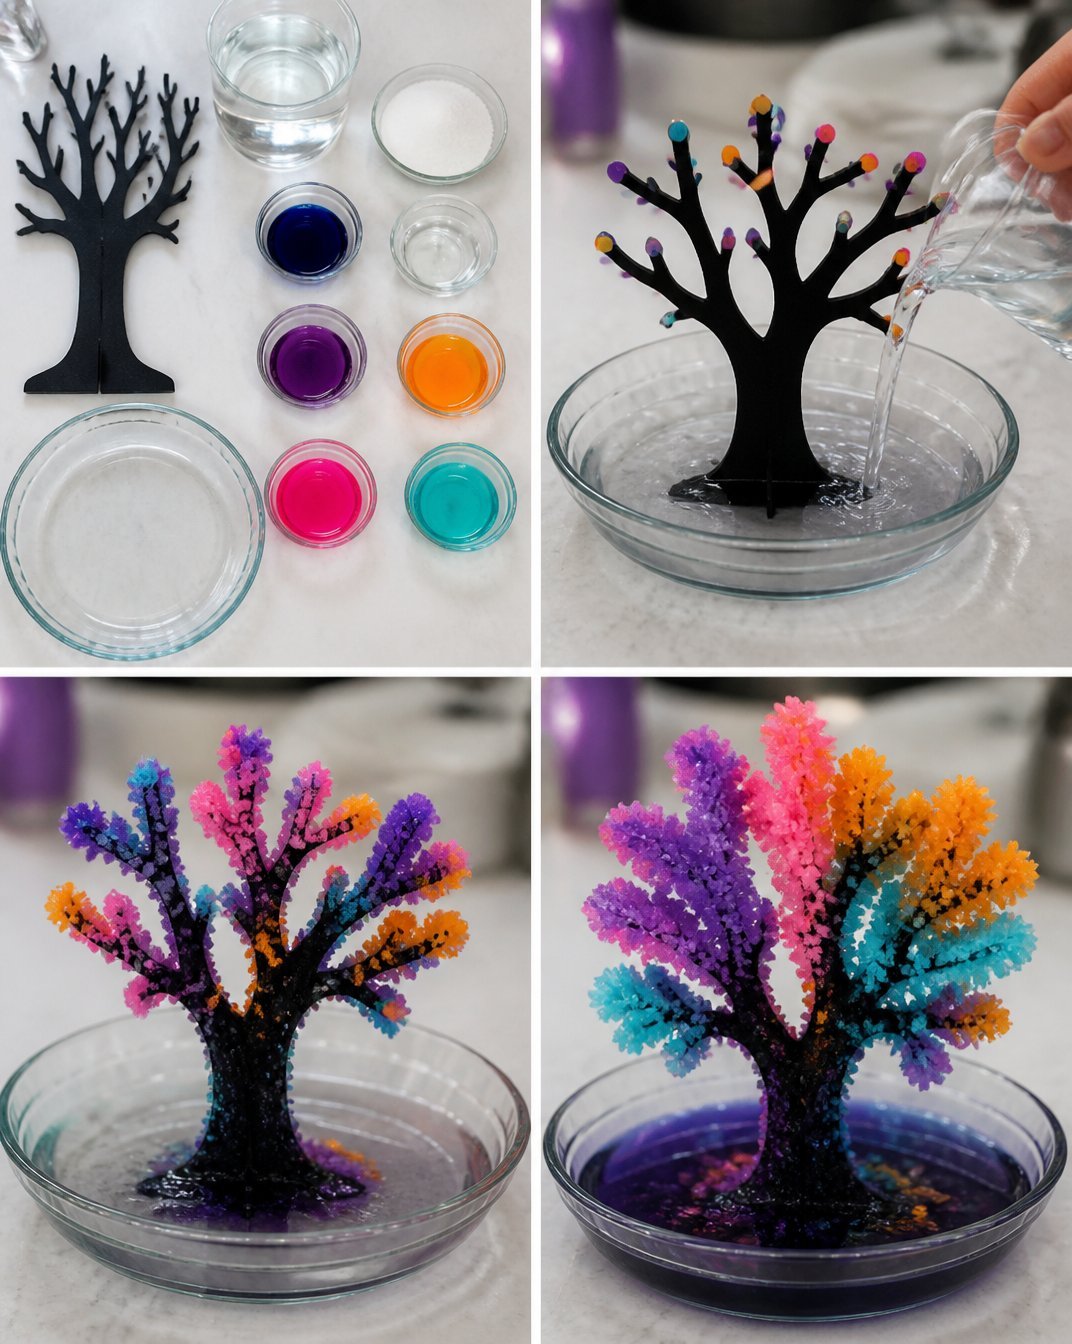
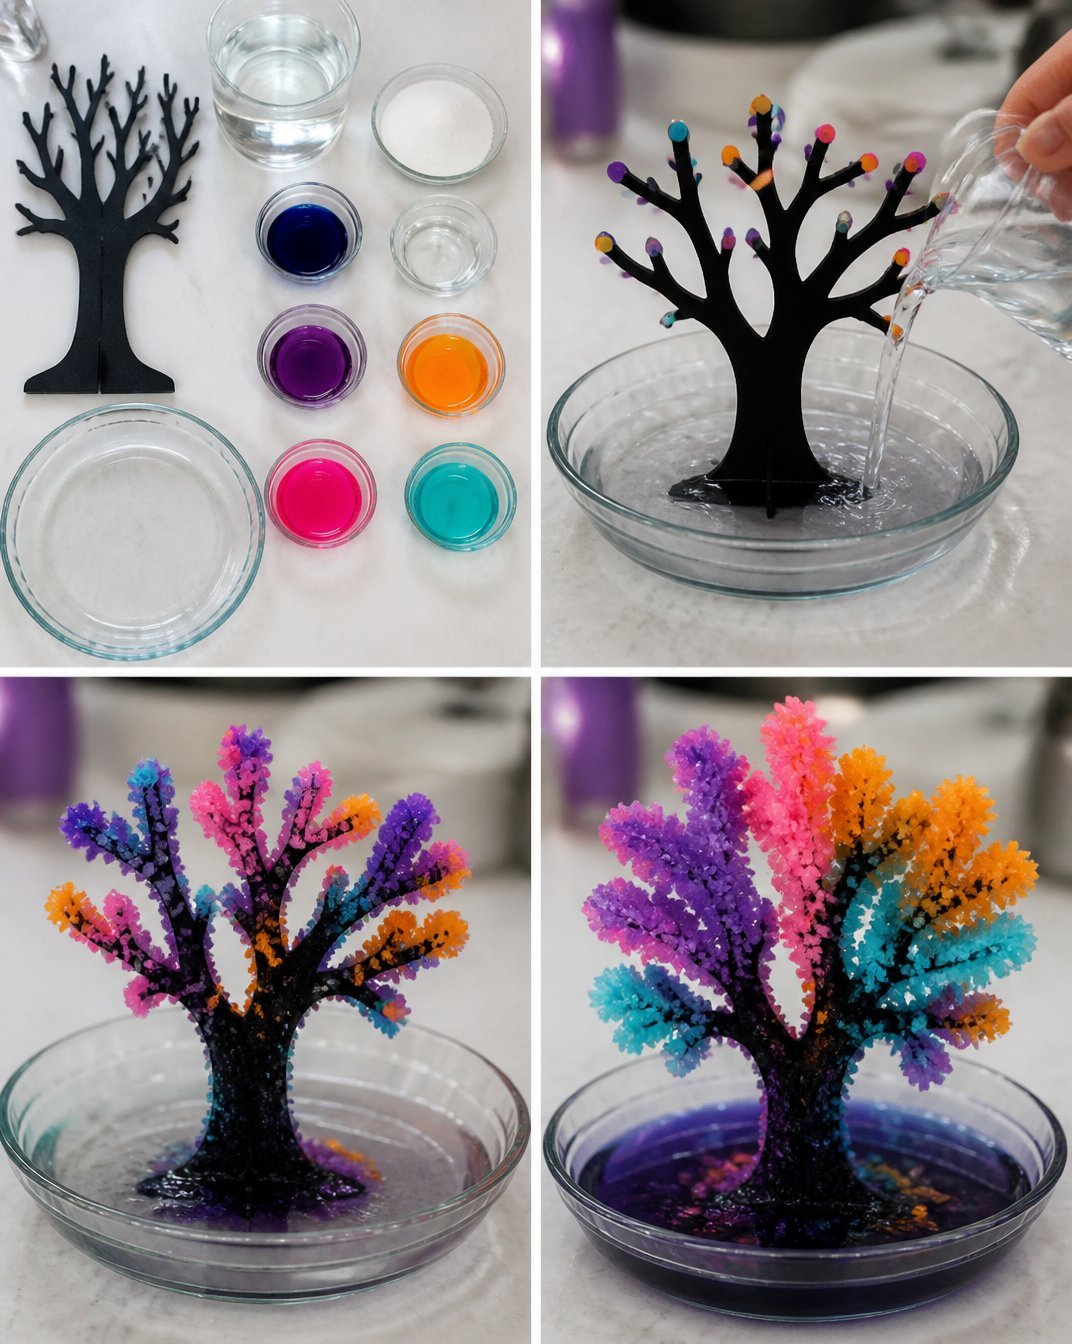
The Rainbow Crystal Haunted Tree grows through a simple yet fascinating process. When you combine warm water with salt and a few other ingredients, you create a crystal-growing solution. As the water evaporates and the solution becomes more concentrated, colorful crystals start to form. This project pairs science with beauty, resulting in an enchanting display that hopefully enchants everyone who sees it!
Materials You Will Need
Gathering materials for your Rainbow Crystal Haunted Tree is simple. Most items can be found easily at home or a local store. Here’s what you will need:
- Black cardboard tree
- 1 cup warm water
- 2 tbsp salt
- 2 tbsp liquid bluing
- 1 tbsp ammonia
- Purple food coloring
- Orange food coloring
- Pink food coloring
- Turquoise food coloring
- Shallow dish
Most of these materials are easy to find, and you can adjust them based on what you have available. It’s okay to substitute where necessary for example, if you don’t have liquid bluing, just use more salt instead!
Step-by-Step Directions
Creating your Rainbow Crystal Haunted Tree is a straightforward process. Just follow these simple steps:
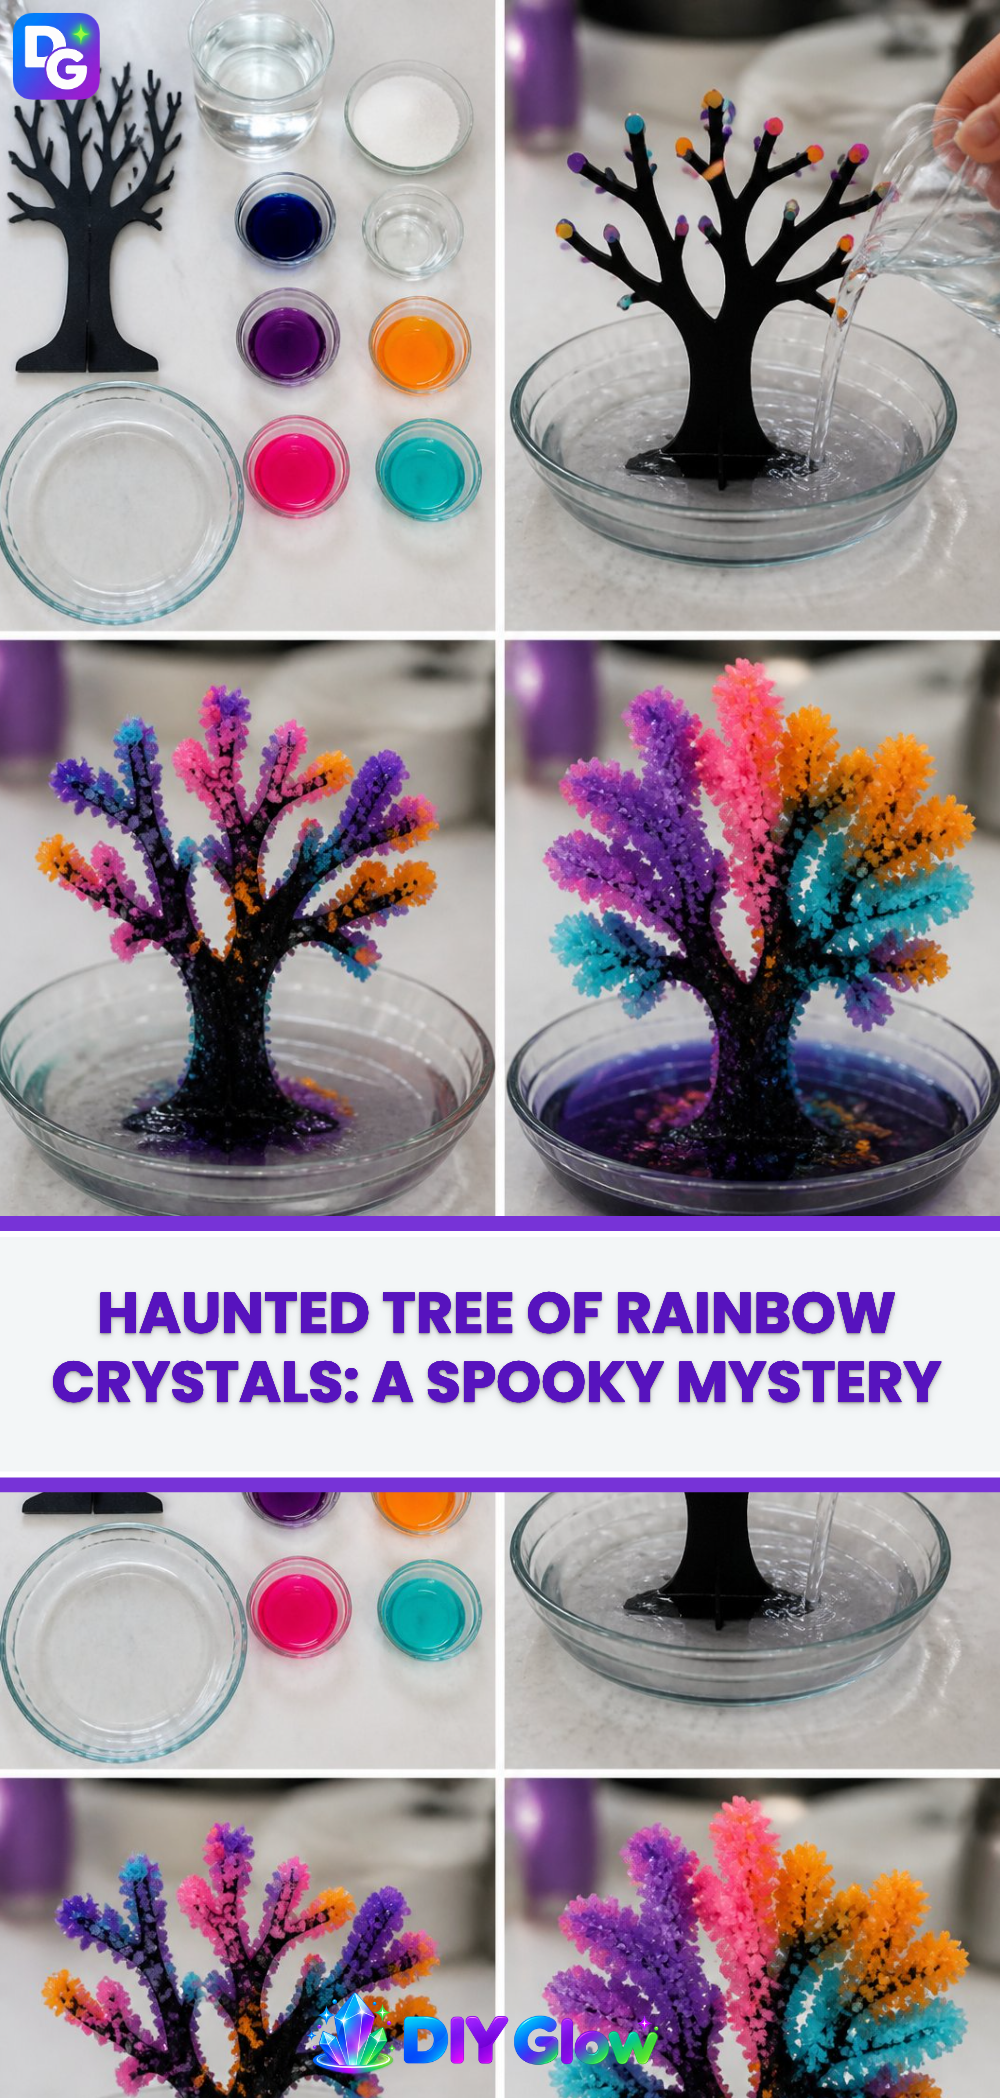
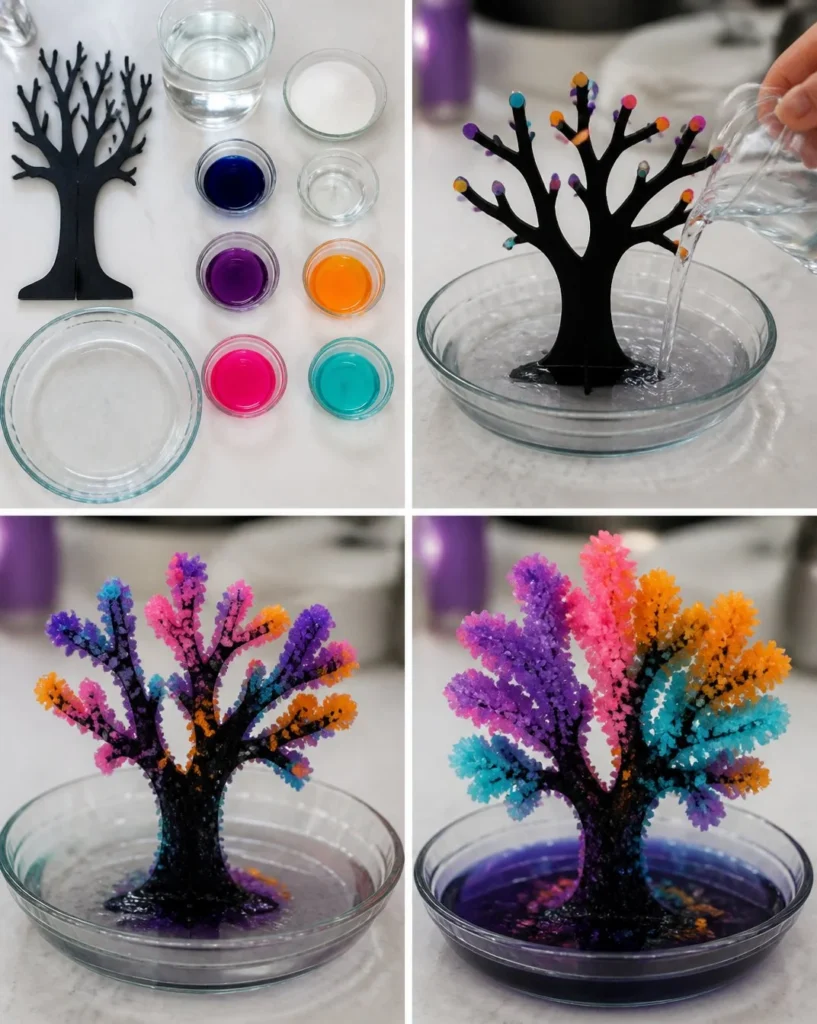
- Stand the black tree in a shallow dish. Make sure it is upright and stable. This will catch the developing crystals.
- Pour the crystal-growing solution around its base. You want enough solution to cover the area but not so much that it overflows.
- Dot vivid Halloween colors onto the branch tips. Use the food coloring to create a festive look let your imagination guide you!
- Leave undisturbed and watch as bright crystals develop across the dark branches. Over the next few days, keep an eye on your creation and enjoy the stunning transformation.
While making this project, be careful with the hot water and ammonia, as they require adult supervision.
Displaying Your Finished Rainbow Crystal Haunted Tree
The final display of your Rainbow Crystal Haunted Tree is as exciting as the creation process. Once the crystals have fully formed, find a beautiful spot to showcase your masterpiece. A sunny windowsill is ideal, as the light will make the colors sparkle even more. If you want it to be a centerpiece, consider placing it on a festive tablecloth or decorating around it with other Halloween decorations. This craft also makes a wonderful gift or an eye-catching addition to holiday decorations.
Keeping Your Rainbow Crystal Haunted Tree Looking Great
Your Rainbow Crystal Haunted Tree can last for quite some time with the right care. Store it in a cool, dry place to avoid moisture that could damage the crystals. If you notice any dust gathering on it, gently brush it off with a soft cloth. Realistically, the crystalline beauty may start to fade or dissolve after a while, especially in humid environments, but the memories made during the crafting process will always endure.
Fun Tips and Colorful Variations
To make your Rainbow Crystal Haunted Tree even more unique, consider adding your own flair! Here are a few friendly suggestions:
- Experiment with different color combinations. Use any food coloring you have or mix colors for unexpected shades.
- Change the size of your tree. Use a bigger cardboard tree for a more dramatic display or smaller branches for a clustered arrangement.
- Try seasonal versions of the tree. Use all spring colors for an Easter version or reds and greens for Christmas.
Let your creativity flow as you explore these variations!
FAQs About Rainbow Crystal Haunted Tree
Do you have questions about making your Rainbow Crystal Haunted Tree? Let’s clear up some common concerns!
Will it work if I substitute ingredients?
Yes, you can substitute ingredients, but results may vary. For instance, using different types of food coloring or varying the amount of salt can lead to unique crystal formations!
Is it safe for kids to do alone?
Safety first! While many parts are kid-friendly, adult supervision is necessary, especially when using hot water and ammonia.
How long does it take for the crystals to form?
Typically, you should see some crystals developing within a few hours, but the best results will appear after a day or two.
Why did mine not turn out?
Several factors can affect your project’s success. Make sure your measurements are correct, the solution is warm enough, and that the tree is undisturbed during the crystal-growth process.
How can I make it last longer?
To preserve your creation, avoid placing it in humid situations, and store it safely when not in use.
A Little Note Before You Go
As you wrap up your journey in making the Rainbow Crystal Haunted Tree, take a moment to soak in the experience. This project lets you explore colors, witness transformation, and share quality time with family and friends. Don’t hesitate to play with hues or forms, allowing the creative magic to flow. The joyful mess, the eager anticipation, and the stunning outcome make this project truly worth your time. Enjoy every vibrant, glowing moment happy crafting!
Follow us on social for more DIY ideas & inspiration!
Rainbow Crystal Haunted Tree
Would you like to save this project?
By submitting you agree to receive this project and occasional emails. Unsubscribe anytime.
Materials
Materials
- 1 piece Black cardboard tree Ensure it is tall and stable.
- 1 cup Warm water Use hot water for best results.
- 2 tbsp Salt Can substitute with sugar if necessary.
- 2 tbsp Liquid bluing Use more salt if bluing is unavailable.
- 1 tbsp Ammonia Handle with care and supervise kids.
- 5 drops Purple food coloring Use to add color to crystals.
- 5 drops Orange food coloring Use to add color to crystals.
- 5 drops Pink food coloring Use to add color to crystals.
- 5 drops Turquoise food coloring Use to add color to crystals.
- 1 piece Shallow dish To hold the growing solution.
Directions
Preparation
- Stand the black tree upright in the shallow dish.
- Pour the crystal-growing solution around the base of the tree.
- Dot the branch tips with vivid Halloween colors using food coloring.
- Leave it undisturbed to allow the crystals to develop.
Displaying Your Tree
- Find a sunny spot to showcase your finished tree.
- Consider placing it on a festive tablecloth for decoration.
Maintenance
- Store the tree in a cool, dry place to prevent moisture damage.
- Gently brush off any dust that accumulates.
Last Step: Don’t forget to leave a rating and comment below! It helps other readers find the best DIY projects — and it helps us too!