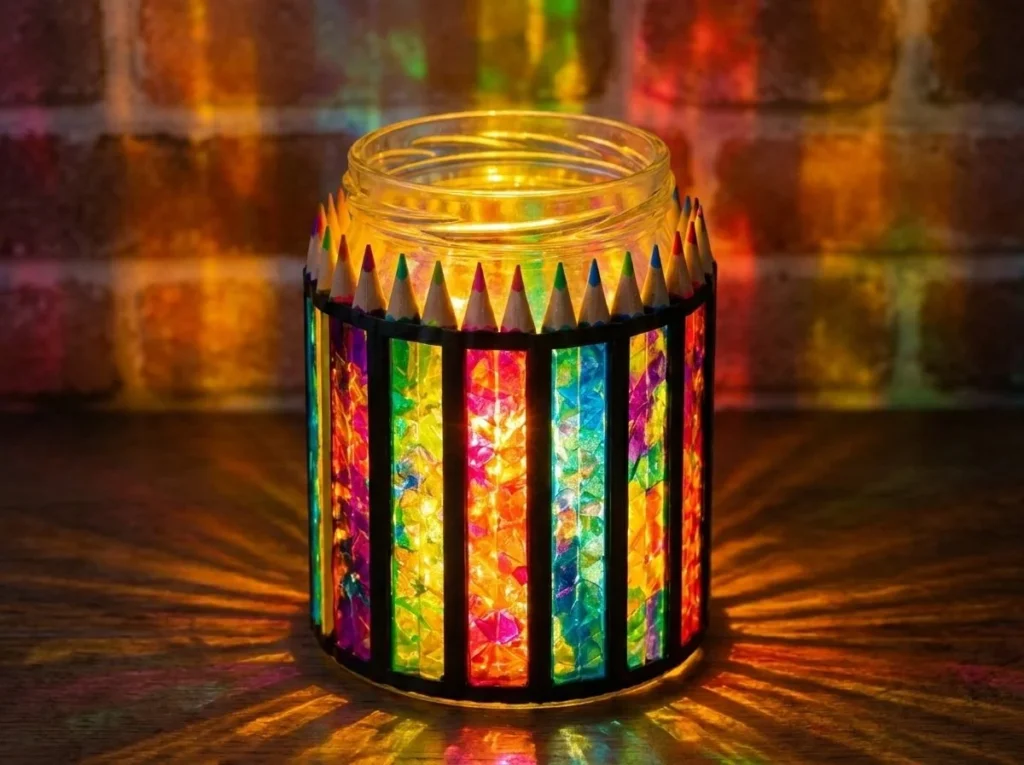
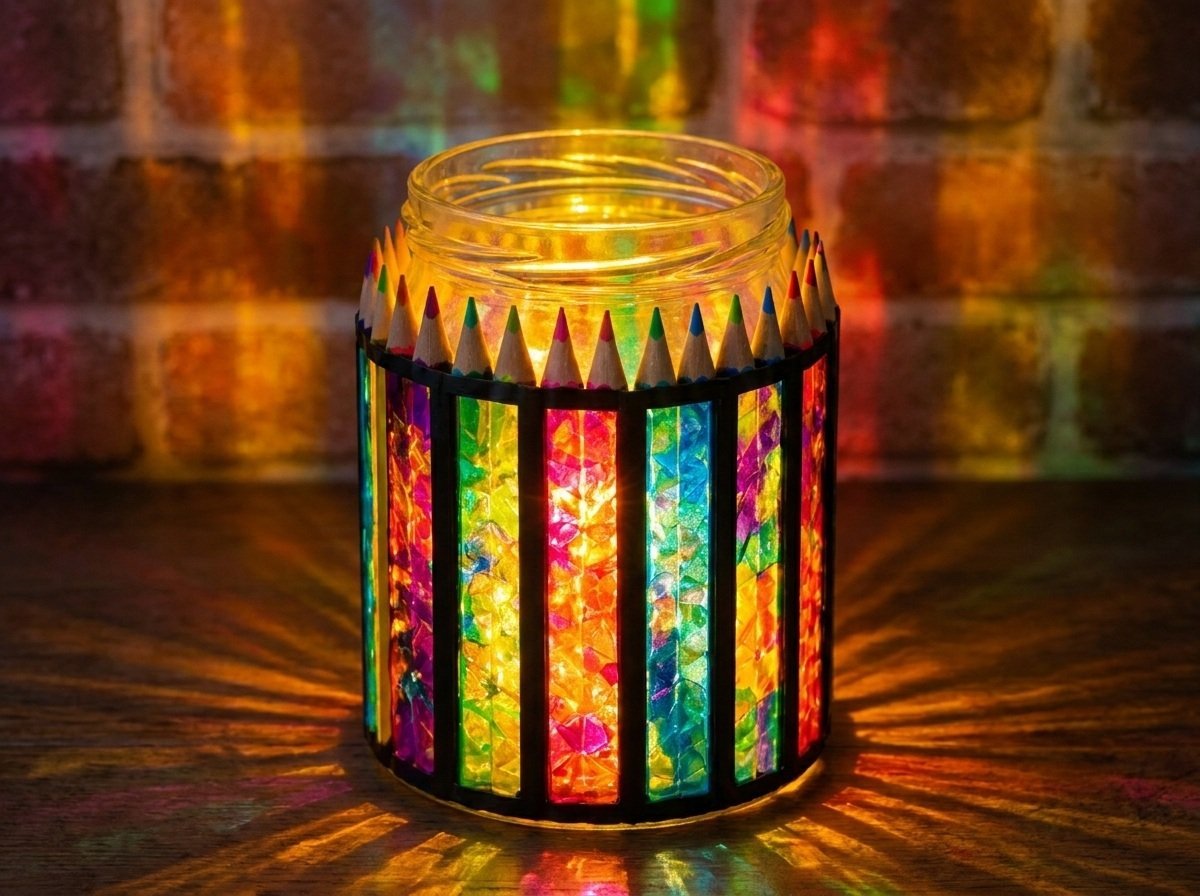
The Glowing Rainbow Pencil Stained-Glass Lantern charms with its colorful and intricate design, transforming any space where it’s placed. This unique lantern is not just visually appealing; it also serves as a soft, ambient light for areas like your shelf or window. Let’s get started on making this delightful craft that brings a bit of the rainbow into your home. You may also find Back To School Rainbow Pencil Bouquet useful.
What Makes This Work
The key to the lantern’s enchanting appearance lies in the combination of materials and light. The stained-glass effect creates a beautiful interplay of colors, especially when light passes through it. When you cut and arrange the black cardstock and colorful cellophane, you’re essentially creating a canvas for the light to shine through. For additional inspiration, consider checking out how you can brighten your home with similar techniques.
Materials
Gather the following materials for this glowing project: You may also find Broken Crayons Glowing Rainbow Flowers Recycle Art Supplies useful.
- Clear jar
- Black cardstock
- Rainbow/pink/blue cellophane
- Holographic film
- Glue
- Fairy lights
These materials will help create the stunning stained-glass effect that you desire. Safety is important, so remember to supervise kids, particularly when using scissors or handling glue.
Steps
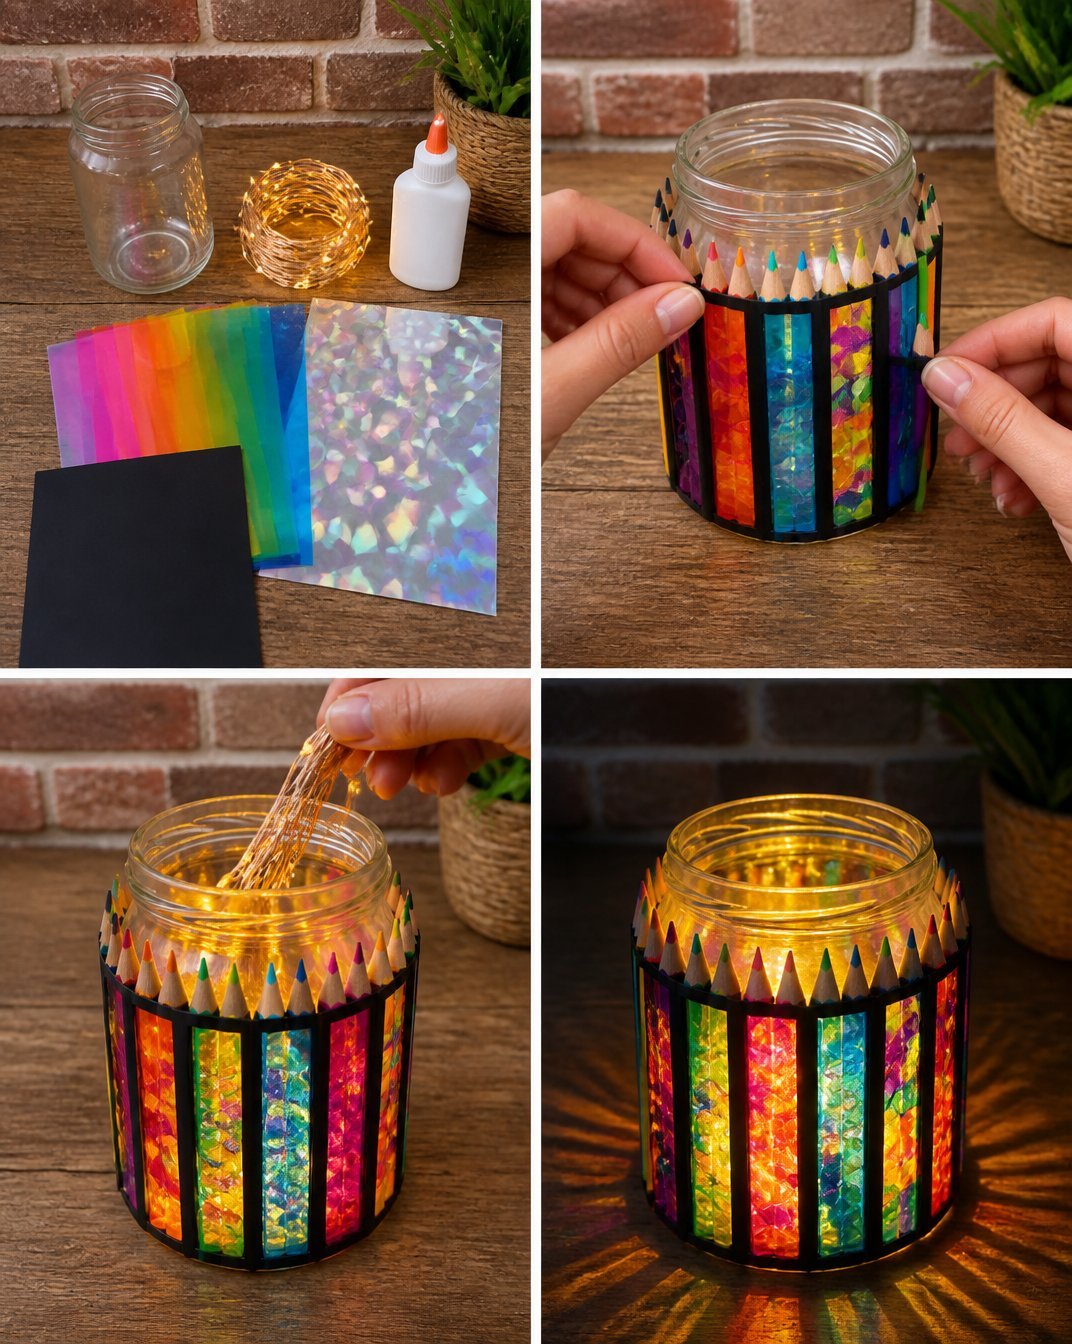
Step 1: Create Stained-Glass Pencil Sections Around Jar
Begin by cutting pieces of the black cardstock and colorful cellophane into pencil shapes. These pieces will serve as your stained glass. When arranging the shapes, consider how the different colors will look once they’re backlit by the fairy lights. Be creative, and don’t worry if it isn’t perfect. What matters is the beautiful color change that occurs when you place the lights inside.
Step 2: Insert Fairy Lights
Once you’ve finished creating the stained-glass sections, it’s time to insert the fairy lights. Carefully place them inside the clear jar, ensuring they are well-distributed. This step is crucial, as the fairy lights will bring your artwork to life. Look for the glow and sparkle that emerges it should fill the jar with a warm, inviting light.

What Goes Wrong and How to Fix It
Sometimes, the colors may not appear as vibrant as you envisioned. This usually happens if the cellophane is not thick enough or if the fairy lights are too dim. To fix this, try using brighter or larger fairy lights. Additionally, you can layer multiple pieces of cellophane to enhance the colors.
Where to Display It
This lantern makes a stunning centerpiece for your coffee table or a charming addition to your window at night. When sunlight hits the lantern during the day, it will create a lovely display of color. You might also consider positioning it in a reading nook or on a shelf. For other decorative ideas, the Aurora Bottle Lantern could provide more inspiration for glowing decor.
Variations
Feeling adventurous? You can experiment with different shapes and colors. Try using different colored cardstock or varying sizes of jars. Mixing in a few more textures, like adding some holographic film, can provide an interesting twist to your lantern. This way, you can create a unique piece that showcases your personal style.
FAQs
Can I use other materials for the lantern?
Yes, you can substitute different types of paper or even thin fabric. Just ensure they are semi-translucent to let the light shine through.
How long does this lantern last?
The longevity of the lantern mainly depends on the quality of the materials. However, if stored properly and not exposed to harsh conditions, it could last for years.
Is this safe for kids to make?
Yes, but adult supervision is vital during cutting and gluing stages, especially with small parts. Make sure they help in a safe way.
What should I do if the glue doesn’t hold?
If the glue fails to hold, try using a stronger adhesive or applying pressure for a longer period while it sets.
How can I clean the lantern?
You can clean the lantern gently with a damp cloth. Avoid soaking it in water, as that can damage the materials.
What if my fairy lights don’t work?
If the lights do not illuminate, make sure to check the batteries or plug connections. Replacing the batteries often resolves the issue.
Conclusion
The Glowing Rainbow Pencil Stained-Glass Lantern is a delightful craft that not only beautifies your space but also offers a hands-on experience that can brighten any day. If you’re interested in exploring more crafts that shine, consider taking the Fantasy Glow Effects Masterclass. For ideas on more art projects for your home, check out the collection of stained glass coloring books available. Happy crafting!
Follow us on social for more DIY ideas & inspiration!
Glowing Rainbow Pencil Stained-Glass Lantern
Would you like to save this project?
By submitting you agree to receive this project and occasional emails. Unsubscribe anytime.
Materials
Materials
- 1 unit Clear jar Use a medium-sized jar for best results.
- 1 sheet Black cardstock This will serve as the main body of your stained-glass effects.
- 1 pack Rainbow/pink/blue cellophane Assorted colors will enhance the visual appeal.
- 1 sheet Holographic film Optional, for added texture and visual interest.
- 1 bottle Glue Make sure it's strong enough to hold materials together.
- 1 set Fairy lights Battery-operated lights work best.
Directions
Crafting the Lantern
- Step 1: Create Stained-Glass Pencil Sections Around Jar - Cut pieces of the black cardstock and colorful cellophane into pencil shapes to create your stained glass.
- Step 2: Insert Fairy Lights - Carefully place fairy lights inside the clear jar, ensuring even distribution for maximum effect.
Last Step: Don’t forget to leave a rating and comment below! It helps other readers find the best DIY projects — and it helps us too!