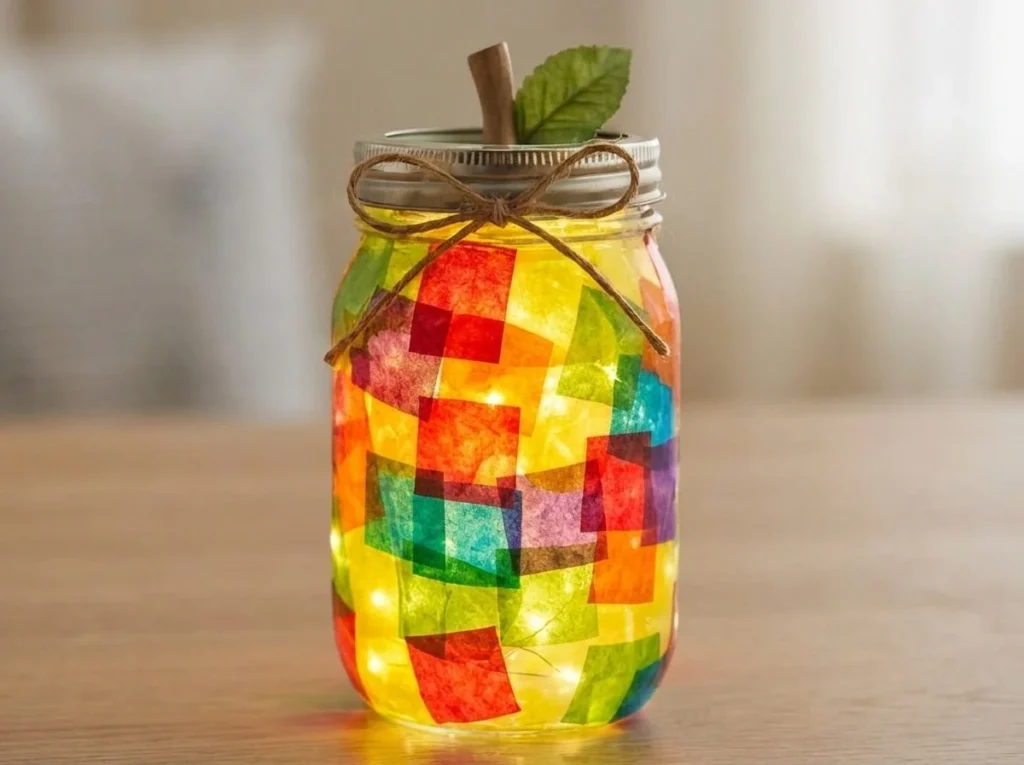
The Rainbow Apple Mason Jar Teacher Lantern transforms a simple mason jar into a vibrant, glowing decor piece. As you layer torn tissue paper around the jar, you’ll notice the rich colors come together, creating a lovely apple-like appearance. This project is perfect for gifting to teachers or brightening up any space. You may also find Colorful Crystal Mason Jar Lantern For Home Decor useful.
Materials
To get started, gather the following supplies: You may also find Colorful Crystal Mason Jar Lantern Home Decor useful.
- 1 pint mason jar
- 2 tbsp clear school glue
- Red tissue paper
- Clear pink tissue paper
- Rainbow tissue paper
- Green felt
- Brown cardstock
- 12-inch twine
- Alphabet stickers
- Battery tea light
Once you have your materials, you can follow these easy steps to create your lantern. You may also find Diy Radiant Mason Jar Lantern Crystal Accents useful.
Steps
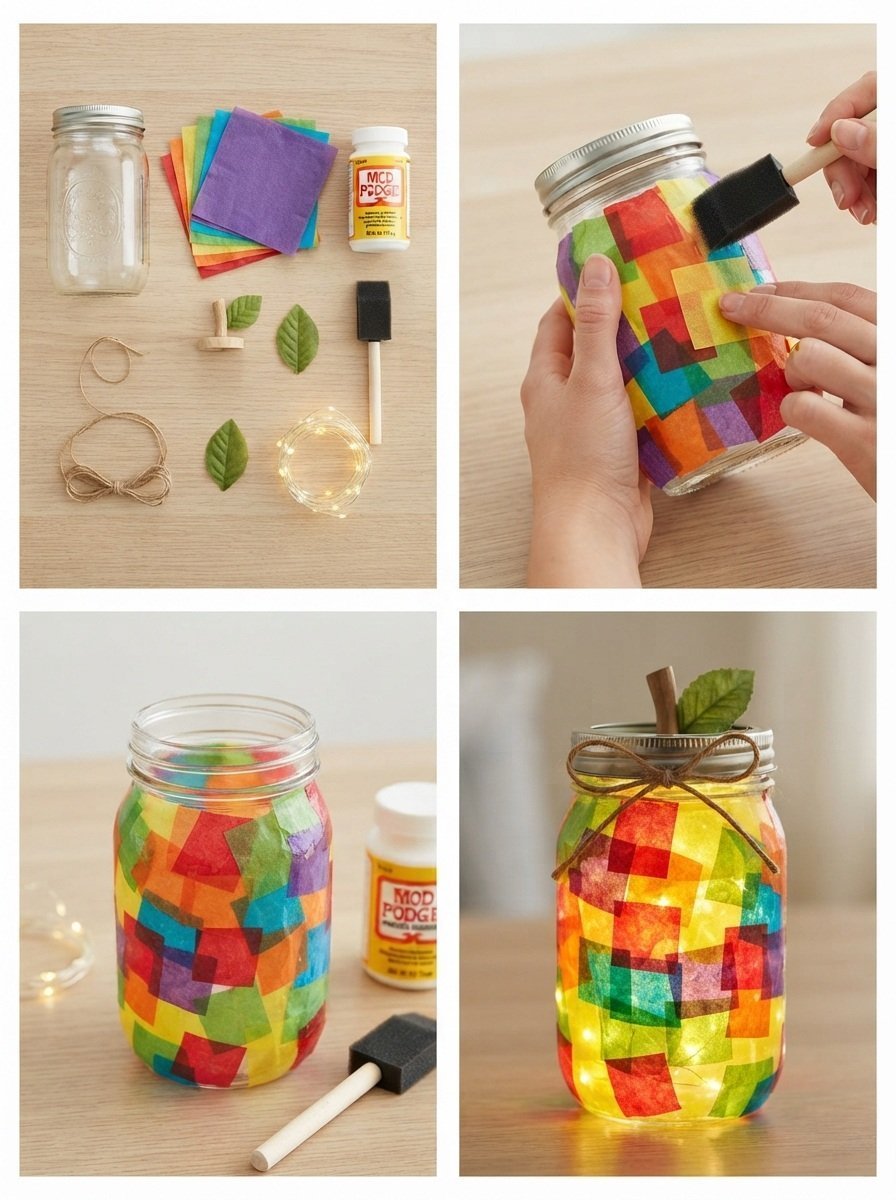
- Brush the Outside: Start by brushing the outside of the mason jar with clear glue. This will help the tissue paper stick better. It’s important to cover the entire surface so that every layer adheres well. You may also find Diy Radiant Mason Jar Lantern With Crystal Accents useful.
- Layer the Tissue: Next, take your torn red and clear pink tissue paper and layer it around the jar. This layering creates a beautiful apple effect. You will see the colors blend and create a vibrant display as you work.
- Add Features: Cut out a green felt leaf and a brown paper stem, then attach them near the rim of the jar with a bit of glue. This adds to the apple theme and gives the jar more personality.
- Personalize It: Use the alphabet stickers to add a teacher’s name or a small label on the jar. After that, finish the look by tying twine around the top for a rustic charm.
- Illuminate: Finally, place a battery-operated tea light inside. This will provide a warm glow that brings the entire piece to life, making it perfect for evening displays.
Using clear glue allows the colors to pop and gives your lantern a polished finish. The layered tissue paper creates texture, while the vibrant hues make it eye-catching.
What Goes Wrong and How to Fix It
Sometimes, the tissue paper may not stick well. If that happens, you can apply a bit more glue to the edges and press down gently. Another issue may be that the colors become too muddled. To prevent this, ensure each layer dries before adding the next. Checking that the surface is no longer tacky between layers can help maintain distinct colors.
Where to Display It
This lantern can light up numerous settings. It looks wonderful on a bookshelf, adding a splash of color. Consider placing it in a window where the light can shine through the tissue paper, casting beautiful patterns. Additionally, it makes a delightful center piece on a dining table for seasonal decorations.
Variations
Feel free to experiment with different colors and patterns. For instance, using shades of blue and green can create a cool ocean theme, while yellow and orange can evoke a sunny day. You can also use patterned tissue paper to add a unique flair. Another idea is to create multiple lanterns and display them together in varying heights.
FAQs
Can I use other types of glue?
Yes, you can use other types of glue, but clear school glue is recommended for its ability to dry clear and hold well with tissue paper.
How do I keep the lantern looking fresh?
To keep your lantern in good condition, avoid placing it in direct sunlight for prolonged periods, as this may fade the colors.
Can kids help with this project?
Absolutely! This is a great project for kids to assist with, especially in tearing the tissue papers or applying glue. However, an adult should handle the cutting of the felt and cardstock.
What if I want to add extra decor?
You can always add additional decorations like glitter or stickers based on the occasion or theme. This can elevate the lantern’s design even more.
How long does this project take?
The project may take around 30 to 60 minutes, depending on drying time between layers and personal crafting speed.
Why did my lantern not glow as brightly?
If your lantern does not shine brightly, check that the tea light is working and that the tissue layers are sufficiently thin for the light to pass through.
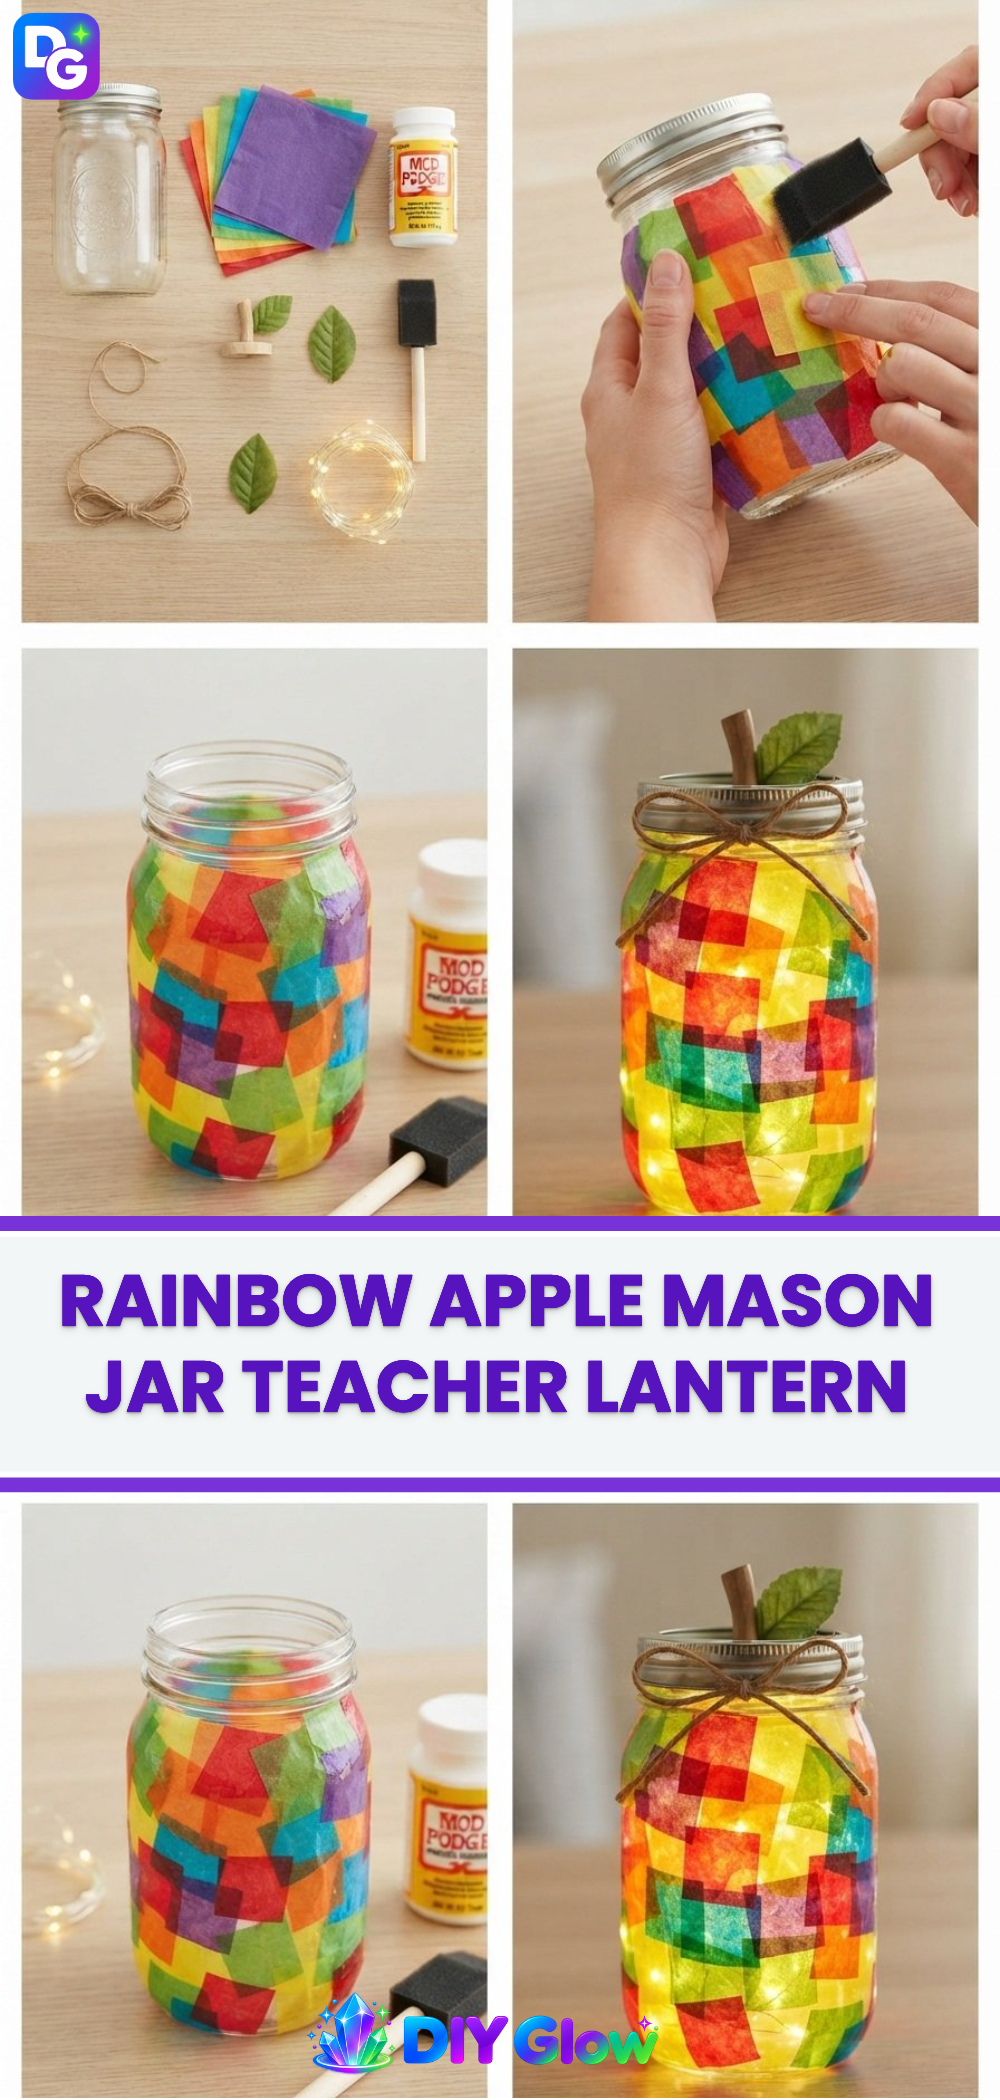
Creating the Rainbow Apple Mason Jar Teacher Lantern is not only a fun craft but also a way to add warmth and color to your home. The process allows for your creativity to shine through and can result in a beautiful piece that holds sentimental value.
Conclusion
Engaging in DIY projects like making stylish mason jar crafts can be a rewarding experience. For more inspiring ideas, explore 20 Mason Jar Crafts to Make and Love!. If you’re looking for additional gift ideas, check out the Gift Ideas Archives.
Follow us on social for more DIY ideas & inspiration!
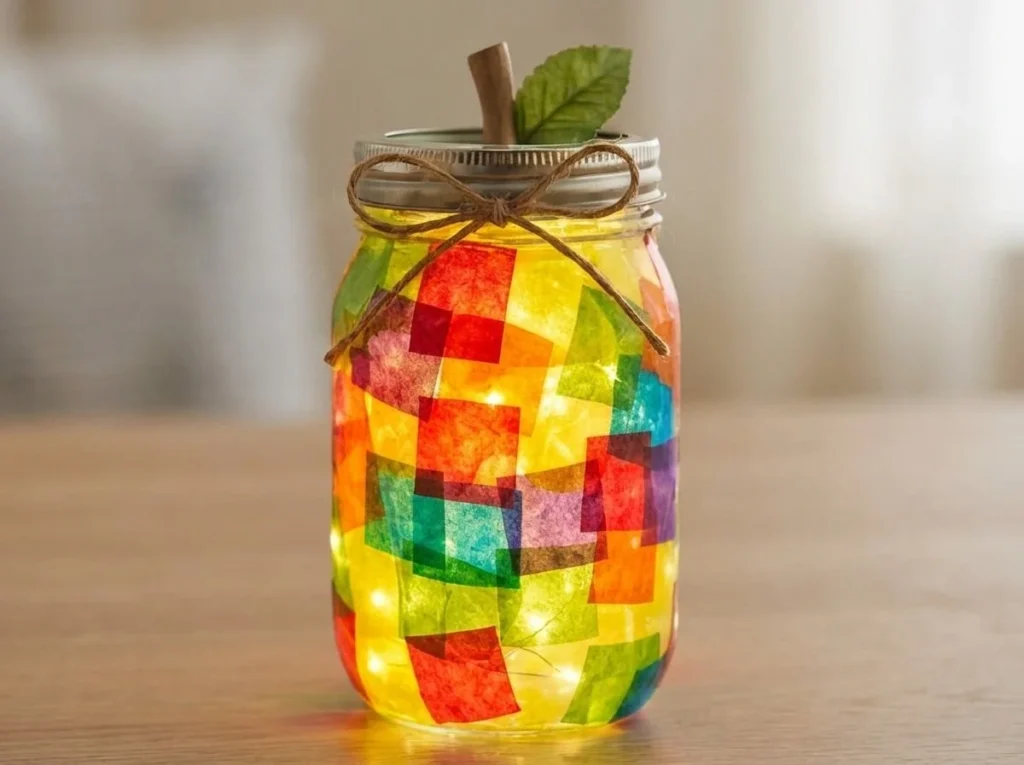
Rainbow Apple Mason Jar Teacher Lantern
Would you like to save this project?
By submitting you agree to receive this project and occasional emails. Unsubscribe anytime.
Materials
Materials
- 1 pint pint mason jar
- 2 tbsp clear school glue
- 1 pack red tissue paper
- 1 pack clear pink tissue paper
- 1 pack rainbow tissue paper
- 1 sheet green felt
- 1 sheet brown cardstock
- 12 inches twine
- 1 pack alphabet stickers
- 1 battery tea light
Directions
Preparation
- Start by brushing the outside of the mason jar with clear glue. Ensure the entire surface is covered for better adherence of the tissue paper.
- Take torn red and clear pink tissue paper and layer them around the jar to create a beautiful apple effect.
- Cut out a green felt leaf and a brown cardstock stem, then attach them near the rim of the jar with glue.
- Use alphabet stickers to add a teacher's name or a small label on the jar, then tie twine around the top for a rustic charm.
- Place a battery-operated tea light inside the jar to provide a warm glow.
Last Step: Don’t forget to leave a rating and comment below! It helps other readers find the best DIY projects — and it helps us too!