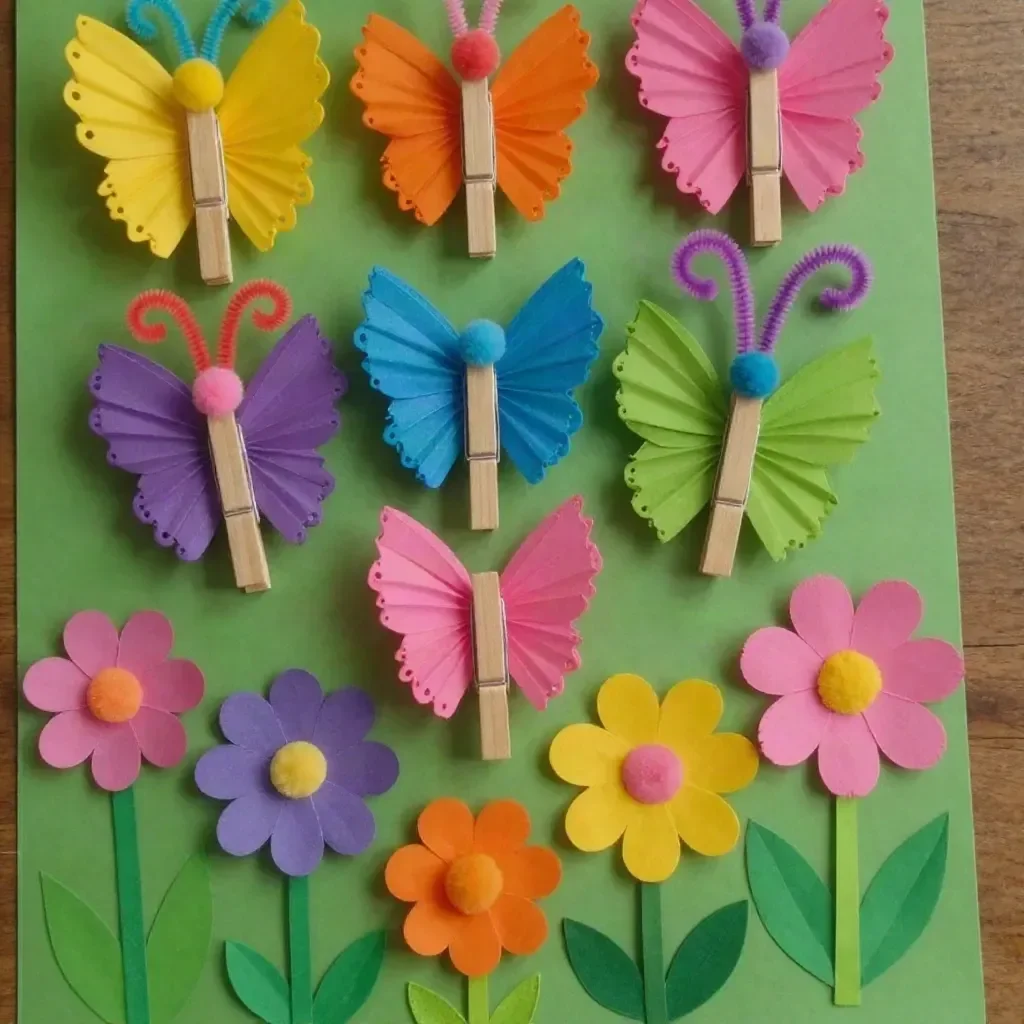
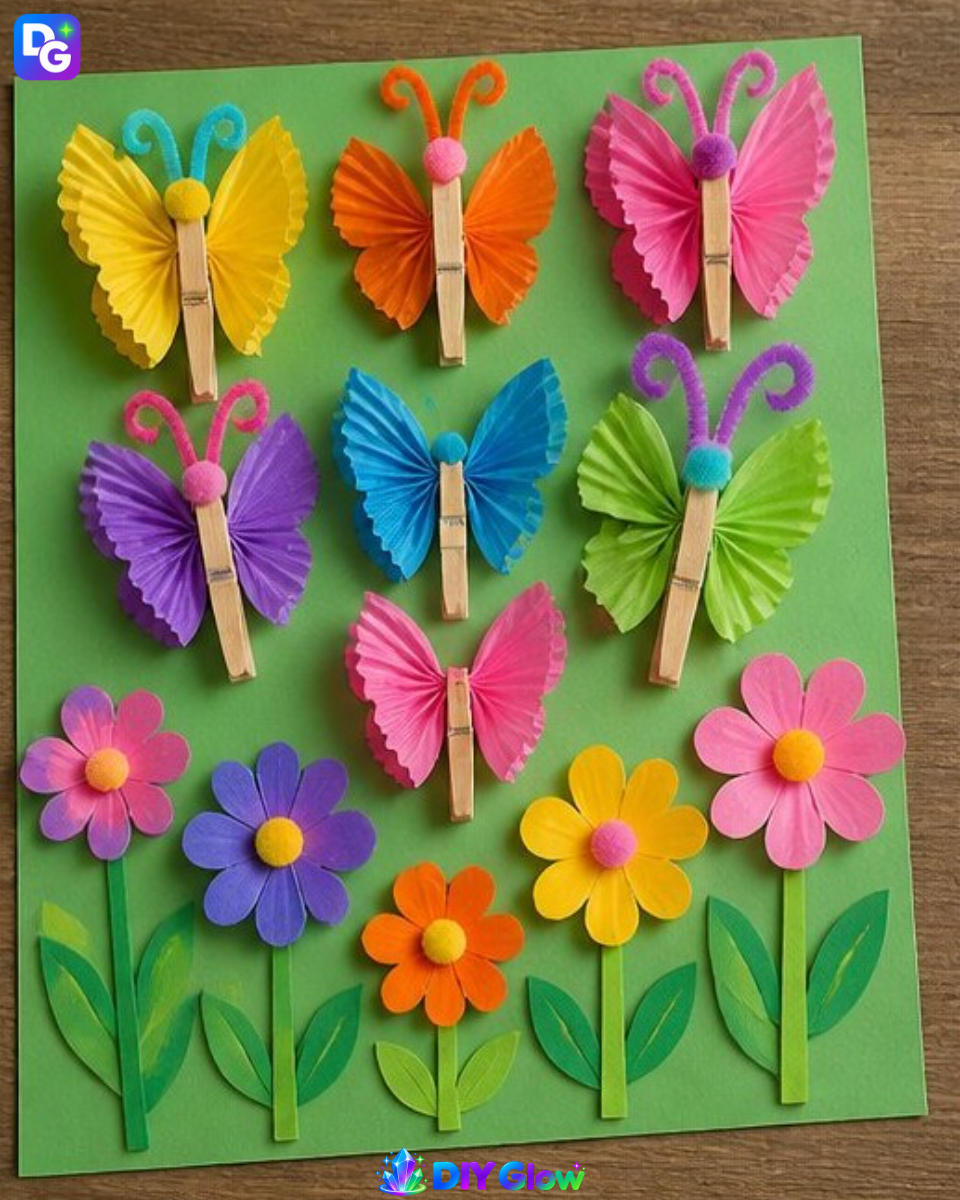
The moment you place the colorful cupcake-liner butterfly garden on a shelf or in a window, it transforms into a bright and cheerful display. The Rainbow Cupcake-Liner Butterfly Garden showcases vibrant colors and a delightful design using simple household items. This project not only encourages creativity but also brings light and joy into your space. You may also find Crystal Rainbow Butterfly Tree Garden Decor useful.
What Makes This Work
The process of crafting the butterfly garden allows each cupcake liner to take on a new form. By pinching and folding the liners, you create unique shapes that mimic real butterfly wings. This transformation emphasizes the pliability of paper, which is an essential characteristic in crafting. The project highlights colors and textures, making it a visually appealing decoration. You may also find Crystal Rainbow Butterfly Tree Vibrant Garden Decor useful.
Materials
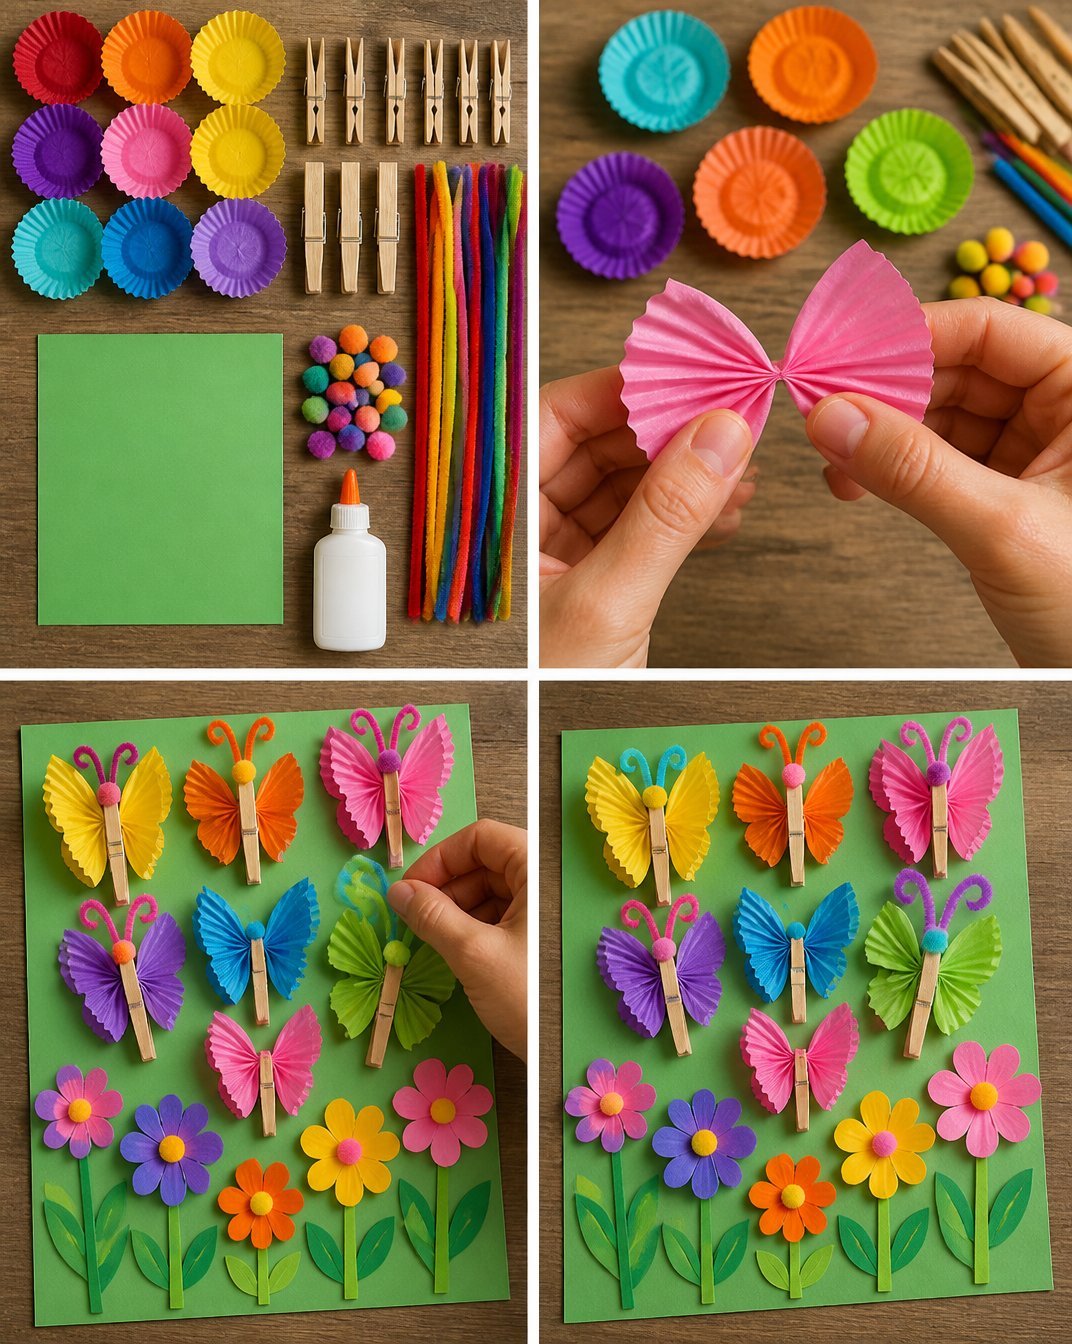
Gather your materials to get started on this fun project. You will need: You may also find Rainbow Butterfly Jar Stained Glass Home Decor useful.
- 16 colorful cupcake liners
- 8 clothespins
- Pipe cleaners
- Pom-poms (optional, for decoration)
- 12 × 12-inch cardstock (any color)
- Glue
Don’t forget to have a flat surface for working. This will make the assembly easier and help prevent messes while you glue. You may also find Rainbow Butterfly Jar With Stained Glass Handcrafted Home Decor useful.
You may also find Baking Soda Rainbow Crystal Forest Rainbow Crystals useful.
Steps
1. Flatten Butterfly Wings
Begin by taking two cupcake liners and flattening them. Next, pinch the center tightly to form the butterfly wings. Adjust the pinch as needed to create the desired wing size. This step is crucial as it dictates the final appearance of your butterfly.
2. Form the Butterfly Body
Once you have your wings, align the paired liners at the center. Use a clothespin to clip them together, creating the butterfly’s body. Ensure that the liners are clipped securely so they maintain their shape.
3. Add Antennae
For the antennae, cut a pipe cleaner into two equal pieces. Poke the ends into the top of the clothespin where the wings are clipped. This adds an extra element of fun and detail to your butterflies.
4. Arrange the Butterflies
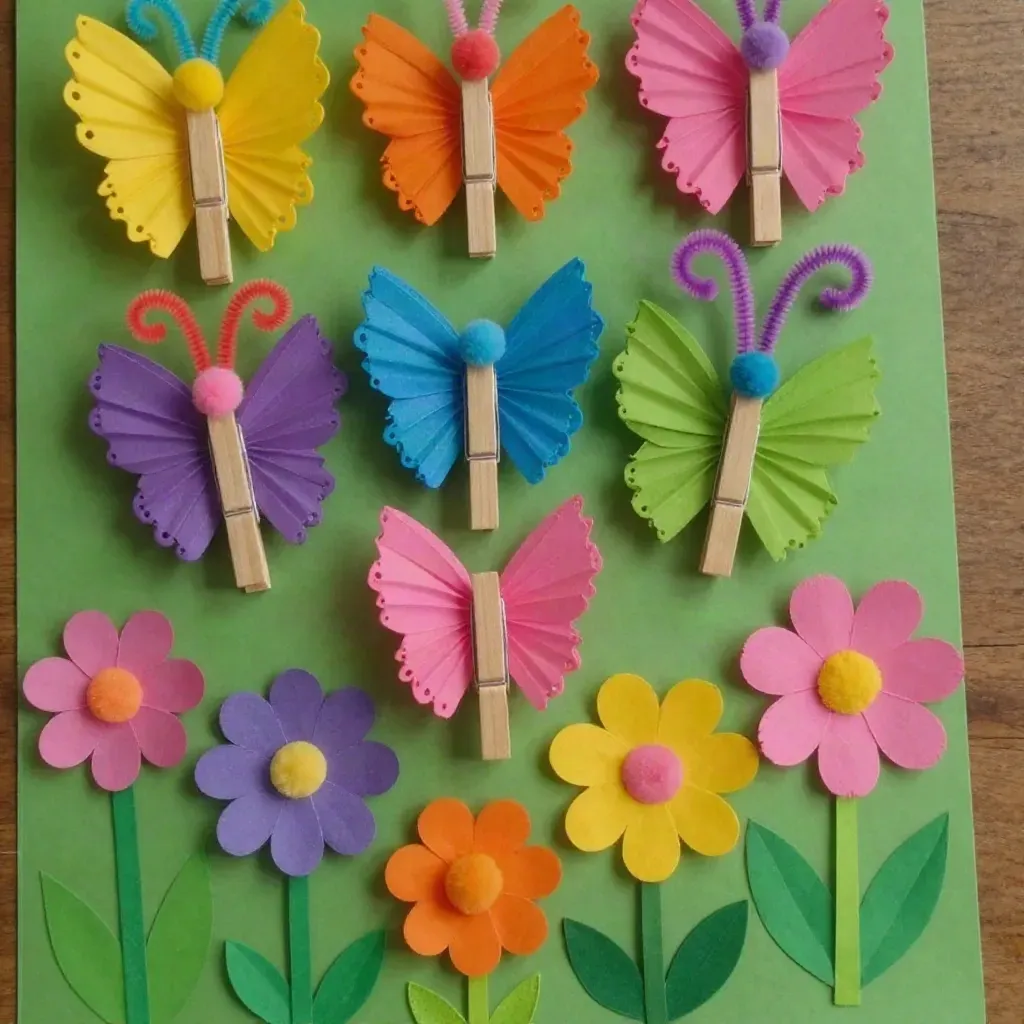
Now, take the arranged butterflies and place them on the cardstock in a creative layout. You can even glue them down or let them sit freely on the cardstock. Adding extra embellishments like paper flowers can enhance the design even more.
5. Final Assembly
As you assemble your butterfly garden, use flat surfaces to avoid any mishaps. Apply glue sparingly to prevent messes, and allow sufficient drying time before moving your finished project. The glue should dry clear to keep the butterflies looking as beautiful as they were intended.
What Goes Wrong and How to Fix It
Sometimes, the wings might not hold their shape as desired. If that occurs, readjust the pinch and ensure the clothespin is tightly securing the wings together. If the glue is too much, use a small brush to spread it evenly and reduce the excess. Remember, practice makes perfect!
Where to Display It
Your Rainbow Cupcake-Liner Butterfly Garden can brighten up many spaces. Hanging it by a window allows sunlight to play with the colors, enhancing the visual effect. Alternatively, it can serve as a vivid centerpiece on a dining table or desk. The butterflies can even be a delightful addition to a child’s room, inspiring them to explore creativity further.
Variations
Feel free to customize your butterfly garden in many ways. You can choose a theme, such as all shades of blue or a mix of pastels. Another idea is to experiment with different papers, like textured cardstock or patterned sheets, for a unique look. The possibilities here are as colorful as your imagination!
FAQs
How do I make the butterflies stay in place on the cardstock?
To keep the butterflies in place, you can apply a dot of glue to the base of the clothespin. It will help them adhere firmly to the cardstock.
Can I use other materials instead of cupcake liners?
Yes, you can use colorful paper cutouts or even old magazines to create your butterflies. Just ensure that the material is lightweight for easy assembly.
Why does my glue not seem to dry clear?
Different brands of glue can vary in drying properties. Using a glue that specifically states “dries clear” will give you the best results.
How long does this project take to finish?
Most people find that this project takes about an hour to complete, depending on the number of butterflies you want to create and any additional decorations.
Can kids help with this project?
Absolutely! Supervise younger children while using scissors or glue and let them express their creativity with the design.
What can I do if my butterfly wings tear?
If the cupcake liners tear, you can reinforce them with a bit of tape on the back. Alternatively, you might choose to use new liners, adjusting the size and shape as needed.
Conclusion
Creating a Rainbow Cupcake-Liner Butterfly Garden can be a fantastic way to explore arts and crafts with family. This fun project can be complemented by delicious treats like Funfetti Cupcakes or beautifully paired with various projects, such as butterfly scenes with cupcake liners for extra creativity.
Follow us on social for more DIY ideas & inspiration!
Rainbow Cupcake-Liner Butterfly Garden
Would you like to save this project?
By submitting you agree to receive this project and occasional emails. Unsubscribe anytime.
Materials
Craft Materials
- 16 pieces colorful cupcake liners
- 8 pieces clothespins
- 2 pieces pipe cleaners
- Optional pom-poms for decoration
- 1 piece 12 × 12-inch cardstock any color
- As needed glue
Directions
Preparation
- Begin by taking two cupcake liners and flattening them. Pinch the center tightly to form the butterfly wings. Adjust as needed to create the desired wing size.
- Once you have your wings, align the paired liners at the center. Use a clothespin to clip them together to create the butterfly's body.
- Cut a pipe cleaner into two equal pieces and poke the ends into the top of the clothespin where the wings are clipped to create antennae.
- Arrange the butterflies on the cardstock in a creative layout. Glue them down or let them sit freely. Add extra embellishments if desired.
- Use flat surfaces to assemble your butterfly garden. Apply glue sparingly and allow adequate drying time before moving.
Last Step: Don’t forget to leave a rating and comment below! It helps other readers find the best DIY projects — and it helps us too!