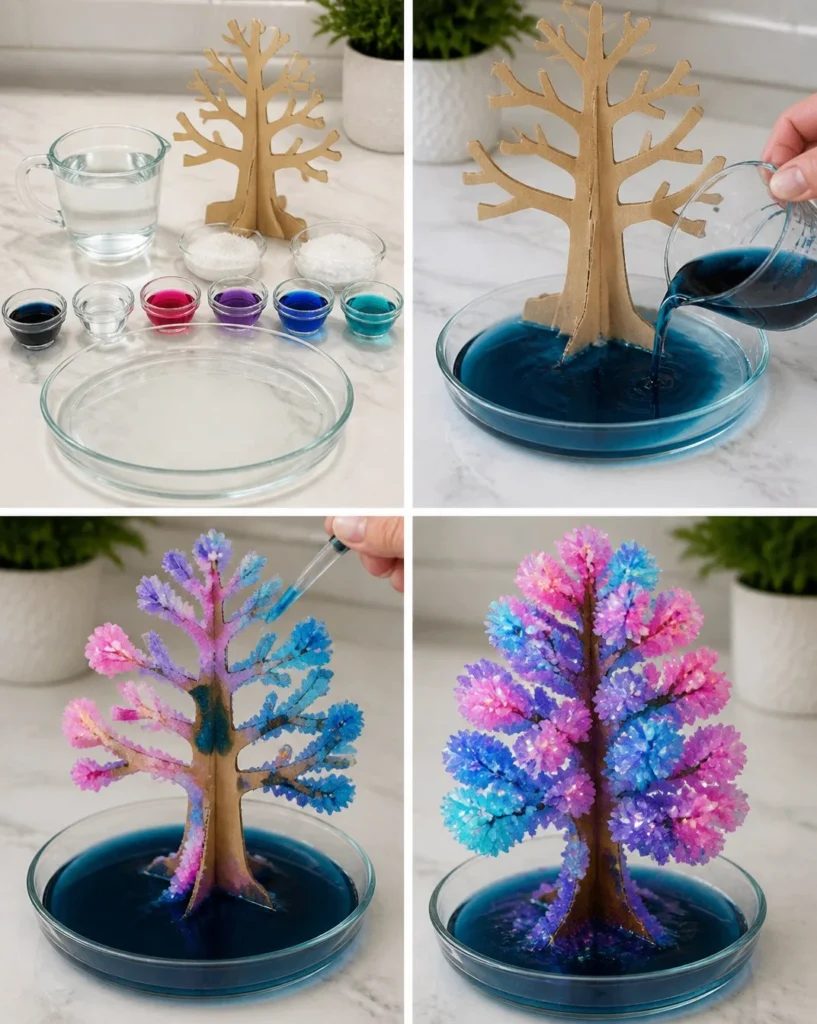
Sparkling Joy: Your Rainbow Crystal Blossom Tree Awaits!
Imagine a world where your ordinary cardboard tree bursts into a magical display of color and sparkle. With the Rainbow Crystal Blossom Tree project, this dream becomes a delightful reality right in your home. As the colored crystals bloom and grow, you and your little ones will experience the joy of watching science come alive. This vibrant, interactive craft project invites curiosity and creativity, making it a true family favorite. Let’s dive into the colorful journey of the Rainbow Crystal Blossom Tree, where every moment shines.
Why Make This Rainbow Crystal Blossom Tree
Creating the Rainbow Crystal Blossom Tree is not just about making something pretty; it’s a joyful exploration of color, texture, and transformation. This project sparks excitement in children and adults alike, bringing families together. It offers a wonderful opportunity to bond over crafting while also dipping into the fascinating world of science. Kids get to see firsthand how simple materials can combine to create a rainbow of sparkling crystals, merging art with exploration.
This project is special because it delights the senses from the vibrant colors that dance before your eyes to the satisfying texture of the crystals as they form. Imagine a sunny afternoon full of laughter and wonder as everyone gathers to make memories with this enchanting craft.
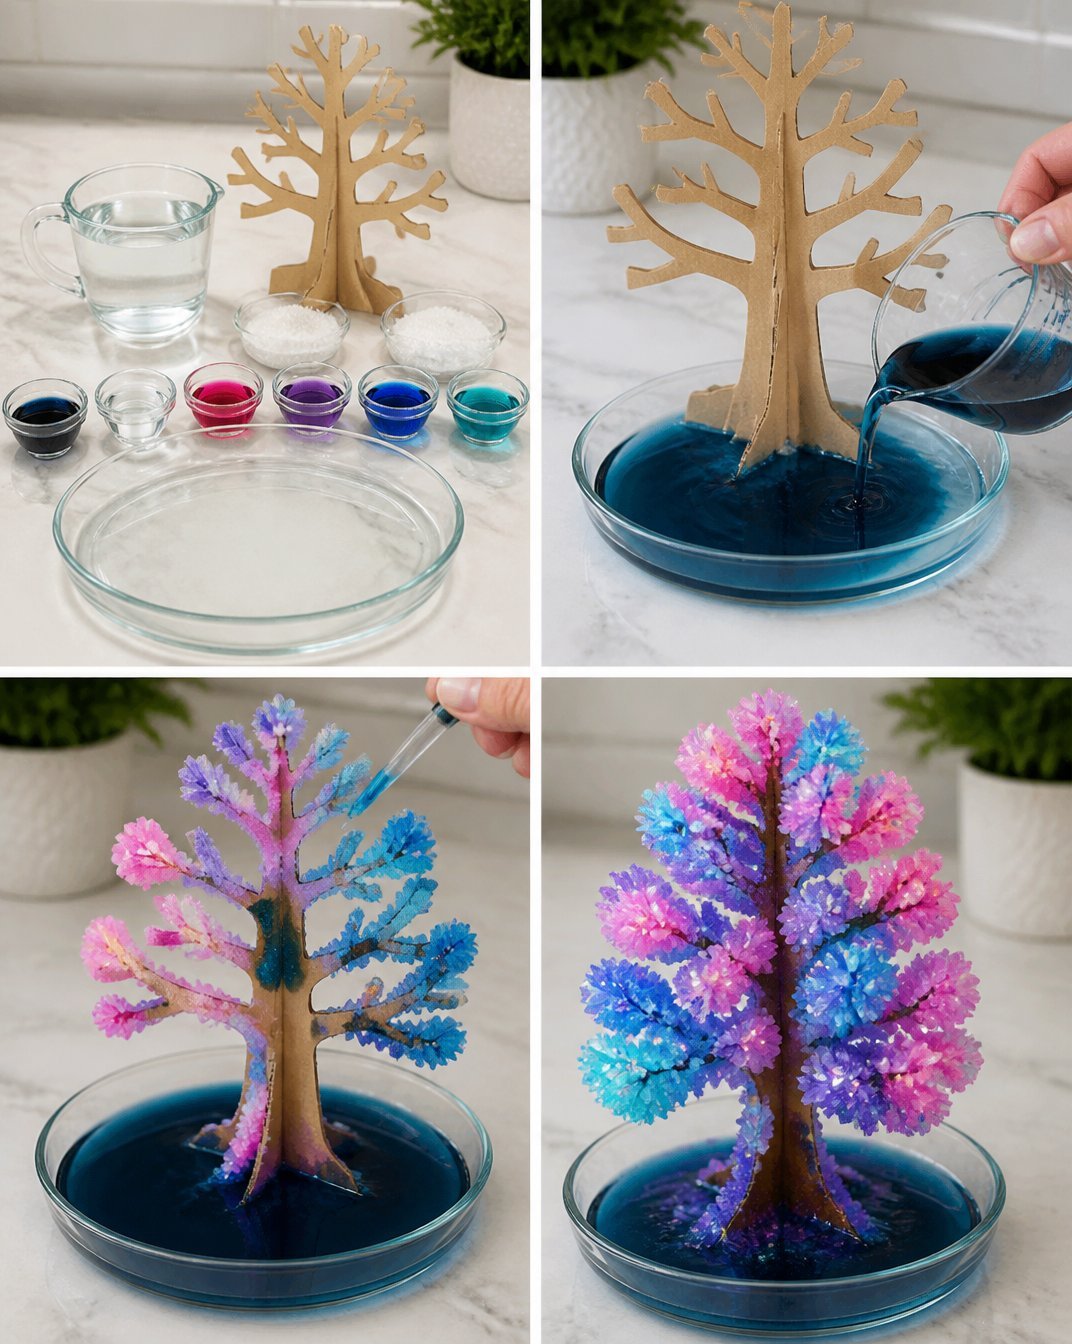
A Quick Look at How It Works
At its core, the Rainbow Crystal Blossom Tree is a dazzling fusion of science and art. When you mix the ingredients together, a process called crystallization occurs. In simple terms, this means that the solution forms solid crystals as it cools and evaporates, creating that stunning visual effect. The result? Beautifully colorful crystals that form on the branches of your tree, turning it into a cheerful piece of décor that catches the light and sparkles enchantingly. Let’s gather what you need and get started on this exciting sensory journey!
Materials You Will Need
Before you begin, make sure you have everything gathered and ready to go. Here’s your list of materials for the Rainbow Crystal Blossom Tree:
- Cardboard tree shape (you can cut it out or use a pre-made one)
- 1 cup warm water
- 2 tbsp salt
- 2 tbsp liquid bluing
- 1 tbsp ammonia
- Pink food coloring
- Purple food coloring
- Blue food coloring
- Turquoise food coloring
- Shallow dish (to catch the crystal growth)
All of these materials are easy to find and safe to use, but remember that adult supervision is recommended, especially when working with hot water or ammonia.
Step-by-Step Directions
Step-by-Step Directions
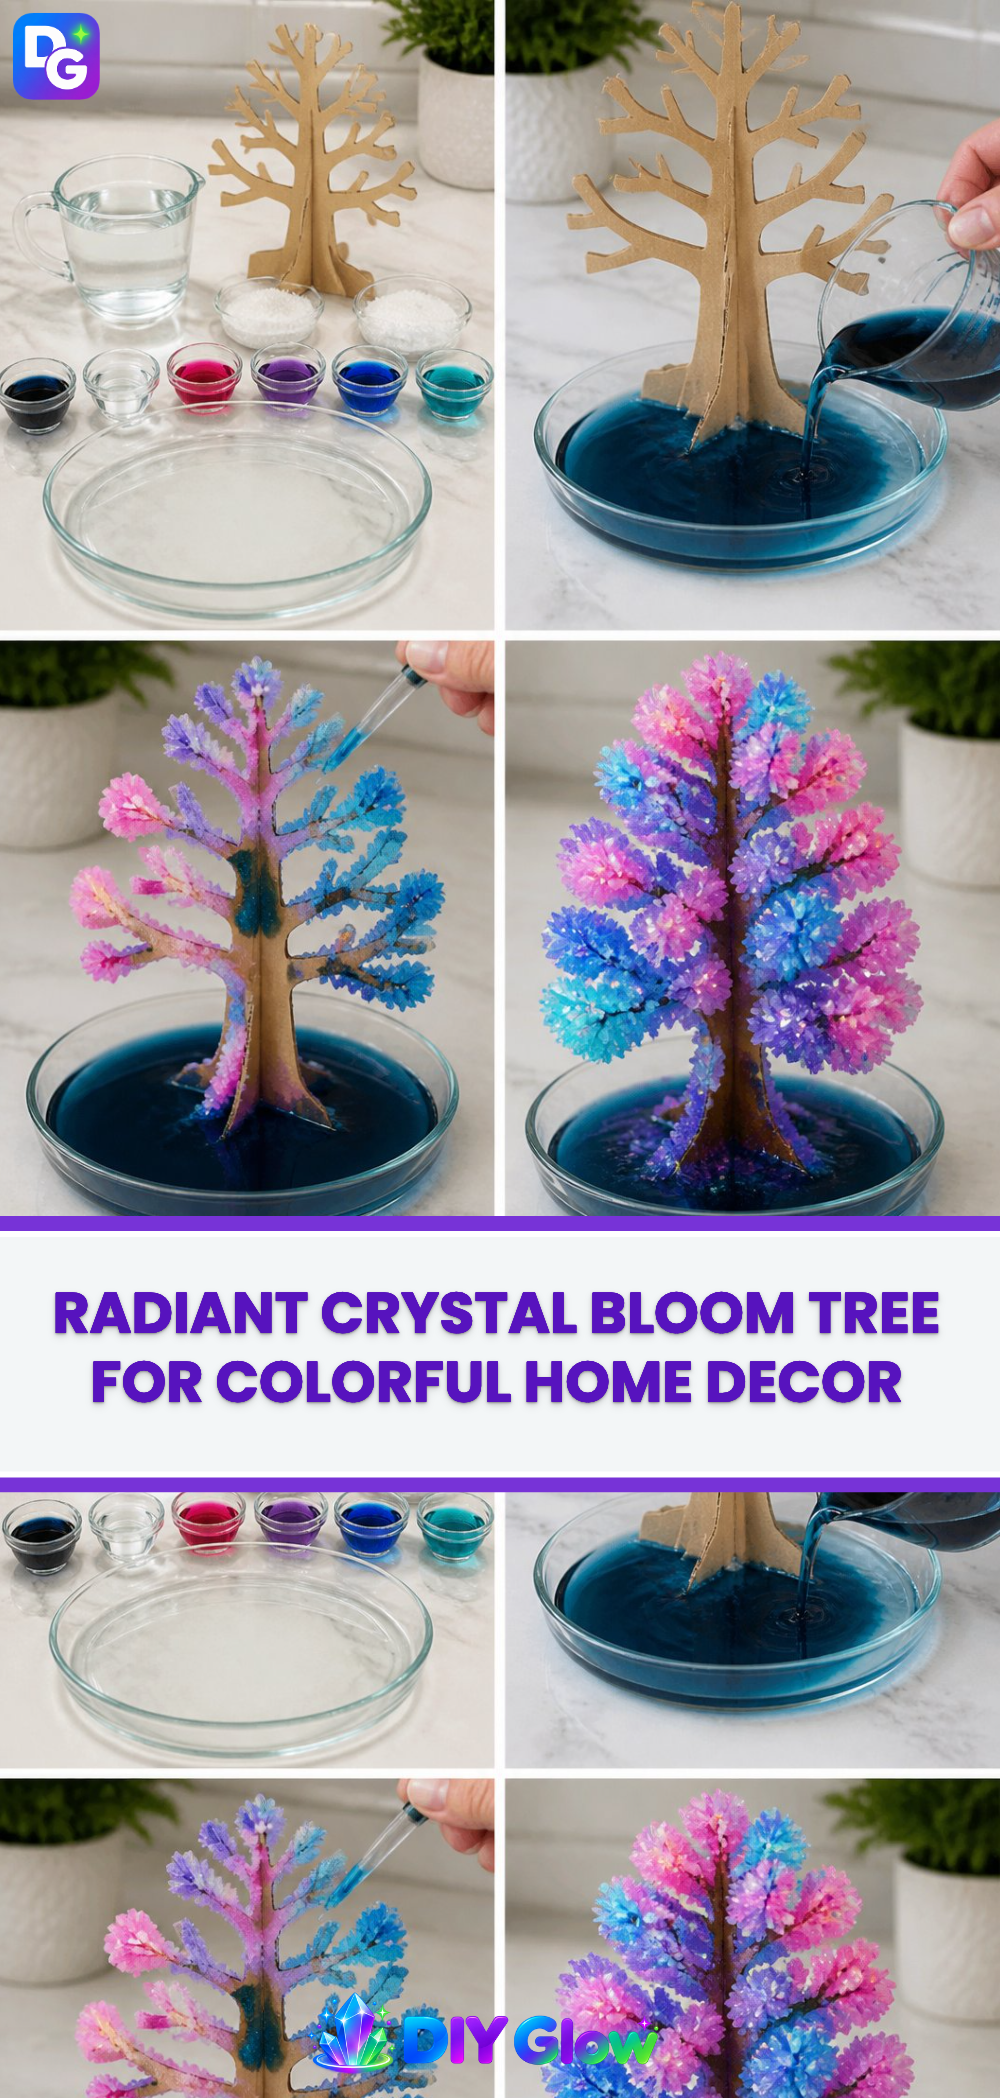
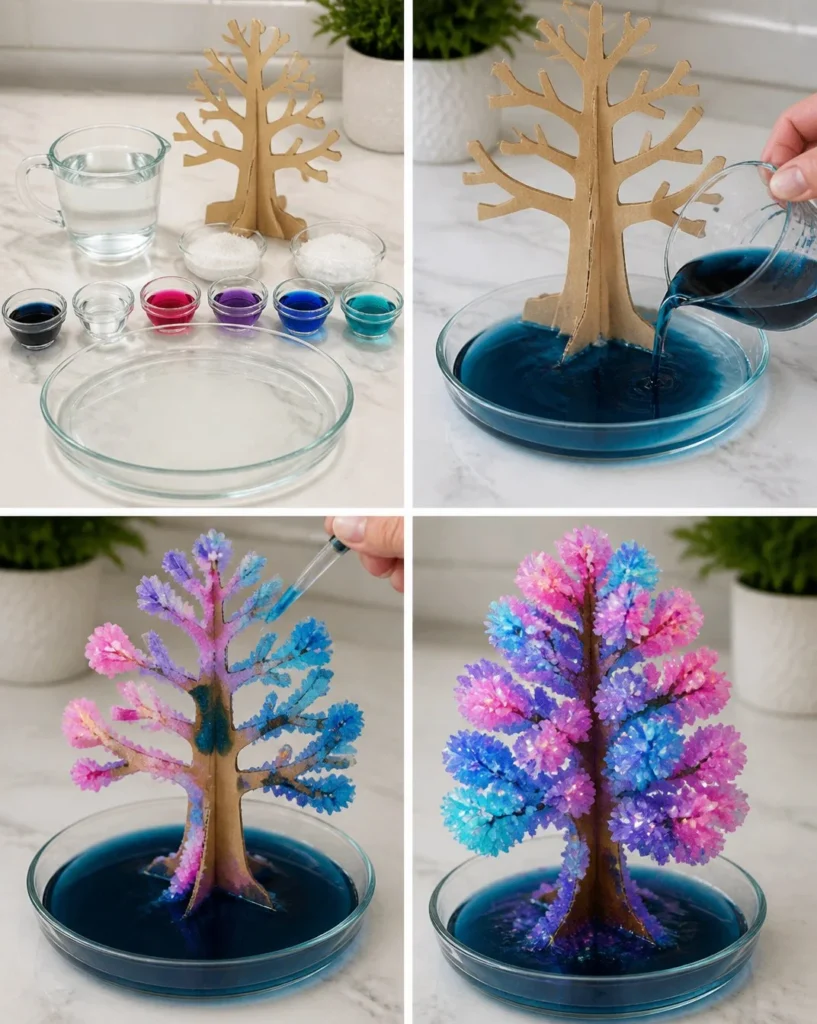
Stand the cardboard tree in a shallow dish. Make sure it’s stable; this will catch your vibrant crystal growth.
Mix the crystal solution. In a separate container, combine the warm water, salt, liquid bluing, and ammonia. Stir until everything dissolves completely.
Pour it around the base of the tree. Fill the dish with the mixture. Watch how it sparkles and spreads around your cardboard tree.
Dot different colors along the branches. Use the food coloring to add drops of pink, purple, blue, and turquoise along the branches of your tree. The colors will start to mix and create lovely new shades.
Leave it undisturbed. Now, the magic happens! Let your creation sit quietly to allow the colorful crystals to bloom across the tree. You can check back in a few hours to see how it transforms.
Remember, while mixing and pouring, keep an eye on the little ones, especially since you’re working with warm water and some stronger ingredients. Safety first!
Displaying Your Finished Rainbow Crystal Blossom Tree
Once the crystals have formed and dried beautifully, it’s time to display your dazzling creation! Place your Rainbow Crystal Blossom Tree on a sunny windowsill or a colorful shelf where it can catch the light. The way the crystals catch and refract sunlight creates a shimmering effect that can brighten any room.
Alternatively, consider gifting your Rainbow Crystal Blossom Tree to a loved one. It makes for a unique surprise full of personality and color. No matter where you choose to showcase it, this cheerful piece will always inspire joy and spark curiosity.
Keeping Your Rainbow Crystal Blossom Tree Looking Great
To ensure your Rainbow Crystal Blossom Tree stays beautiful, keep it in a dry area away from moisture. If you notice some dust collecting on the crystals, gently wipe them with a soft cloth. Avoid using water, as this might cause the colors to run.
The crystals may last for weeks or even months if cared for properly. However, be aware that they can become fragile after a while, so treat your colorful creation with love.
Fun Tips and Colorful Variations
Here are a few playful ideas to make your Rainbow Crystal Blossom Tree even more unique:
Experiment with colors. Try using different shades of food coloring for a different look. Maybe create a sunset-themed tree with warm oranges and yellows!
Shape variety. Instead of a tree, create a crystal blossom version with flowers made from recycled materials like yogurt containers or egg cartons.
Seasonal themes. Consider making trees that reflect different seasons. Use pastel colors for spring or deep reds and greens for the winter holidays.
Let your imagination guide you as you create variations of this beautiful project.
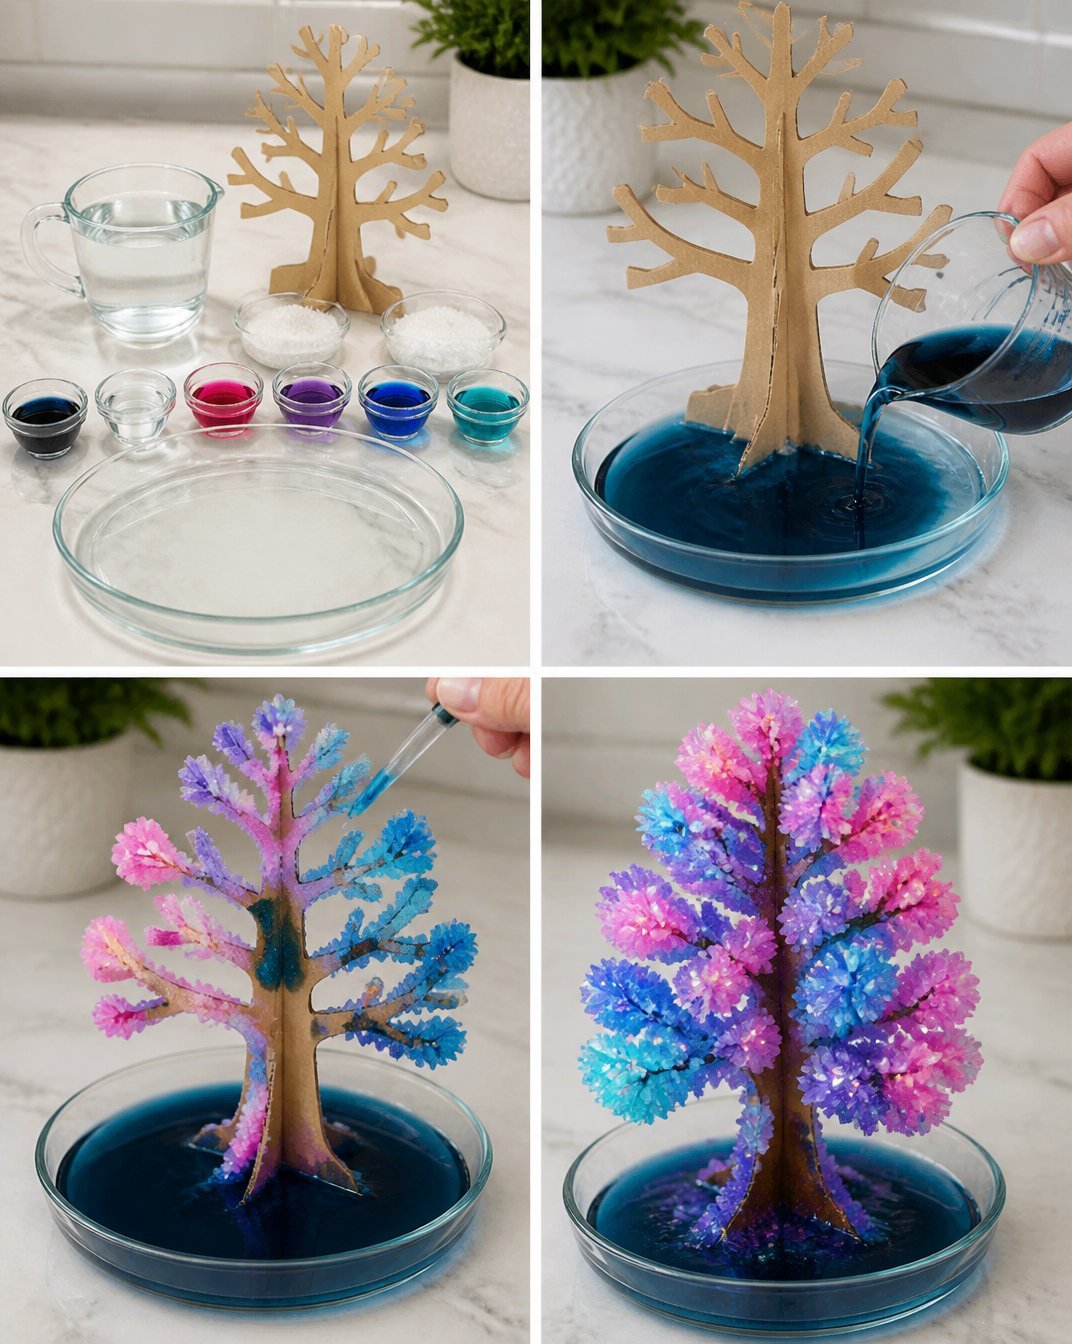
FAQs About Rainbow Crystal Blossom Tree
Q: Will it really work?
A: Yes! As long as you follow the steps, you should see your vibrant crystals form beautifully.
Q: Is it safe for kids to do this craft?
A: Absolutely! Just be sure an adult assists with the hot water and ammonia to ensure safety.
Q: How long does it take for the crystals to form?
A: Typically, you’ll see some growth within a few hours, but for the best results, let it sit overnight.
Q: Why did mine not turn out right?
A: Sometimes, if the solution isn’t mixed well or the conditions are too humid, the crystals might not form correctly. Try again, and don’t be discouraged!
A Little Note Before You Go
Creating your Rainbow Crystal Blossom Tree brings not just the fun of crafting but also the thrill of science in action. Every drop of color is an invitation to explore creativity and imagination. Enjoy the surprising transformations, feel free to play with colors, and most importantly, cherish the time spent crafting together as a family. This magical project isn’t just about the end result it’s about the joyful moments you create along the way. Happy crafting!
Follow us on social for more DIY ideas & inspiration!
Rainbow Crystal Blossom Tree
Would you like to save this project?
By submitting you agree to receive this project and occasional emails. Unsubscribe anytime.
Materials
Materials
- 1 piece Cardboard tree shape Cut it out or use a pre-made one.
- 1 cup Warm water Use caution, as it's hot.
- 2 tbsp Salt
- 2 tbsp Liquid bluing
- 1 tbsp Ammonia Handle with care, adult supervision required.
- 1 drop Pink food coloring For coloring the crystals.
- 1 drop Purple food coloring For coloring the crystals.
- 1 drop Blue food coloring For coloring the crystals.
- 1 drop Turquoise food coloring For coloring the crystals.
- 1 piece Shallow dish To catch the crystal growth.
Directions
Preparation
- Stand the cardboard tree in a shallow dish, ensuring it's stable to catch the crystal growth.
- In a separate container, mix warm water, salt, liquid bluing, and ammonia until dissolved.
- Pour the mixture around the base of the tree in the shallow dish.
- Dot food coloring on the branches: pink, purple, blue, and turquoise. Watch the colors mix.
- Leave the creation undisturbed for the crystals to bloom and form, checking back in a few hours for transformation.
Display
- Once the crystals have formed, display the Rainbow Crystal Blossom Tree in a sunny spot.
- Gifting it can make for a unique and colorful surprise.
Last Step: Don’t forget to leave a rating and comment below! It helps other readers find the best DIY projects — and it helps us too!