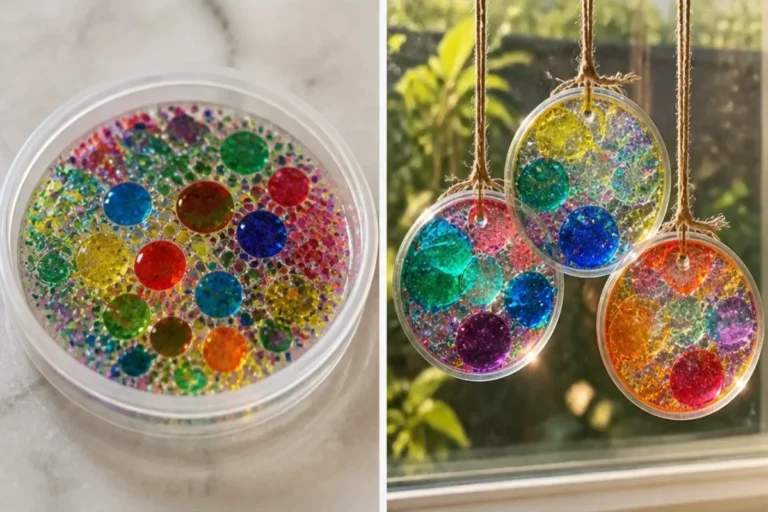
Creating Galaxy-Inspired Bubble Suncatchers for Window Decor
As you make your own Galaxy-Inspired Bubble Suncatchers for Window Decor, you will notice the way light embeds into the vibrant colors. The cheerful hues will dance as they catch and reflect sunlight, transforming a simple window into a celestial masterpiece. This DIY project not only adds beauty to your space but also sparks curiosity about space and light, making it an ideal craft for families. You may also find Prismatic Rainbow Crystal Waterfall Sun Catcher For Window Decor useful.
To start this project, you will need a few materials that will help you create those lovely, colorful suncatchers. Look for clear plastic sheets or contact paper, bubble solution, food coloring, and a variety of tools, such as a cup for mixing and a straw to blow bubbles. All these materials come together to create an enchanting effect. You may also find Rainbow Marbled Acorn Suncatchers Window Decor useful.
Materials
- Clear plastic sheets or contact paper
- Bubble solution
- Food coloring (various colors)
- Straw
- Scissors
- Small plate or shallow dish
- Tape
- Optional: glitter or sequins for extra shimmer
Steps
Prepare the Bubble Solution: Start by pouring the bubble solution into a small plate or shallow dish. If you want to add a unique touch, mix in a few drops of food coloring. Observe how the color swirls and changes within the solution. You may also find Bioplastic Suncatchers Cozy Decor useful.
Blow Bubbles: Using the straw, gently blow bubbles into the colored solution. Look for the moment the bubbles rise and capture the vibrant colors in their rounded shapes. You may see a beautiful, translucent effect that will look stunning when dried.
Collect the Bubbles: Once the bubbles start to overflow, gently place the clear plastic sheet or contact paper over the top of the bubbles. Hold it in place for a few seconds and watch the bubbles stick to the surface. You’ll notice the colors changing while they pop, leaving behind their lovely prints.
Let it Dry: Allow your suncatcher to sit for a few hours until completely dry. As it dries, the colors will deepen and the design will sharpen. This moment is crucial for achieving that desired vibrant effect.
Trim and Display: After it has dried, carefully cut out your suncatcher shape. You can trim it into circles, stars, or any design you like. Use tape or string to hang it on a window and enjoy how it brightens your space.
While working on this project, maintaining safety is important, especially when scissors are involved. Young crafters should have adult supervision for cutting steps.
What Goes Wrong and How to Fix It
Sometimes, the bubbles may not stick well, or the colors might run. If the bubbles pop quickly, try blowing less forcefully. Instead, let the bubbles form naturally before capturing them. In case colors blend too much, keep your food coloring amounts separate to retain distinct hues.
Where to Display It
These suncatchers look fantastic in any window. They can add charm to bedrooms, playrooms, or even kitchens. Hang them where sunlight can stream through, creating captivating light displays. For more ideas on how to create window decor, consider exploring colorful rainbow glass suncatchers.

Variations
Don’t hesitate to experiment! Use different shapes and sizes for your suncatchers. You may also add glitter or sequins to your bubble mixture, which creates a dazzling affect once it catches the sunlight. You can even make themed suncatchers based on different celestial bodies, like stars or planets. For example, if you’re inspired by nature, you could craft melted crayon flower suncatchers to bring a garden look into your home.
FAQs
How long does it take to dry?
The drying time usually takes a few hours. Wait until the suncatcher is completely dry before cutting it out to ensure it maintains its shape.
What can I use instead of bubble solution?
In a pinch, you can create your own bubble solution with water, dish soap, and a little sugar. This can work as a great substitute.
Can kids help make this craft?
Absolutely! Kids can assist in blowing bubbles and decorating. Just make sure adults supervise any cutting with scissors.
Why didn’t my bubbles stick?
If the bubbles didn’t stick, try using a thicker layer of bubble solution or adding a bit more color to see if they adhere better.
How do I clean my suncatchers?
You can simply wipe them with a soft cloth to remove dust. If they’re very dirty, use a mixture of water and mild soap to gently clean them without scratching the surface.
What happens if I use too much food coloring?
Excessive food coloring can lead to running colors. Aim for just a few drops so that the hues remain distinct.
Making it with Kids
This activity is perfect for family bonding. Kids will find joy in the colorful process. Encourage them to notice how the colors change in different light and how the shape shifts as the bubbles pop. Such observations can help them learn more about light and colors.

Conclusion
Creating galaxy-inspired suncatchers is a delightful activity everyone can enjoy. It combines creativity with a touch of science, making it engaging for all ages. If you wish to add more celestial decor to your home, you may find intriguing options like Galaxy Window Film or Glass Solar System Decor for Home that complement your suncatchers beautifully.
Follow us on social for more DIY ideas & inspiration!
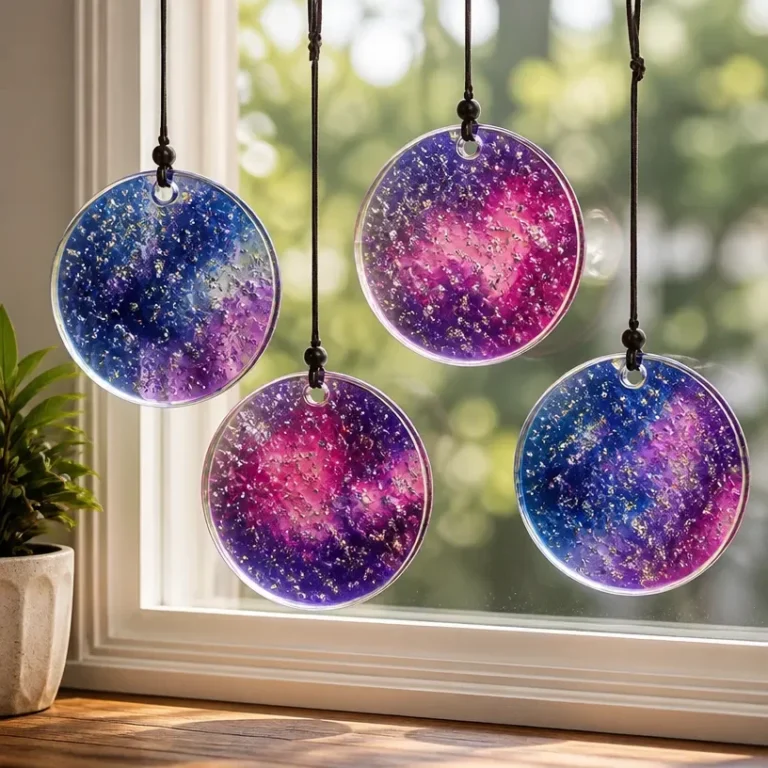
Galaxy-Inspired Bubble Suncatchers
Would you like to save this project?
By submitting you agree to receive this project and occasional emails. Unsubscribe anytime.
Materials
Materials
- 1 sheet Clear plastic sheets or contact paper
- 1 cup Bubble solution
- a few drops Food coloring (various colors)
- 1 piece Straw For blowing bubbles
- 1 piece Scissors For cutting the suncatcher
- 1 plate Small plate or shallow dish For mixing bubble solution
- 1 roll Tape For hanging the suncatcher
- optional Glitter or sequins For extra shimmer
Directions
Preparation
- Start by pouring the bubble solution into a small plate or shallow dish.
- Mix in a few drops of food coloring to add color to the solution.
Creating Bubbles
- Using the straw, gently blow bubbles into the colored solution.
- Capture the moment the bubbles rise and take on the vibrant colors.
Collecting Bubbles
- Once the bubbles overflow, place the clear plastic sheet or contact paper over the bubbles.
- Hold it in place for a few seconds to watch the bubbles stick and pop, leaving behind prints.
Drying
- Allow your suncatcher to sit for a few hours until completely dry.
Finishing Touches
- Carefully cut out your suncatcher shapes once dry.
- Use tape or string to hang it on a window and enjoy the bright colors.
Last Step: Don’t forget to leave a rating and comment below! It helps other readers find the best DIY projects — and it helps us too!