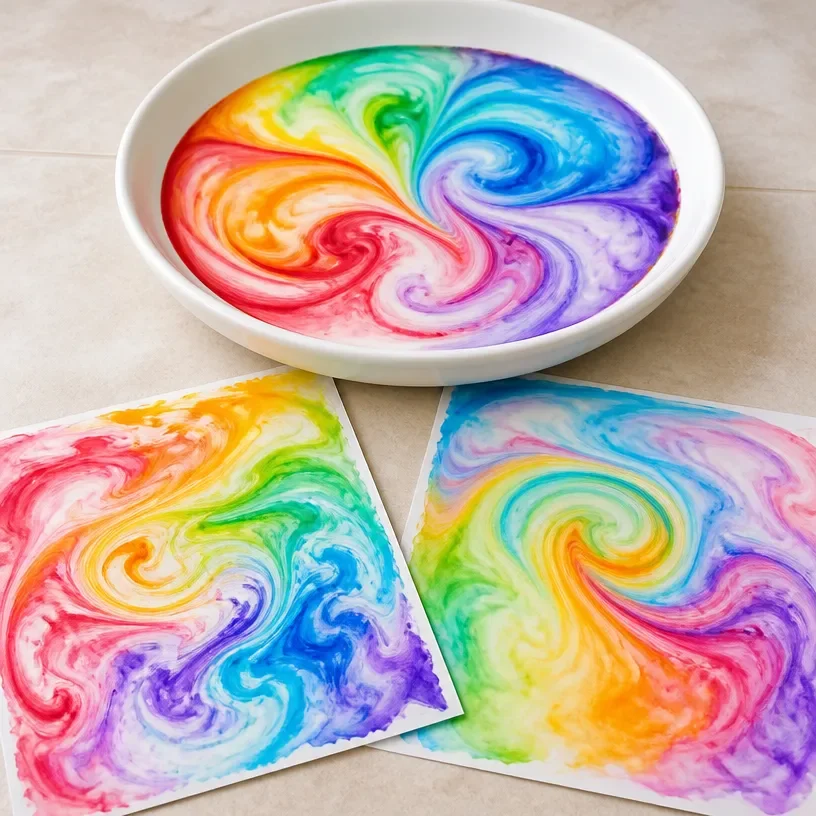
Colorful Milk Swirls: Rainbow Art Techniques result in stunning, vibrant artworks that highlight the beauty of colors mixing and swirling together. This creative project is not just visually pleasing; it also engages curiosity and provides a wonderful opportunity for exploration. As you create your vibrant milk artwork, you will witness a beautiful transformation in colors, which is a significant part of the art-making process. You may also find Rainbow Milk Art Colorful Milk Swirl Prints useful.
What Makes This Work
This project works because of the properties of milk and food coloring. When food coloring is added to the milk, the colors do not immediately mix; instead, they remain distinct for a moment, creating a beautiful display. The soap introduces dish soap to the mix, breaking the surface tension of the milk, allowing the colors to swirl and blend effectively. This key reaction provides a mesmerizing display. You may also find Broken Crayons Glowing Rainbow Flowers Recycle Art Supplies useful.
Materials
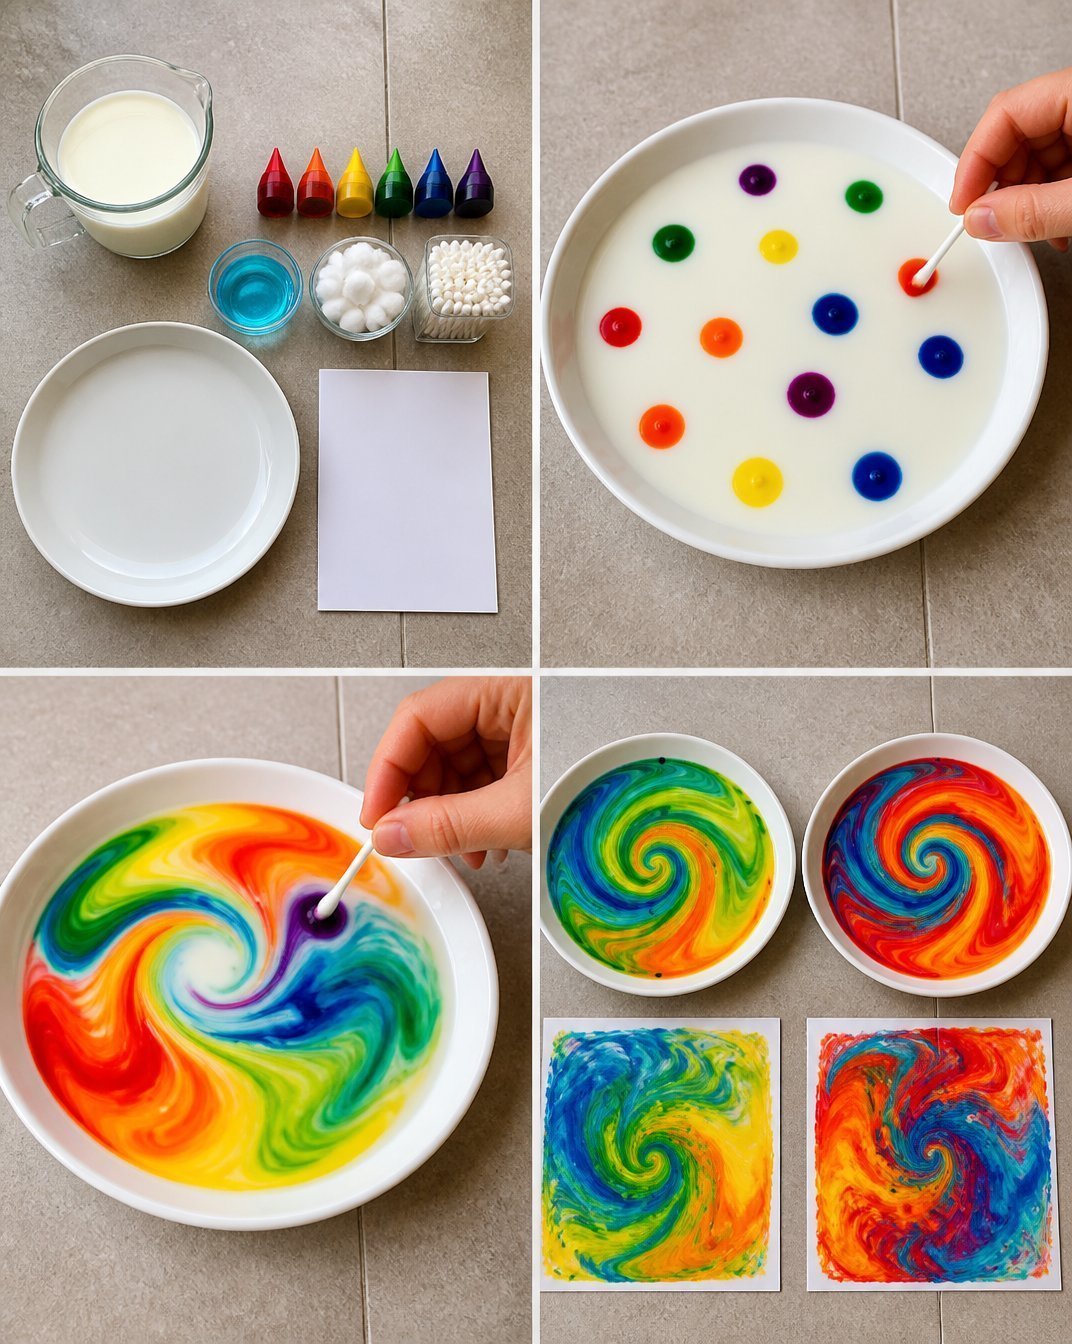
Before starting, gather the following materials: You may also find Prismatic Rainbow Crystal Wall Art useful.
- Whole milk
- Food coloring
- Dish soap
- A shallow dish or plate
- Cotton swabs
- Optional: glitter for added sparkle
Make sure you have everything ready, as the process is best when done in one go. You can also explore other projects such as recycled art supplies to complement your colorful creations.
Steps
Pour the Milk: Pour enough milk into the shallow dish to cover the bottom. Aim for about 1/2 inch depth, but do not fill it to the rim.
Add Food Coloring: Drop various colors of food coloring into the milk. You can place the drops in different areas and watch how they spread slightly before they mix.
Introduce the Soap: Dip a cotton swab into the dish soap. Touch it gently to the surface of the milk. Watch as the colors react and swirl around the dish.
Experiment: Try placing the cotton swab in different areas. You can use multiple swabs to see how the colors interact in various spots.
Document Your Work: Take photos of your creations at different stages. The swirling colors change rapidly, so capturing each moment is key.
Optional Sparkle: If you prefer, sprinkle some glitter onto your artwork for a bit of extra shine.
Drying Time: Let the milk sit for at least 30 minutes before moving it. This will prevent unwanted spills.
Take caution when using dish soap and food coloring, as these can stain. Ensure that any spills are cleaned immediately before they set.
What Goes Wrong and How to Fix It
In art, unexpected results can happen. If colors don’t spread as much as you hoped, it might be due to not using enough soap. You can add more soap to the swab and reapply it. If you notice that the milk is curdling, it indicates that the milk is turning old. Always use fresh milk for the best results.
Where to Display It
Your finished art can brighten any space. Consider placing it in a sunny window to enhance the color’s vibrant nature. Alternatively, you might set it on a shelf alongside other crafts, like the rainbow heart suncatcher. This not only showcases your work but creates a harmonious space filled with color.
Variations
While the colorful milk swirls project is fun on its own, you can mix it up. Use different types of milk, like almond or skim, to see how the colors react. You might even integrate other art projects, such as egg art to create a multi-dimensional display.
FAQs
How long does the colorful milk art last?
The artwork will begin to deteriorate as the milk spoils, typically within 1-2 days. It’s best to photograph your work for lasting memories.
Can I use skim milk instead of whole milk?
Skim milk will still work, but the results may differ. The colors may not swirl as vibrantly due to the lower fat content.
What if my colors get muddy?
If you see murky colors, it’s likely because colors mixed too early. To avoid this, apply the food coloring sparingly and watch for the reactions before moving to the next color.
Can children help with this project?
Yes! Kids can participate in pouring milk and adding colors. However, an adult should handle the dish soap for safety.
Is it okay to use expired milk?
Expired milk can produce unexpected results and may not be safe to handle. Always use fresh milk for the best experience.
Where can I find more colorful projects?
If you’re interested in more rainbow-themed projects, consider checking out the prismatic rainbow crystal wall art.
Conclusion
Creating colorful milk swirls is a fantastic way to explore art and science at home. It not only results in captivating artwork but can also spark curiosity about colors and reactions. For more inspiration, check out Rainbow Milk Art: Kitchen Fun Part 5 – Popsicle Blog or learn about baking beautiful treats with colors in How to Make Rainbow Swirl Cupcakes – Sugar & Sparrow. Explore the joy of crafting and let your colorful expressions shine!
Follow me on social for more recipe ideas & inspiration!
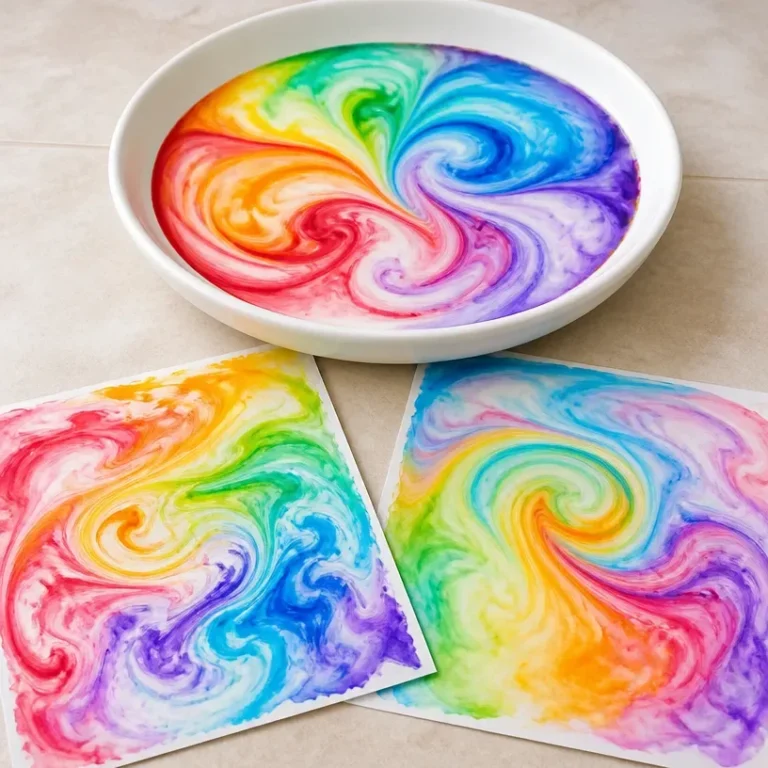
Colorful Milk Swirls Art
Would you like to save this recipe?
By submitting you agree to receive this recipe and occasional emails. Unsubscribe anytime.
Materials
Main Ingredients
- 1 cup Whole milk Use fresh milk for best results.
- various Food coloring Choose a mix of your favorite colors.
- 1 tbsp Dish soap Use sparingly to avoid excess curdling.
- 1 shallow dish A shallow dish or plate Use one that can hold the milk without spilling.
- 1 cotton swab Cotton swabs For introducing dish soap to the milk.
- optional Glitter For added sparkle.
Instructions
Preparation Steps
- Pour enough milk into the shallow dish to cover the bottom, aiming for about 1/2 inch depth.
- Drop various colors of food coloring into the milk at different spots and observe how they spread.
- Dip a cotton swab into the dish soap and touch it gently to the milk's surface to start the swirling reaction.
- Experiment by placing the swab in different areas to observe various color interactions.
- Document your creations by taking photos at different stages as the colors quickly change.
- Optionally, sprinkle glitter onto your artwork for extra shine.
- Let the milk sit for at least 30 minutes before moving to avoid spills.
Last Step: Don’t forget to leave a rating and comment below! It helps other readers find the best recipes — and it helps us too!
Tips & Notes:
Nutrition Information: Serving: 1 | Calories: 150kcal | Carbohydrates: | Protein: | Fat: | Sodium: | Fiber: | Sugar:
Nutritional information is provided as a courtesy and calculated automatically. Values can vary depending on the brands and ingredients you use, so if you’re tracking closely, I recommend calculating with your own preferred tool.