Rainbow Milk Art: Colorful Milk Swirl Prints
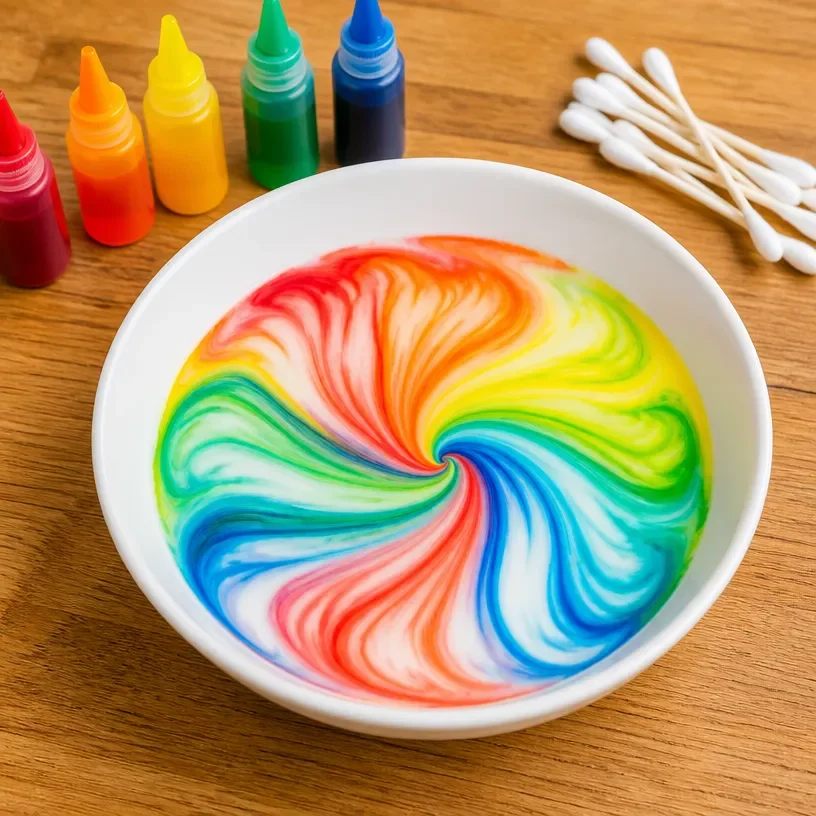
When you create Rainbow Milk Art: Colorful Milk Swirl Prints, you will witness vibrant colors dance and swirl beautifully in a way that captivates anyone who sees it. The project transforms ordinary milk and color into a magical piece of art that shines when displayed on a sunny windowsill. This process not only involves some fun crafting but also a little bit of science as you experiment with how colors blend and react. You may also find Bioplastic Suncatchers Colorful Swirls Recipe useful.
To get started, gather your materials. Here’s what you will need: You may also find Rainbow Milk Magic Print Cozy useful.
Materials
- Whole milk (or any milk with a fat content)
- Food coloring in various colors
- Dish soap
- Shallow dish or plate
- Cotton swabs or toothpicks
- Paper or cardstock for printing
- Optional: gloves to keep your hands clean
Steps
Prepare Your Surface: Pour a thin layer of milk into the shallow dish, covering the bottom. The milk needs to be deep enough to submerge the colors slightly but not too deep that they won’t spread. You may also find Rainbow Painted Rocks Colorful Flower Garden useful.
Add Food Coloring: Place a few drops of food coloring in different areas of the milk’s surface. You can choose a pattern or just randomly drop them in. You will see that the colors start to disperse. You may also find Colorful Crystal Urchins Guide Rainbow Hued Ocean Dwellers useful.
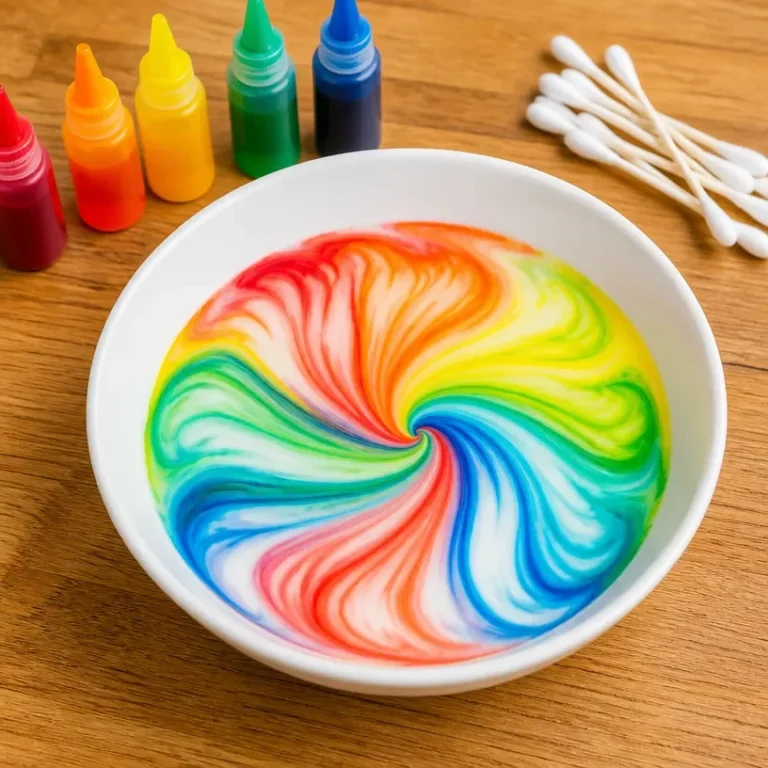
Add Dish Soap: Dip a cotton swab or toothpick in dish soap. Touch the cotton swab to the surface of the milk where there is food coloring. Watch as the colors explode and swirl outward! This occurs because the soap reduces the surface tension of the milk, allowing the color to spread rapidly.
Print Your Swirls: For your prints, place a piece of paper or cardstock on the surface of the milk. Lift it gently after a few seconds, and reveal a beautiful swirl design.
Repeat and Play: You can repeat the process as many times as you wish. Try different combinations of colors and amounts. Each print will have a different appearance based on where you place the soap and coloring.
During this activity, you will notice that the colors blend beautifully but can sometimes turn muddy if mixed too much. To avoid this, use a fresh cotton swab for each new color interaction.
What Goes Wrong and How to Fix It
Issues might arise if the colors do not spread as expected. If this happens, consider adjusting the amount of soap you use. More soap typically enhances the reaction with the color, allowing for a more vibrant swirl. Also, using lower-fat milk can lead to less impressive results, so stick to whole milk or alternatives with a higher fat content.
Where to Display It
Once your prints dry, display them in unique places. They look wonderful framed and hanging on a wall, or laid out on a shelf. For a sparkling touch, you might even pair them with other colorful projects like Rainbow Crystal Butterfly Window Suncatchers to highlight the light and colors throughout your space.
Variations
Play around with different types of milk, such as almond milk or oat milk, and observe the unique effects they create. You can also vary the colors based on the season or occasion, making pastel swirls for Easter or bold colors for a summer celebration.
FAQs
What ages can do Rainbow Milk Art?
Children ages 5 and up can enjoy this activity with adult supervision, especially when using the dish soap.
How long does it take for the prints to dry?
Typically, the prints will dry in about one to two hours, depending on the thickness of the paper and the humidity.
Can I use skim milk for this project?
While you can use skim milk, the results may not be as vibrant. Whole milk tends to work best due to its higher fat content.
What can I do if my colors aren’t vibrant?
Ensure you are using fresh food coloring and a good bit of soap to facilitate the swirling effect. If the fading occurs quickly, try reducing the milk’s surface area or using less soap.
Can I use other liquids?
Experimenting with other liquids, like cream or half-and-half, can yield interesting results, but they may behave differently from regular milk.
How should I store the finished prints?
Store the prints flat in a cool, dry place, away from direct sunlight, to prevent fading.
Conclusion
Rainbow Milk Art: Colorful Milk Swirl Prints is an enjoyable and educational activity for families. By understanding the science behind color mixing and surface tension, you can create stunning pieces of art. For more fun projects, check out How to Make Rainbow Milk Marbled Paper Art and discover even more ways to bring color into your crafting sessions. Additionally, you may explore techniques on Rainbow Milk Art: Kitchen Fun Part 5 – Popsicle Blog for additional inspiration!
Follow me on social for more recipe ideas & inspiration!
Rainbow Milk Art
Would you like to save this recipe?
By submitting you agree to receive this recipe and occasional emails. Unsubscribe anytime.
Materials
Materials
- 1 cup Whole milk (or any milk with a fat content) Whole milk is recommended for best results.
- several drops Food coloring in various colors Choose multiple colors for vibrant effects.
- 1 tbsp Dish soap Used to create swirls by reducing surface tension.
- 1 shallow dish Shallow dish or plate To hold the milk.
- 1 pack Cotton swabs or toothpicks For applying soap to the milk.
- 1 sheet Paper or cardstock for printing Use to capture the milk art.
- 1 pair Optional: gloves To keep your hands clean during the process.
Instructions
Preparation
- Pour a thin layer of milk into the shallow dish, covering the bottom. The milk should be deep enough to submerge the colors slightly.
Creating the Art
- Place a few drops of food coloring in different areas of the milk's surface.
- Dip a cotton swab or toothpick in dish soap and touch it to the surface of the milk where there is food coloring to watch the colors explode and swirl.
- Place a piece of paper or cardstock on the surface of the milk and lift it gently after a few seconds to reveal the swirl design.
- Repeat the process with different combinations of colors and amounts for unique prints.
Last Step: Don’t forget to leave a rating and comment below! It helps other readers find the best recipes — and it helps us too!
Tips & Notes:
Nutrition Information: Serving: 1 | Calories: 150kcal | Carbohydrates: | Protein: | Fat: | Sodium: | Fiber: | Sugar:
Nutritional information is provided as a courtesy and calculated automatically. Values can vary depending on the brands and ingredients you use, so if you’re tracking closely, I recommend calculating with your own preferred tool.