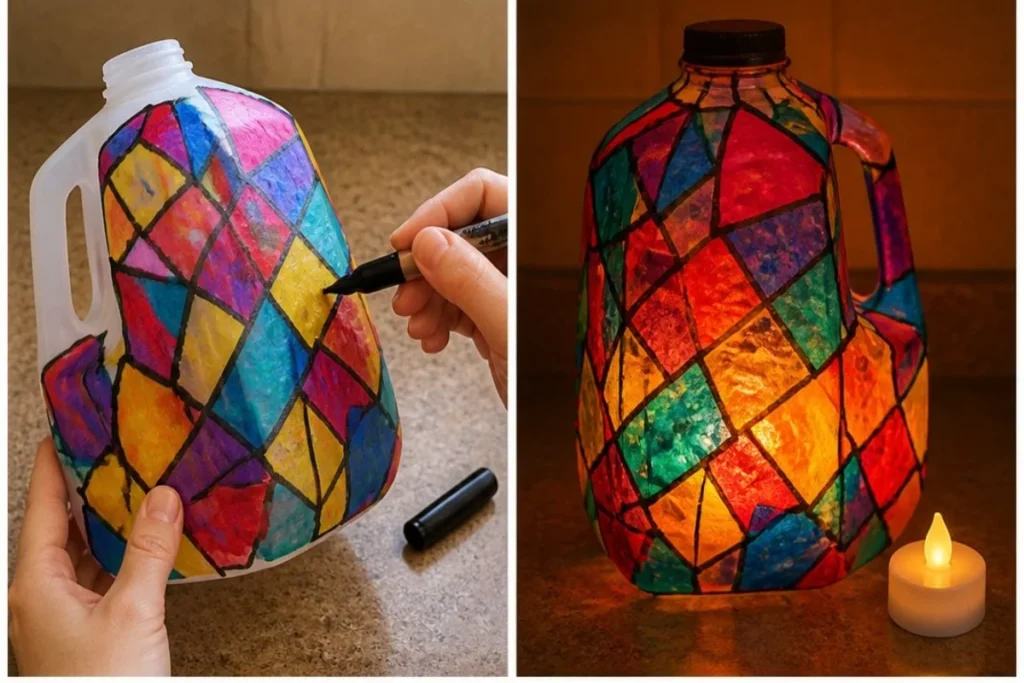
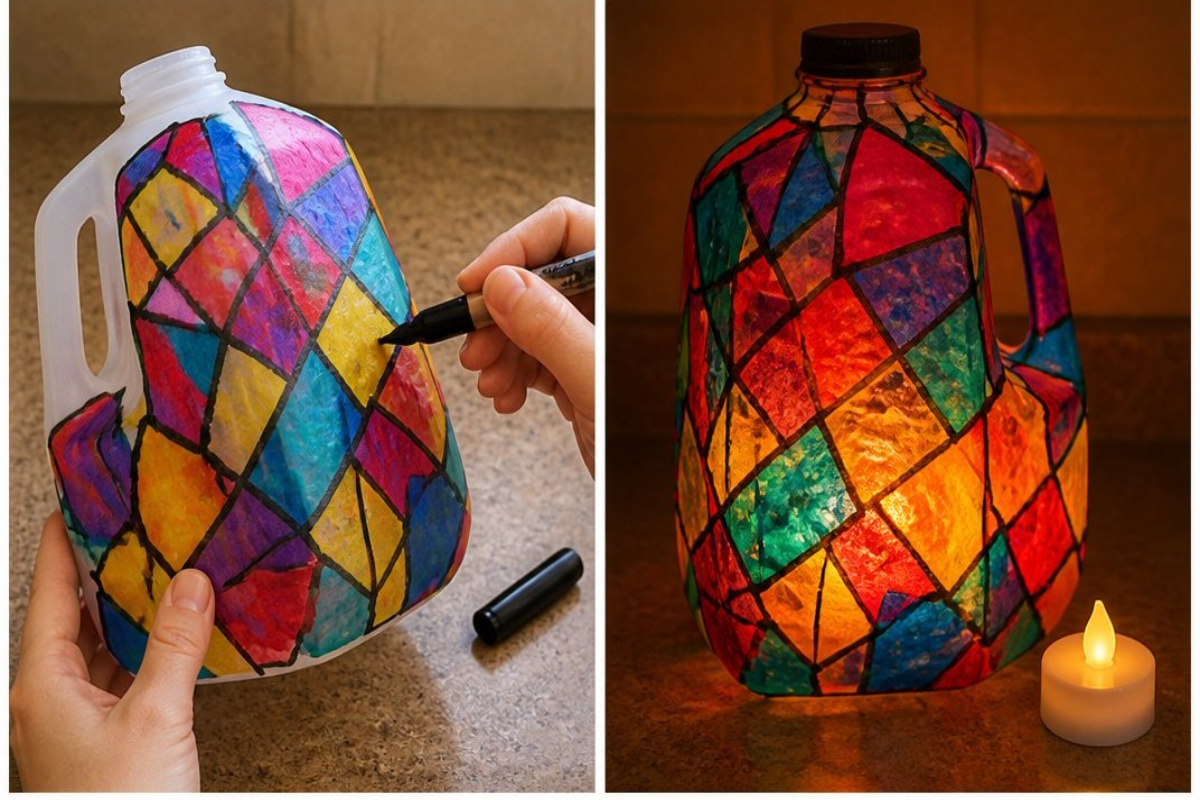
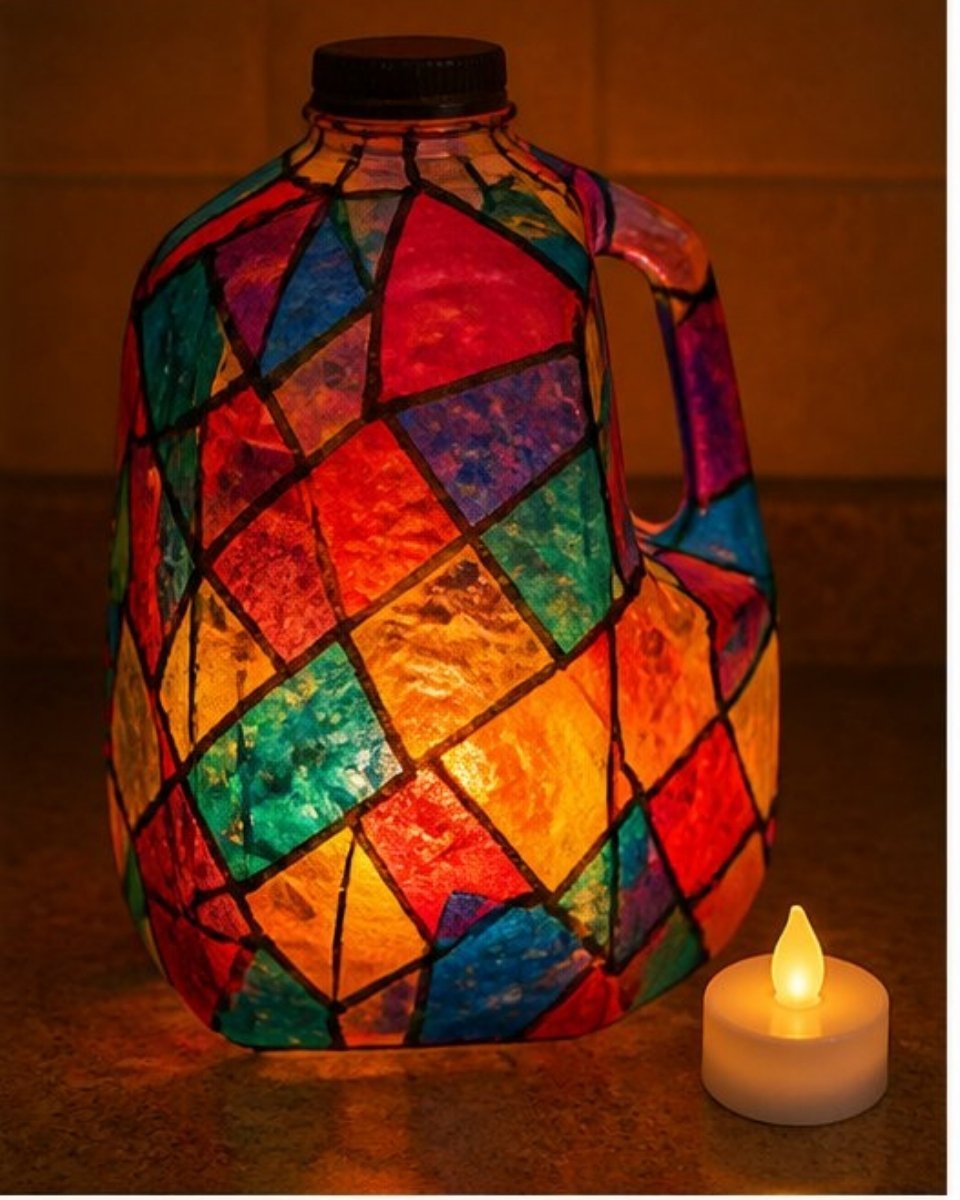
Milk Jug Stained-Glass Lanterns transform a simple container into a beautiful light display. As you layer colorful tissue paper onto the milk jug, you’ll see how the surface changes under your fingers, creating a vibrant piece of art that glows beautifully when illuminated by an LED tea light. This project is perfect for families who want to engage in a fun, creative activity together. You may also find Diy Mosaic Milk Jug Lantern Cozy useful.
What Makes This Work
The key to creating stunning milk jug lanterns lies in the decoupage process. When you apply the decoupage glue, it acts as both an adhesive and a sealant, allowing the colored tissue paper to become part of the jug while ensuring a protective layer is formed. This not only enhances the colors but also adds texture. For further inspiration, you might consider exploring the idea of fake stained glass lanterns as another creative approach.
Materials
To make your milk jug lantern, you will need: You may also find Diy Mosaic Milk Jug Lantern useful.
- Clean milk jug
- Colored tissue paper
- Decoupage glue
- Scissors
- Black marker
- Battery LED tea light
Make sure the milk jug is clean and dry before starting. The colored tissue paper will be the star of your project, so choose a variety of colors to create a striking visual effect. You may also find Milk Jug Fairy Lantern Becomes Cozy useful.
Steps
Cut the Tissue Paper into Small Shapes
Use scissors to cut the colored tissue paper into small shapes. These shapes can be squares, triangles, or whatever design you feel inspired to create. Aim for pieces that are manageable to work with, as this will make application easier.Brush the Outside of the Milk Jug with Decoupage Glue
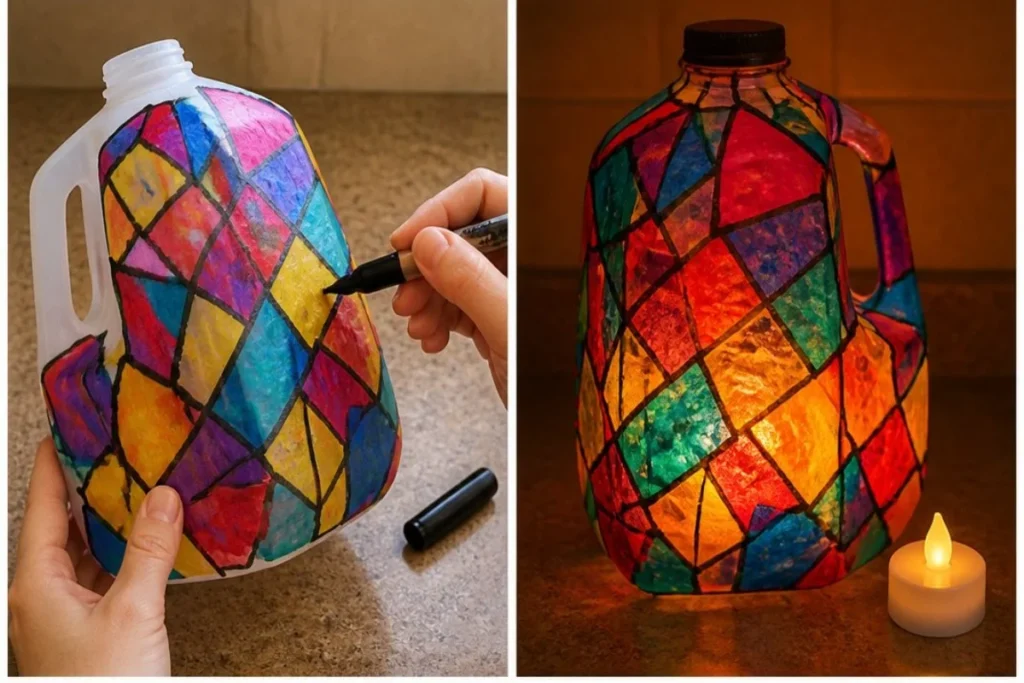
Take your decoupage glue and brush a thin layer onto the outside of the milk jug. Carefully layer the tissue pieces over the surface, sealing them with another coat of glue. You will notice the colors becoming more vibrant as they stick to the jug.
Use a Black Marker to Draw Faux Stained-Glass Outlines
Once the glue has dried, use a black marker to create outlines that mimic stained glass. This step adds depth to your design and enhances the overall aesthetic of your lantern.Let It Dry Completely and Then Place an LED Tea Light Inside
Make sure the lantern is fully dry before placing the LED tea light inside. The light will shine through the tissue paper, creating a cozy glow. This step reveals your work’s colors and patterns, making it a rewarding finish.
What Goes Wrong and How to Fix It
Sometimes the tissue paper can bubble or wrinkle. To avoid this, apply the decoupage glue smoothly, and press down firmly when applying the tissue paper pieces. If there are wrinkles, you can gently smooth them out while the glue is still wet. If drying time is an issue, it is best to leave the lantern undisturbed in a warm, dry area.
Where to Display It
These lanterns can light up many spaces. Consider placing them on your porch during summer evenings or showcasing them in your living room. They also make wonderful decorations for holidays or special occasions. For a different style, check out how a milk jug fairy lantern can add a whimsical touch to your décor.
Variations
You can customize the designs by using different shapes and colors of tissue paper. Experiment with layering various shapes or even sticking some decorations like glitter.
FAQs
Can I use regular glue instead of decoupage glue?
Regular glue may not adhere as well or seal the tissue effectively. Decoupage glue is designed for this type of project, so it’s best to stick with it for best results.
How long does it take for the lantern to dry?
Typically, it takes around 1-2 hours for the lantern to dry completely, but this may vary based on humidity levels and the amount of glue used.
Can kids help with this project?
Absolutely! Kids can assist with cutting the tissue paper and applying it to the jug, but adult supervision is necessary during the gluing process.
What if my lantern doesn’t glow brightly?
If your lantern appears dim, ensure thick layers of tissue paper are used to block out any light spots. You might also want to try different colors to see which ones provide better illumination.
How do I clean my lantern after it is made?
Avoid using harsh chemicals. Instead, dust it gently or wipe with a damp cloth, ensuring not to soak the tissue paper.
How long will my milk jug lantern last?
If properly sealed, your lantern can last for years. However, if left in direct sunlight, the colors may fade over time.
Conclusion
Making milk jug stained-glass lanterns is a creative way to add color and light to your space. For those interested in other community events related to lantern-making, you can visit this event hosted by the Lowell Public Library. Additionally, if you’re looking to purchase pre-made options, check out the Coca-Cola Vintage Logo LED Stained Glass Lantern for a unique touch. Happy crafting!
Follow us on social for more DIY ideas & inspiration!
Milk Jug Stained-Glass Lanterns
Would you like to save this project?
By submitting you agree to receive this project and occasional emails. Unsubscribe anytime.
Materials
Materials
- 1 Clean milk jug Ensure the jug is clean and dry.
- variety colors Colored tissue paper Choose various colors for a vibrant effect.
- 1 bottle Decoupage glue This acts as both adhesive and sealant.
- 1 pair Scissors For cutting the tissue paper to shape.
- 1 Black marker To create faux stained-glass outlines.
- 1 Battery LED tea light To safely illuminate the lantern.
Directions
Preparation
- Cut the colored tissue paper into small shapes such as squares and triangles for easy application.
- Brush a thin layer of decoupage glue onto the outside of the milk jug.
Assembly
- Layer the tissue pieces over the glue and seal with another coat of glue, making colors more vibrant.
- Once dried, use a black marker to draw outlines that mimic stained glass.
- Let the lantern dry completely, then place the LED tea light inside to finish.
Last Step: Don’t forget to leave a rating and comment below! It helps other readers find the best DIY projects — and it helps us too!