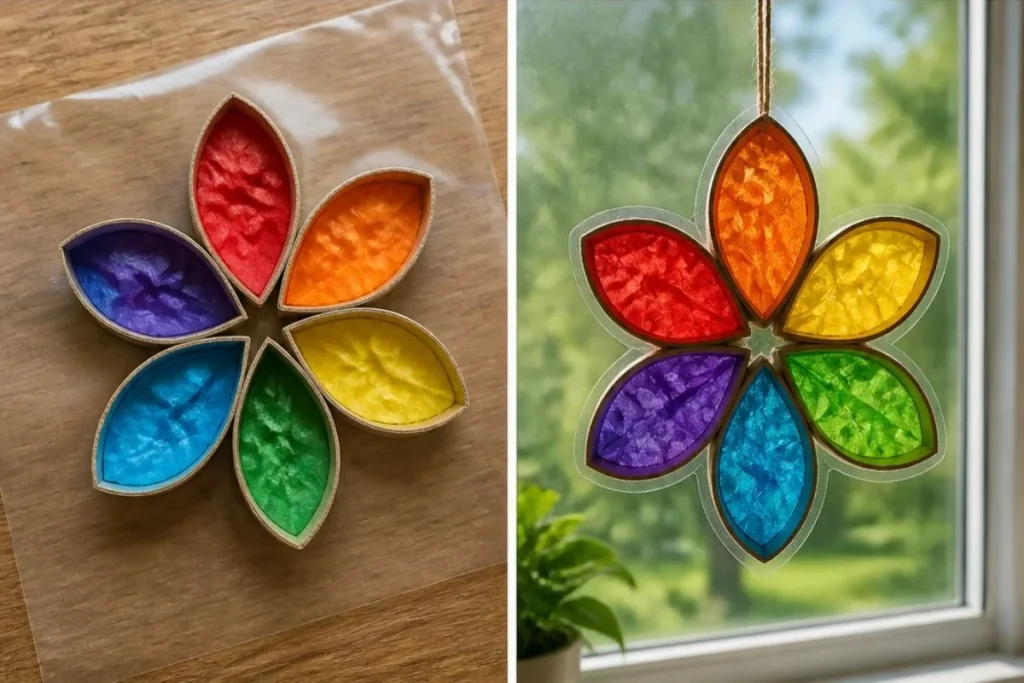
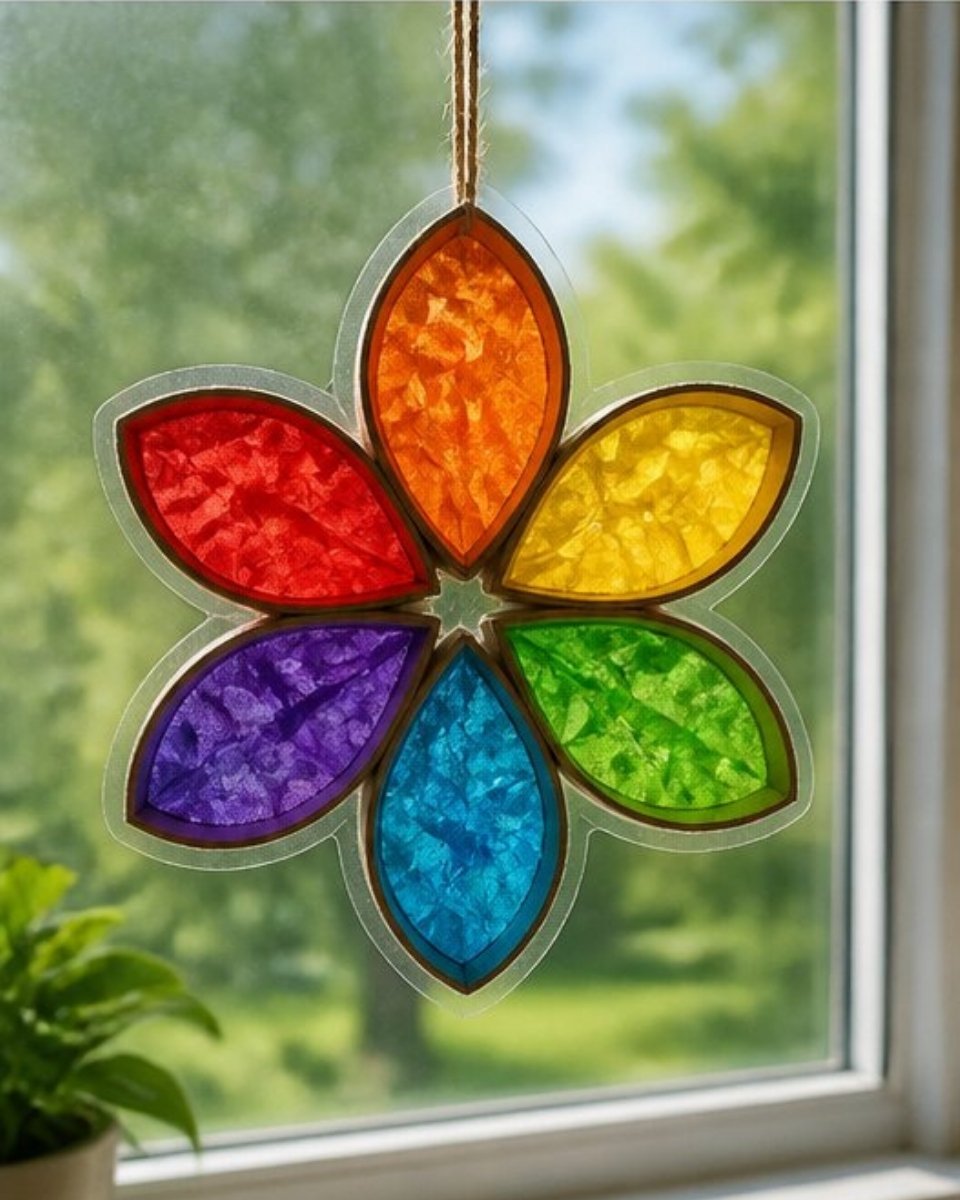
How stunning it is to watch a Paper Roll Rainbow Window Flower transform your space with vibrant colors! This simple crafting project brightens up any window or shelf, bringing a sense of cheerfulness and creativity into your home. The bright colors and textures of the rainbow tissue paper, combined with the clear contact paper, create a delightful display that dances in the light. You may also find Pressed Flower Rainbow Window Medallions useful.
What Makes This Work
The beauty of this craft lies in how light interacts with the materials used. The clear contact paper acts as a perfect base, allowing light to pass through while showcasing the rainbow hues of the tissue paper. As the sun shines through, the colors come alive, creating a sparkling effect that changes throughout the day. You may also find Colorful Rainbow Crystal Butterfly Window Suncatcher useful.
Materials
You will need:
- Cardboard rolls
- Scissors
- Glue
- Clear contact paper
- Rainbow tissue paper
- String
Prepare your workspace with these supplies to ensure a smooth crafting experience. Each material plays a key role in the project’s success, especially when it comes to creating that beautiful display outside your window.
Steps
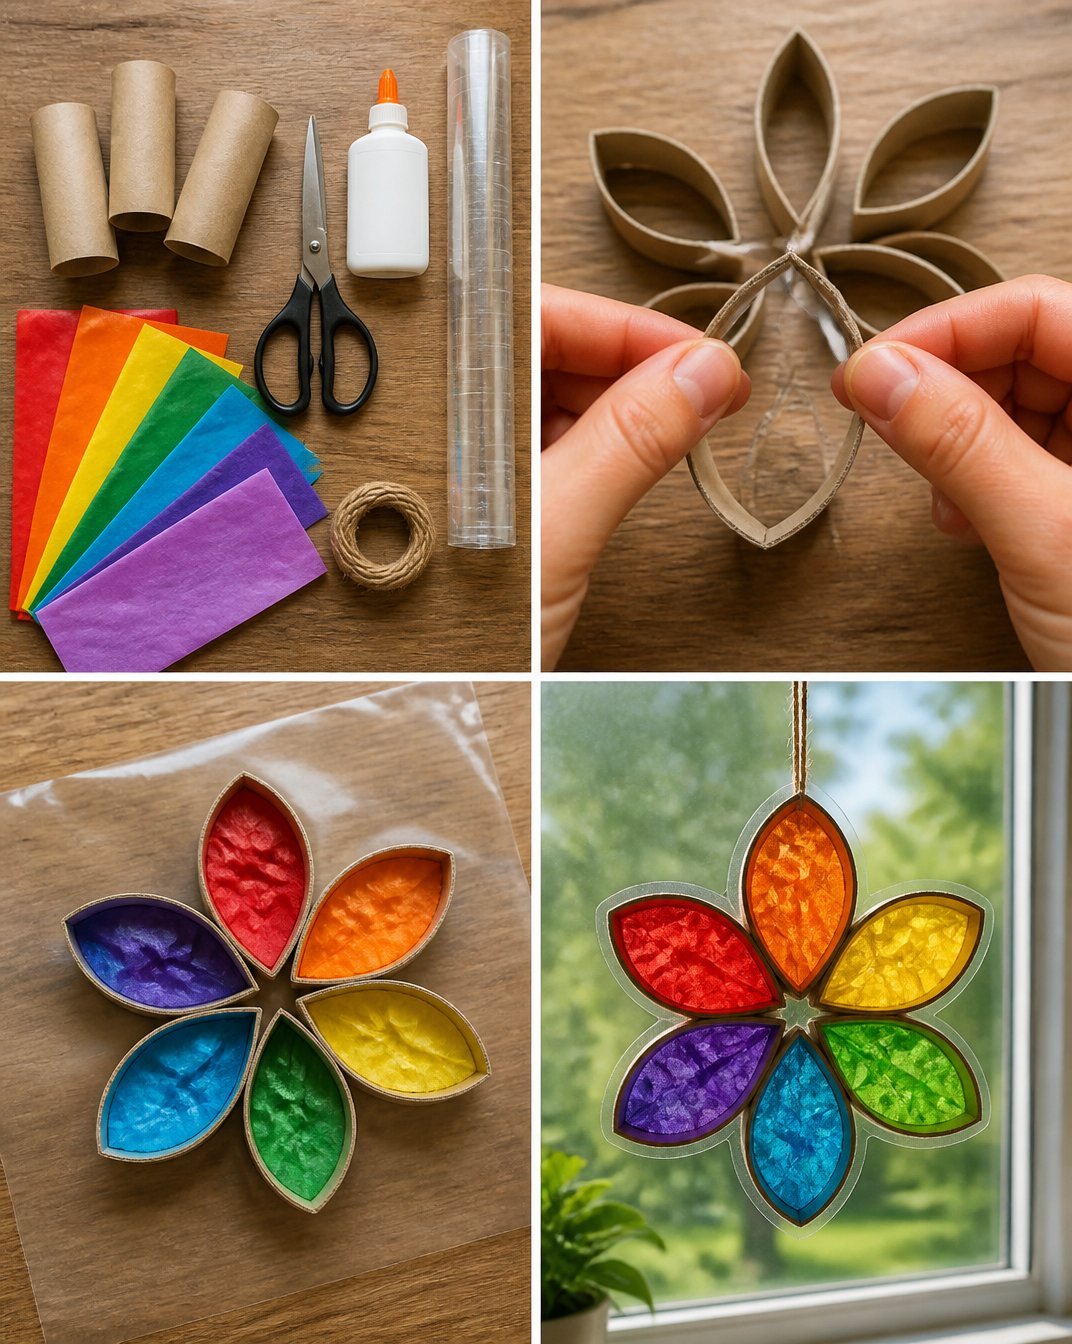
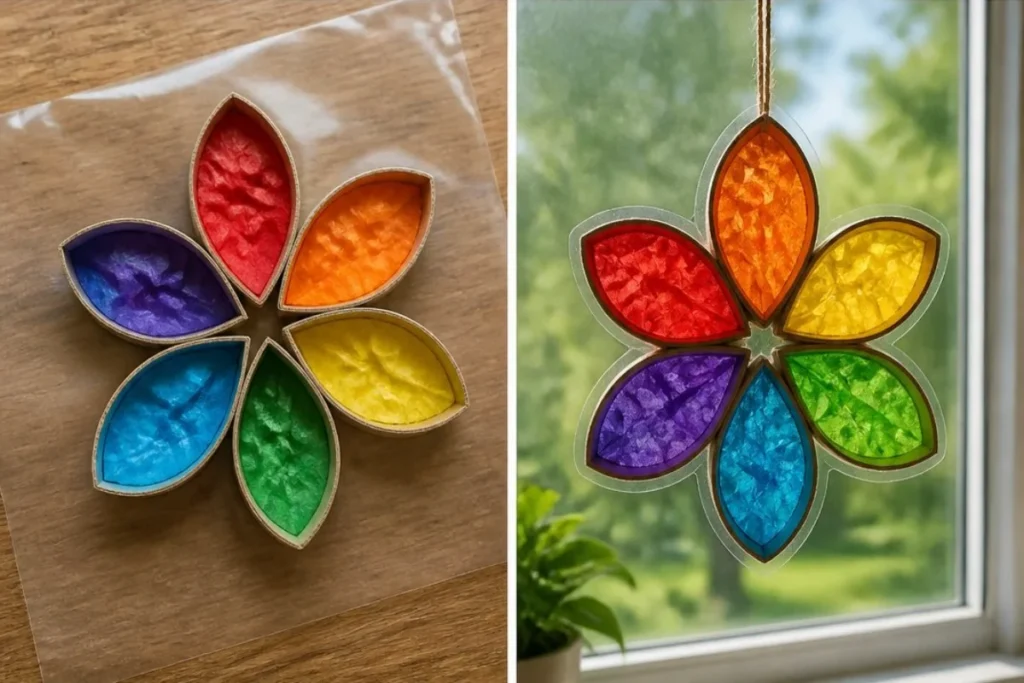
Start by cutting the cardboard rolls into rings and pinching them to form petals. Focus on making even, rounded edges to create beautiful flower petals. The more uniform you make your petals, the better your flower will look.
Glue the petals together to shape a flower. Watch for the glue to dry completely, ensuring the petals stay in place when finished. Using a strong adhesive helps secure the petals firmly.
Stick your flower onto clear contact paper and fill each petal with a different color of rainbow tissue paper. This step is crucial, as the vibrant colors will become the focal point of your creation. Choose colors that complement each other and stand out in sunlight.
Seal it with another sheet of contact paper, trim the edges, and hang it up with string. This step provides a neat finish, making sure the tissue paper stays in place and will resist wear over time.
The transformation is truly magical as the sunlight passes through your completed project, illuminating the colors in a joyful manner. If you enjoy working with colorful materials, you might also want to explore creating rainbow tissue paper flower lanterns.
What Goes Wrong and How to Fix It
Sometimes, the petals may not hold together well. Ensure that you use enough glue and allow ample drying time. If tissue paper tears while cutting, don’t panic; just patch it with a small piece glued over the tear. If the contact paper bubbles up, carefully lift the area and smooth it out before sealing.
Where to Display It
Your Paper Roll Rainbow Window Flower can beautify various areas in your home. It looks fantastic hanging in a window where sunlight shines brightly, but you can also place it on a shelf or table as part of a decorative arrangement. The colors really pop when placed against a contrasting background. For more ideas on colorful window decor, take a look at a crystal flower suncatcher for inspiration.
Variations
Get creative! You can create larger flowers by using bigger cardboard rolls or assemble multiple flowers together for a stunning bouquet. Additionally, consider sprinkling glitter on the tissue paper before sealing it to add an extra sparkle. If you’re interested in reusing old materials, check out this idea for broken crayons for glowing art.
FAQs
How long does this project take?
Depending on how quickly you work, this project usually takes about one to two hours. Allow extra time for glue to dry properly.
Can kids help with this craft?
Yes! Children can assist with cutting cardboard rolls and gluing petals. However, an adult should handle the scissors to ensure safety.
What if my petals are uneven?
If you notice that the petals are uneven after cutting, it’s easy to fix by trimming them again after they are glued together. Just make sure to re-glue any parts that get cut.
Can I use other colors of tissue paper?
Absolutely! You can use any colors you like; the most important aspect is to choose colors that will contrast nicely and create the vibrant effect you desire.
What do I do if the contact paper doesn’t stick?
Make sure the surface where you apply the contact paper is clean and dry. If it doesn’t stick on the first try, gently lift it and reapply, ensuring no air bubbles remain.
Does this craft last long?
When properly sealed and displayed away from moisture, your Paper Roll Rainbow Window Flower can last for months. Keep it out of direct rain or excessive humidity to prolong its life.
Conclusion
Crafting a Paper Roll Rainbow Window Flower is not just a fun activity; it also produces a visually stunning decoration that adds brightness to your home. For those looking for more supplies to enhance their crafting experience, consider checking out iridescent cellophane paper for striking effects. Additionally, you might enjoy exploring boho floral washi tape to add even more flair to your projects. Happy crafting!
Follow us on social for more DIY ideas & inspiration!
Paper Roll Rainbow Window Flower
Would you like to save this project?
By submitting you agree to receive this project and occasional emails. Unsubscribe anytime.
Materials
Materials
- 5 pieces Cardboard rolls Cut into rings for petals.
- 1 Scissors Ensure adult supervision if children are using.
- 1 bottle Glue Use a strong adhesive for securing petals.
- 1 sheet Clear contact paper Acts as a base for the project.
- assorted colors Rainbow tissue paper Various colors to fill the petals.
- 1 piece String For hanging the completed flower.
Directions
Preparation
- Cut the cardboard rolls into rings and pinch them to form petals with even, rounded edges.
- Glue the petals together to shape a flower, ensuring they are secure and allow the glue to dry completely.
Assembly
- Stick the flower onto clear contact paper and fill each petal with a different color of rainbow tissue paper.
- Seal with another sheet of contact paper, trim the edges, and hang using string.
Last Step: Don’t forget to leave a rating and comment below! It helps other readers find the best DIY projects — and it helps us too!