Easy Glowing Lanterns Made from Colorful Milk Jugs
As you create Easy Glowing Lanterns Made from Colorful Milk Jugs, you will notice the vibrant colors transforming the jugs into playful lights. These glowing lanterns brighten up any space, especially on dark nights, creating a warm and engaging atmosphere. You may also find Diy Glowing Jellyfish Lanterns Cozy useful.
Crafting these lanterns combines creativity and a little science. The materials you need are common, making this project accessible for everyone. When following the steps, pay attention to how the colors shift and come to life as you decorate the jugs. This enhancement is what makes the final product truly captivating. You may also find How To Make Easy Glowing Bug Craft useful.
What Makes This Work
The reason these lanterns glow lies in the unique combination of materials and techniques. The glow-in-the-dark paint interacts with light, allowing it to shine brightly at night after absorbing energy from a light source. The effect becomes more pronounced as the jugs take on color and texture. You may also find Colorful Rainbow Milk Art Print Wall Decor useful.
Materials
To make glowing lanterns, gather the following materials: You may also find Diy Glowing Jellyfish Lanterns Become Cozy useful.
- Clean, empty milk jugs
- Glow-in-the-dark paint or luminous paint
- Water and a small bowl for mixing
- A sponge brush
- Black permanent marker
- Scissors
- String lights (optional, for extra glow)
- Safety gloves (if necessary)
Remember to be cautious when using scissors and handling paint. If you’re crafting with children, make sure an adult assists where needed.
Steps
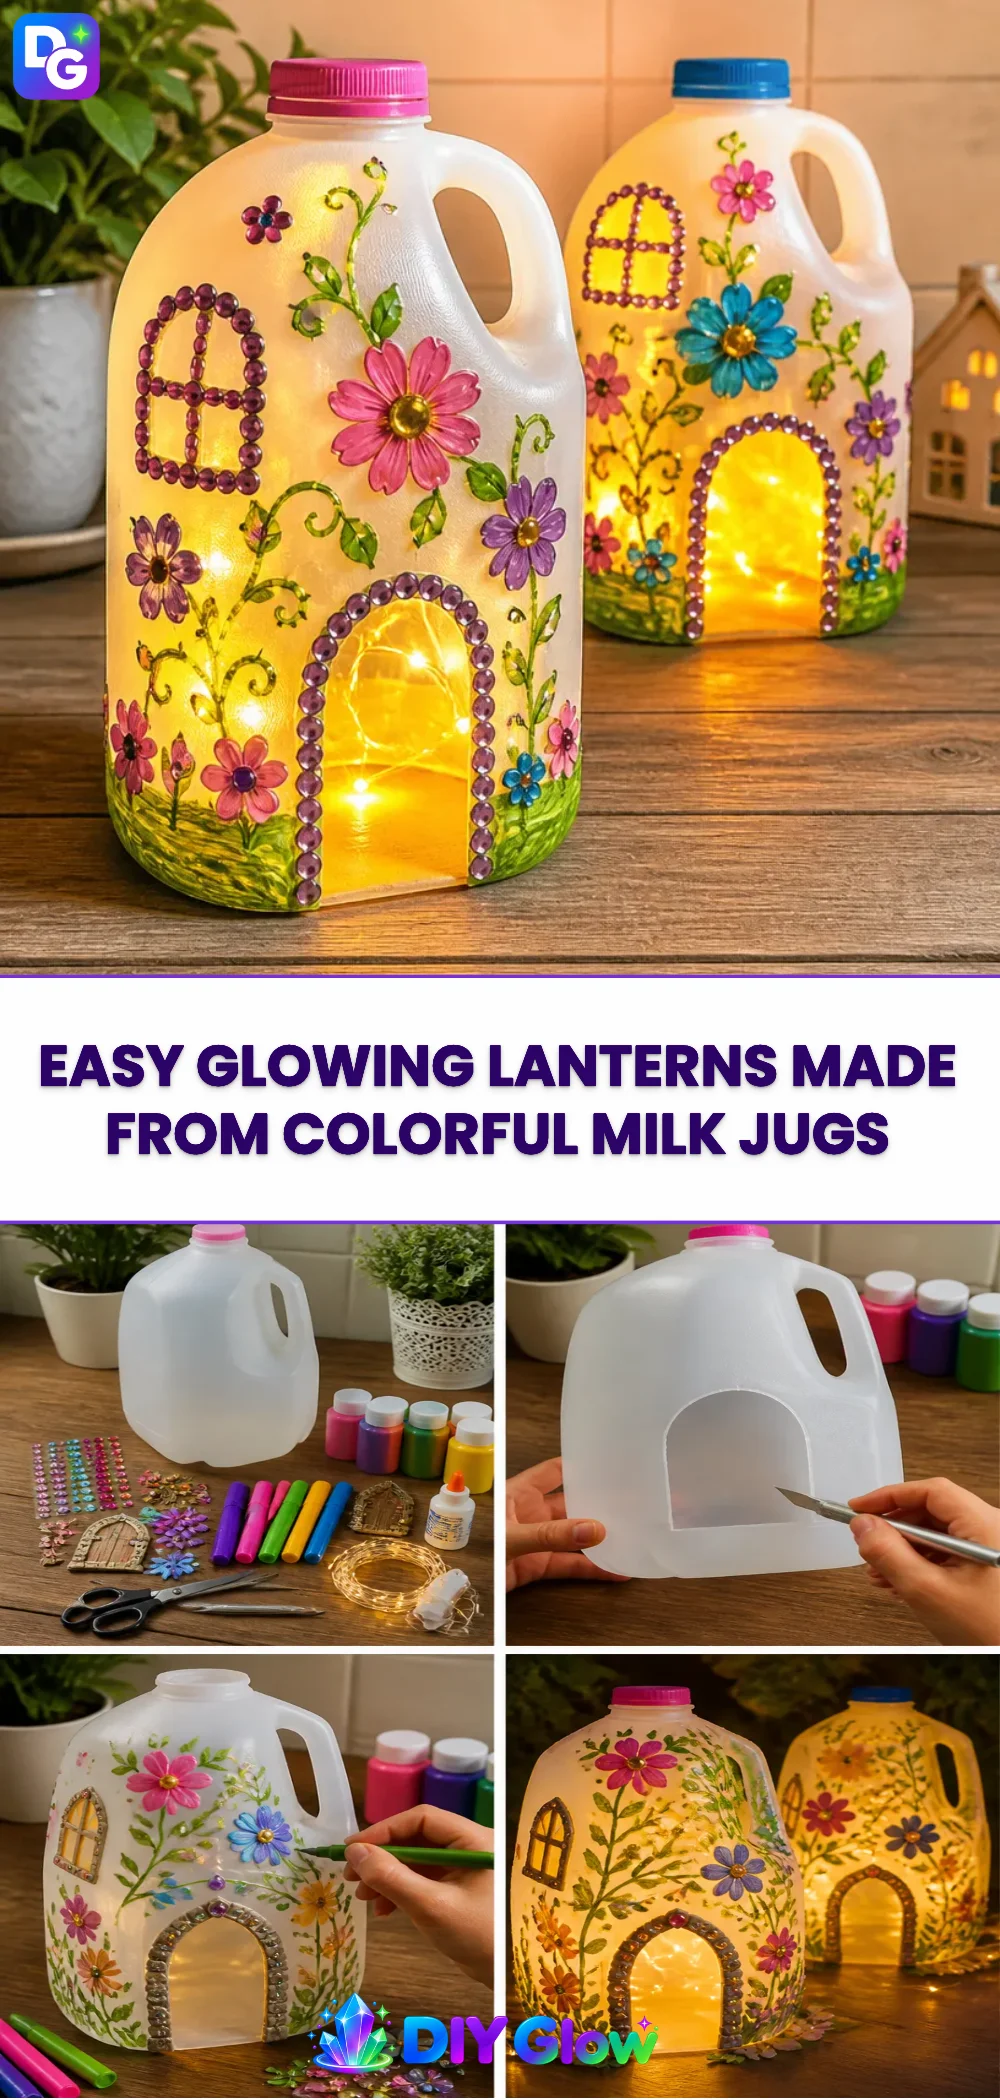
Pick Your Jugs: Choose clean, empty milk jugs. The size and shape can influence the final look of your lanterns.
Create Designs: Use a black permanent marker to draw fun patterns or faces on your jugs. This step adds a personal touch to each lantern. The marker will contrast nicely with the glowing paint.
Prepare the Paint: In a small bowl, mix your glow-in-the-dark paint with a little water to help it spread evenly. This will help achieve a smoother finish.
Paint the Jugs: Using a sponge brush, carefully apply the paint over your designs. Watch how the paint appears on the surface; it should create a textured layer. Ensure you coat areas evenly, avoiding drips.
Let It Dry: Allow the paint to dry completely. You know it’s ready when the surface feels smooth and not tacky. This could take a few hours, depending on your environment.
Add Lights: If you want even more brightness, place string lights inside the jugs when the paint is dry. This addition will enhance the glow and create a stunning visual effect during the night.
Display Your Lanterns: Set your glowing milk jug lanterns on a shelf, or hang them outdoors where they can light up the night.
What Goes Wrong and How to Fix It
If the paint chips or does not glow as intended, there may be some common fixes. For a chipped paint surface, carefully touch up with the same glow-in-the-dark paint. If your lanterns aren’t glowing brightly at night, ensure they were exposed to enough light during the day. If the paint feels tacky after drying, allow more time for it to cure fully.
Where to Display It
These fun glowing lanterns can be placed in various locations. They work great as outdoor decorations for gatherings or can illuminate indoor spaces such as windowsills. You might also consider hanging them from trees or placing them along a walkway for a whimsical touch.

Variations
Get creative with different designs and colors. Instead of using just one type of glow-in-the-dark paint, consider mixing colors for a rainbow effect. You can also try patterns like stars, hearts, or other shapes to suit any occasion. For additional inspiration, explore other projects like colorful milk swirls.
FAQs
Can I use any type of paint for this project?
It’s best to use glow-in-the-dark or luminous paint, as regular paint will not give the desired glowing effect. This type of paint can absorb light and release it in the dark.
How long does the glow last?
The glow will last several hours after being charged with light. The duration may vary based on the quality of the glow-in-the-dark paint used.
Can children participate in this project?
Absolutely! Kids can help with decorating and painting, but an adult should handle the cutting and mixing steps for safety.
What can I do if the paint doesn’t glow well?
Make sure the paint is designed to glow in the dark, and ensure the lanterns are exposed to bright light for a sufficient amount of time before the sun sets.
Can I hang these lanterns?
Yes! You can use string to hang your lanterns. Be sure to secure them well to prevent them from falling.
What if the jug breaks?
If a jug gets damaged, dispose of the pieces carefully. Consider using another jug or opt for a different container for your craft.
Conclusion
Creating glowing lanterns from colorful milk jugs is a fun and rewarding project that brightens up your home. The unique appearance and the science behind the glow make them an excellent choice for family crafting. If you’re interested in more crafting ideas, check out how to make paper lanterns or explore spooktacular milk jug jack-o-lanterns for additional inspiration.
Follow me on social for more recipe ideas & inspiration!
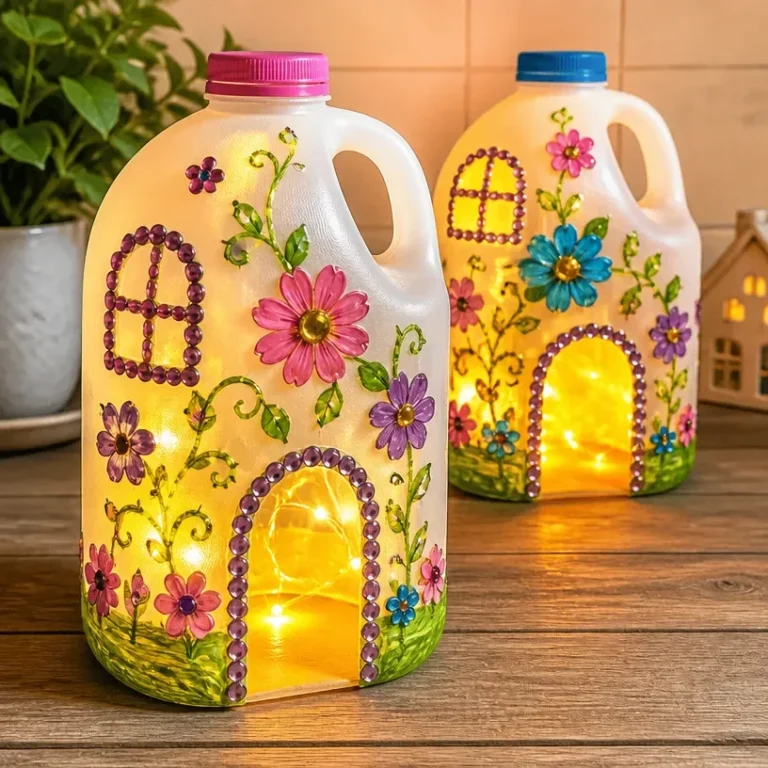
Glowing Milk Jug Lanterns
Would you like to save this recipe?
By submitting you agree to receive this recipe and occasional emails. Unsubscribe anytime.
Materials
Materials
- 2 pieces Clean, empty milk jugs Choose jugs of different sizes and shapes for variety.
- 1 bottle Glow-in-the-dark paint or luminous paint Ensure it's specifically designed to glow in the dark.
- 1 small bowl Water For mixing with paint.
- 1 unit Sponge brush For applying the paint.
- 1 unit Black permanent marker To create designs on the jugs.
- 1 unit Scissors Use with care, especially around children.
- 1 set String lights Optional, for extra glow.
- 1 pair Safety gloves Wear if necessary when crafting.
Instructions
Preparation
- Pick Your Jugs: Choose clean, empty milk jugs. The size and shape can influence the final look of your lanterns.
- Create Designs: Use a black permanent marker to draw fun patterns or faces on your jugs for a personal touch.
- Prepare the Paint: In a small bowl, mix your glow-in-the-dark paint with a little water to help it spread evenly.
Crafting
- Paint the Jugs: Using a sponge brush, carefully apply the paint over your designs, ensuring an even coat.
- Let It Dry: Allow the paint to dry completely until the surface feels smooth and not tacky.
- Add Lights: Once the paint is dry, place string lights inside the jugs for enhanced brightness.
- Display Your Lanterns: Set your glowing milk jug lanterns on a shelf or hang them outdoors to light up the night.
Last Step: Don’t forget to leave a rating and comment below! It helps other readers find the best recipes — and it helps us too!
Tips & Notes:
Nutrition Information: Serving: 1 | Calories: | Carbohydrates: | Protein: | Fat: | Sodium: | Fiber: | Sugar:
Nutritional information is provided as a courtesy and calculated automatically. Values can vary depending on the brands and ingredients you use, so if you’re tracking closely, I recommend calculating with your own preferred tool.