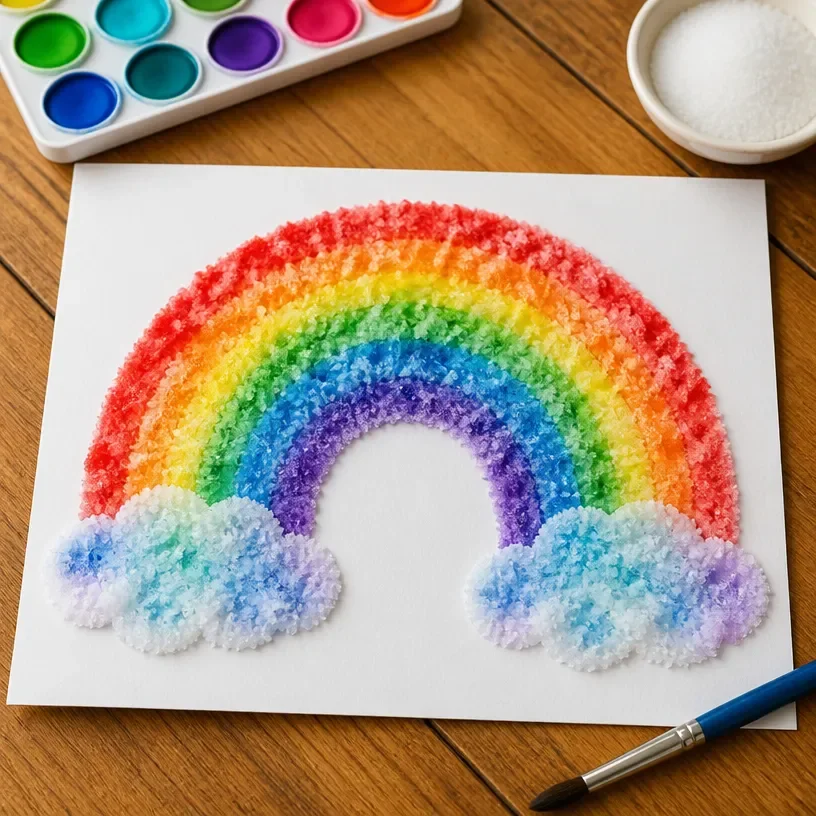
Rainbow Salt Painting brings vibrant colors and textures to any space, transforming a simple canvas into a stunning display. As you work on your painting, watch as the salt interacts with the colors, producing a unique shimmering effect. This project is ideal for families who want to explore creativity while learning about the science behind these colorful transformations. You may also find Rainbow Puppy Paw Salt Painting useful.
What Makes This Work
Rainbow Salt Painting is not just about aesthetics; it involves a fascinating reaction between salt and watercolors. The salt absorbs water from the paint, leaving behind beautiful textures and patterns. This process creates a delightful mix of colors that sparkle and shine, making your artwork truly mesmerizing. You may also find Rainbow Salt Painting Jellyfish Cozy useful.
Materials
Gather the following materials before you start: You may also find Rainbow Puppy Paw Raised Salt Painting useful.
- Watercolor paint
- Salt
- Cardstock or watercolor paper
- Paintbrushes
- Water for mixing colors
- A tray for catching excess salt
- Optional: glitter for extra sparkle
Be sure to have all your materials ready. A well-prepared workspace enhances the creativity of the project. You may also find Rainbow Salt Painting Jellyfish Becomes Cozy useful.

You may also find Diy Flowers Salt Painting For Kids Cozy useful.
Steps
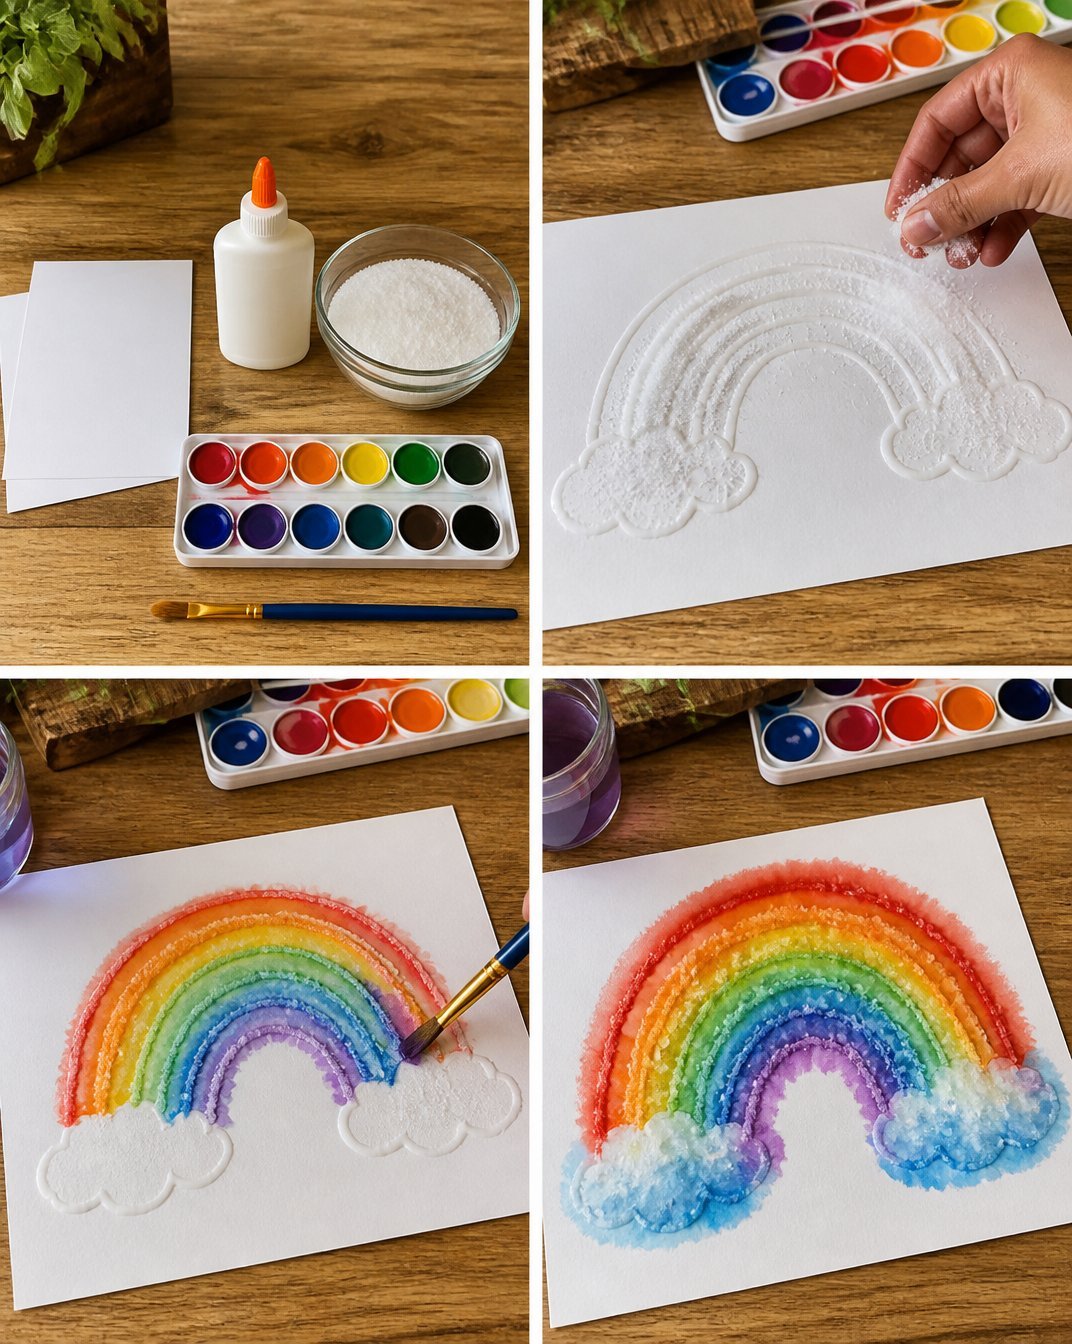
Design Your Artwork: Start with a simple sketch or design plan for your Rainbow Salt Painting. You can choose abstract shapes or defined outlines. This planning stage is crucial to visualize how the colors will blend.
Apply Watercolors: Using paintbrushes, fill your design with vibrant watercolors. Let each color overlap slightly to create a blend. Focus on the overall look and feel, as the mixing of colors will be enhanced once the salt is applied.
Sprinkle Salt: While the paint is still wet, sprinkle salt generously over the painted areas. Watch closely as the salt absorbs the water and spreads the color. This will create interesting patterns. Salt crystals can create unique designs, making each painting one of a kind.
Let It Dry: Allow your artwork to dry completely. This step is essential, as the salt and paint need time to set. You may notice the salt absorbing moisture and changing appearance as it dries.
Remove Excess Salt: Once dry, gently shake off any excess salt. This will leave behind only the salt that has adhered to the paint, showcasing the sparkling effect. If you’re left with some unneeded salt, you can save it for future projects or art endeavors.
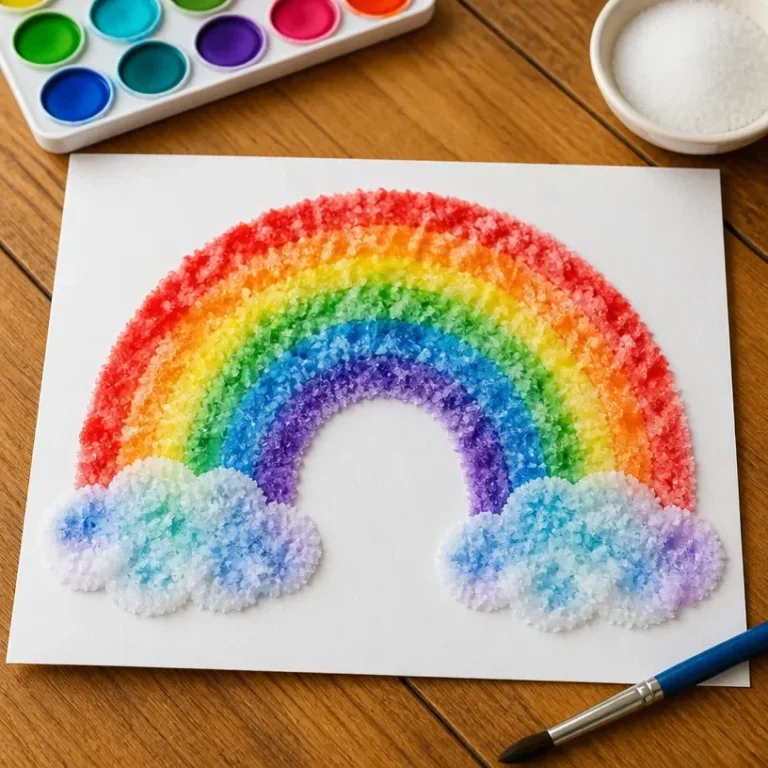
Display Your Art: Finally, find a special place to display your Rainbow Salt Painting. Consider bright spots like windowsills or shelves where the colors can glow and shine.
What Goes Wrong and How to Fix It
Sometimes, your painting might not turn out as expected. If the colors appear dull, it may be because the paint was not applied thickly enough. Always ensure a generous layer of paint before adding salt. If the salt clumps, it may mean too much was applied; simply brush away the excess.
Where to Display It
Your Rainbow Salt Painting can illuminate various spaces. Consider displaying it in your living room, children’s playroom, or even in a lighted corner of your home. The effect of light on the salt will enhance its sparkle, creating a stunning visual for anyone who sees it.
Variations
There are many ways to vary your Rainbow Salt Painting project. You can create themed paintings for holidays or special occasions. Experiment with different types of paper, such as canvases or wooden plaques, for added texture. You could also try incorporating other materials, like glitter, for an extra luminous touch.
FAQs
Can I use regular table salt instead of kosher salt?
Yes, you can use regular table salt. However, kosher salt tends to create larger crystals, which can give a more dramatic effect in your painting.
How long does it take for the painting to dry?
Drying times can vary based on the amount of paint used. Typically, it takes about 2-4 hours for your painting to dry completely, but you can check for dryness by gently touching the surface.
Is this project safe for kids?
Yes, this project is generally safe for children. However, adults should supervise the use of sharp tools and ensure that no small parts are a part of the workspace.
What can I do if my colors mix too much?
If the colors mix more than you want, try using less water or applying more distinct borders of color. Allowing the first colors to dry before applying others can also help maintain distinct lines.
Can I make a Rainbow Salt Painting on canvas?
Absolutely! Using canvas instead of paper can make the painting even more durable and visually striking.
How do I store my Rainbow Salt Painting?
To store your artwork, keep it in a dry area away from direct sunlight. If possible, frame it to protect against dust and damage.
Conclusion
Rainbow Salt Painting is a captivating project that allows families to explore creativity and science together. The beautiful color interactions and textures make it a memorable experience. For more ideas on exciting projects, check out Rainbow Raised Salt Painting – Fun with Mama or learn about the amazing effects of salt and watercolor paint at Salt & Watercolor Paint (+Rainbow Salt!) – Pop Up Art School. Happy crafting!
Follow us on social for more DIY ideas & inspiration!
Rainbow Salt Painting
Would you like to save this project?
By submitting you agree to receive this project and occasional emails. Unsubscribe anytime.
Materials
Materials
- 1 set Watercolor paint
- 1 cup Salt Kosher salt recommended for larger crystals
- 1 sheet Cardstock or watercolor paper
- 1 set Paintbrushes
- 1 dish Water for mixing colors
- 1 tray A tray for catching excess salt
- 1 optional Glitter for extra sparkle Optional
Directions
Preparation
- Design Your Artwork: Start with a simple sketch or design plan for your Rainbow Salt Painting.
- Apply Watercolors: Using paintbrushes, fill your design with vibrant watercolors.
- Sprinkle Salt: While the paint is still wet, sprinkle salt generously over the painted areas.
- Let It Dry: Allow your artwork to dry completely for 2-4 hours.
- Remove Excess Salt: Gently shake off any excess salt once dry.
- Display Your Art: Find a special place to display your Rainbow Salt Painting.
Last Step: Don’t forget to leave a rating and comment below! It helps other readers find the best DIY projects — and it helps us too!