Would you like to save this recipe?
By submitting you agree to receive this recipe and occasional emails. Unsubscribe anytime.
Materials
- Clean seashells (scallop, clam, or small conch; natural textures work best).
- Epoxy resin kit (two-part resin and hardener; follow manufacturer instructions).
- Mixing cups and disposable stir sticks (silicone cups work well and are reusable).
- Nitrile gloves and a dust mask or respirator rated for organic vapors.
- Fine-grit sandpaper (220–400 grit) for gentle smoothing.
- Isopropyl alcohol (70% or higher) and lint-free cloths for cleaning.
- Mica powders, alcohol inks, or pigments for galaxy colors (easy to blend; optional).
- Fine glitter or microbeads for crystal-like sparkles (optional).
- A small handheld torch or heat gun to remove bubbles gently.
- Toothpicks or small pipettes for precise placement of resin.
- A flat tray or silicone mat to keep things tidy.
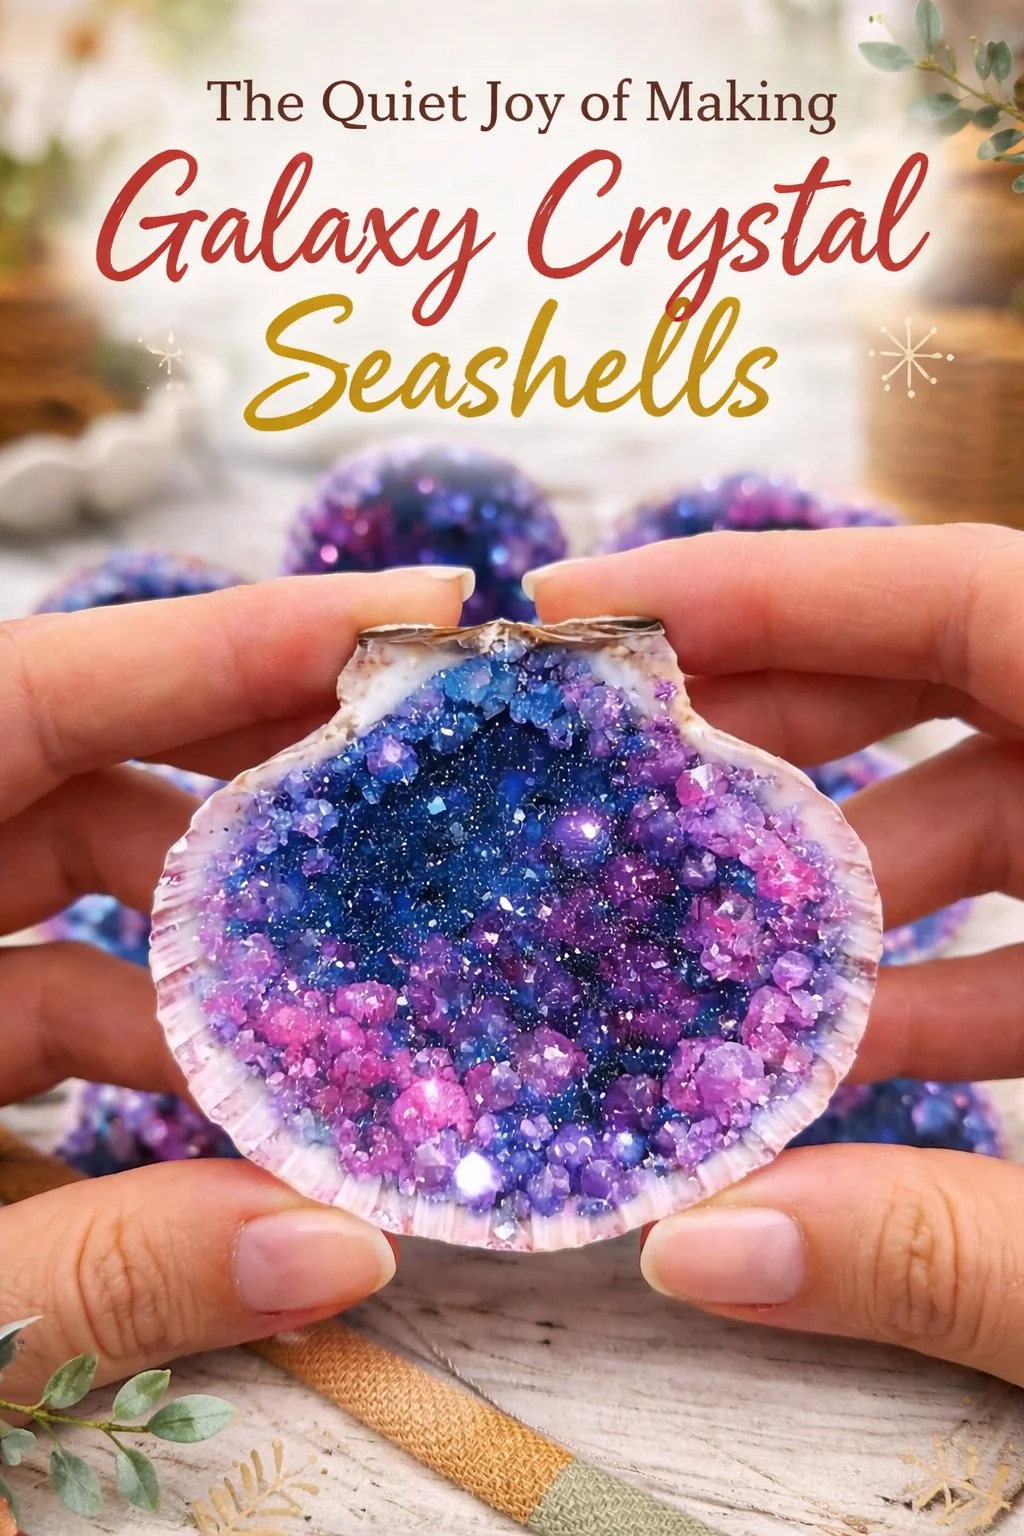
- Paper towels and a waste bag for cleanup.Most items remain simple to find at craft stores or online. If you prefer not to use epoxy, UV resin can work for small shells, but it cures differently and needs a UV lamp. For more color inspiration, explore the variety shown in galaxy crystal seashells sparkling colors.
Instructions
- Prepare your workspace and shells.Work on a flat, well-ventilated surface. Clean shells with warm water and a soft brush, then wipe with isopropyl alcohol until dry and matte.
- Smooth rough edges gently.Use fine-grit sandpaper to remove any sharp bits and create a slightly matte area for resin to adhere. The sanded feel will help the resin lock in.
- Mix epoxy resin carefully.Measure equal parts resin and hardener in a clean cup. Stir slowly for two to three minutes, scraping the sides and bottom so the mixture becomes clear and uniform.
- Add color and sparkle.Drop mica powder or alcohol ink into the mixed resin. Stir lightly so colors swirl without overmixing; small, distinct swirls keep the galaxy effect alive.
- Place shells on a stable surface.Set shells in a shallow tray or on a silicone mat. Tilt them slightly if you want resin to pool toward one side and form a deeper galaxy effect.
- Pour a thin base layer.Use a small cup or pipette to add a thin base of clear resin into the shell. Work slowly so the liquid follows the shell’s contours and settles into ridges.
- Add color details.With a toothpick or pipette, touch tiny drops of colored resin onto the base layer. Watch as the colors spread and edges soften, like nebulae drawing across the curve.
- Remove bubbles carefully.Light a small torch or use a heat gun at low heat and pass it briefly over the resin. Move steadily to pop surface bubbles without overheating the resin.
- Let the resin cure.Cover lightly to keep dust away and leave the shells undisturbed for the time the resin instructions suggest. Check in gently, but avoid moving them until fully cured.
- Add crystal accents if you like.Once the main layer cures, you can add small drops of clear resin mixed with glitter or microbeads. Place them where light will catch the most and cure again.
- Final touches and polish.If you see rough spots, sand them smooth and buff with a soft cloth. A tiny amount of clear gloss resin on the edges will restore shine.
- Rest and reflect.After curing, set your shells where you can see them catch light. Take a moment to breathe and notice the colors and textures you made.
Last Step: Don’t forget to leave a rating and comment below! It helps other readers find the best recipes — and it helps us too!