Would you like to save this recipe?
By submitting you agree to receive this recipe and occasional emails. Unsubscribe anytime.
Materials
- Gelatin powder or agar-agar (depending on whether you prefer animal-based or plant-based options)
- Glycerin (acts as a plasticizer; optional but highly recommended for flexibility)
- Water
- Clear, food-safe glue or cornstarch (if you prefer a starch-based bioplastic variation)
- Natural pigments, watercolors, or diluted food coloring (optional; use sparingly)
- Small pressed flowers, leaves, or thin paper cutouts (dry and flat)
- A nonstick tray, silicone mat, or parchment paper
- Cookie cutters, small round molds, or templates for shapes
- A shallow spoon or silicone spatula for spreading
- A heatproof saucepan and a wooden or silicone spoon
- A fine brush for placement and smoothing of delicate botanicals
- A small hole punch or needle for making a hanging hole after drying
- Scissors and ribbon or twine for hanging
- Oven or sunny windowsill for drying (optional; air drying is gentlest)
Instructions
- Measure one tablespoon of gelatin or agar-agar and two tablespoons of warm water.Stir slowly until the powder dissolves and the mix feels smooth and slightly thick to the touch.
- Add a teaspoon of glycerin and one tablespoon of water.Stir until the glycerin blends and the mixture takes on a glossy sheen.
- Warm the mix gently over the lowest heat, stirring often.Watch the surface change from cloudy to clear; small bubbles should begin to form.
- If you choose color, add a drop or two of diluted watercolor or food coloring.Stir softly; the pigment will spread thinly and will become more subtle as it dries.
- Prepare your tray with parchment or a silicone mat and set your cookie cutters or templates.Work quietly, placing tools and botanicals near the work area so you do not rush.
- Pour a thin layer of the warm bioplastic into each shape.Use the back of a spoon or a spatula to spread it evenly and to release any bubbles.
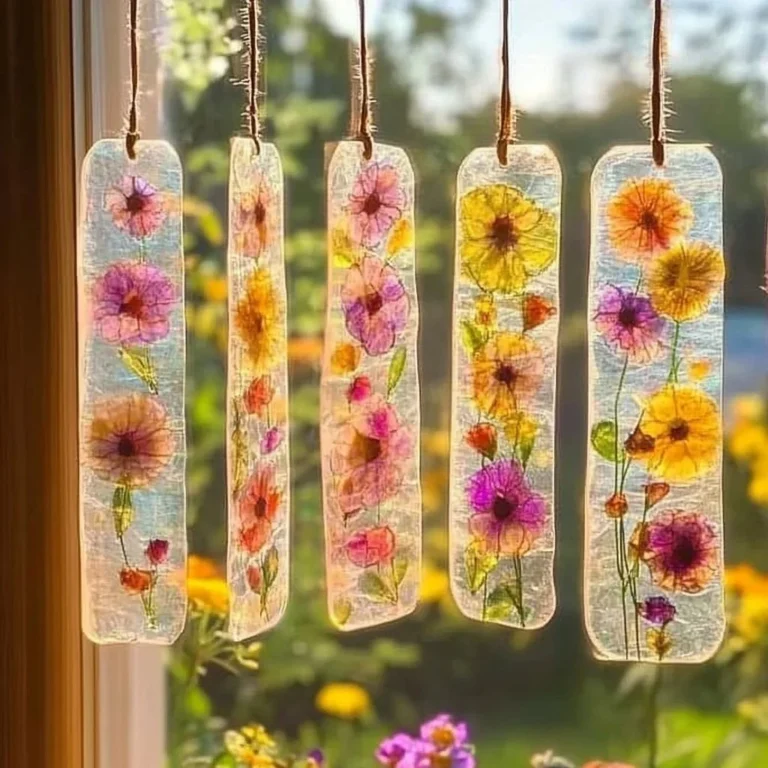
- Gently press small pressed leaves, petals, or paper cutouts onto the surface.Use a fine brush to smooth them so they lie flat; notice the texture change under your fingertips.
- Make a small hole at the top of each piece with a needle or skewer while the material still feels soft.This step saves time later and keeps the hole neat and centered.
- Let the pieces dry in a warm, ventilated place for several hours or overnight.If you prefer, place them in a low oven (around 150 F) for faster drying, checking often.
- Once dry, test flexibility gently by holding the edge and bending slightly.If the piece cracks, store it flat and handle it more gently next time; small adjustments help.
- Trim any uneven edges with scissors and thread ribbon or twine through the hole.Tie with a small, neat knot and hang where light invites a soft glow.
Last Step: Don’t forget to leave a rating and comment below! It helps other readers find the best recipes — and it helps us too!