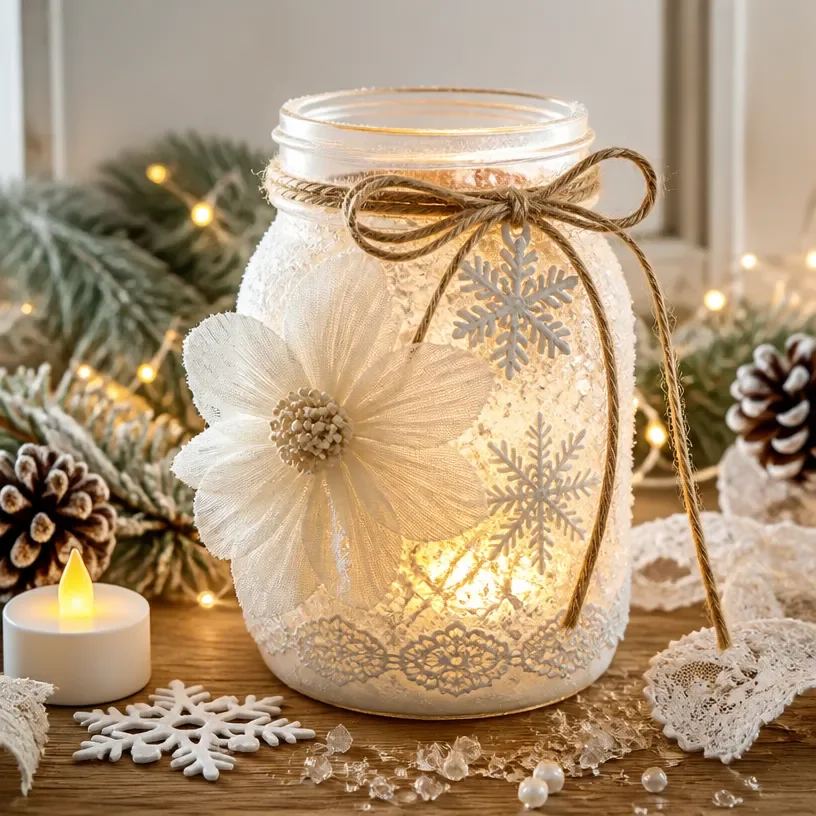
Snowy Wedding Lanterns: Winter Decor Ideas create an enchanting atmosphere that glows softly. These beautiful lanterns bring warmth and charm, which makes them perfect for any winter celebration or cozy home display. Their allure lies not only in their appearance but also in the joyful experience of crafting them together. Let’s explore what makes these lanterns so delightful to create and how to achieve a stunning glow. You may also find Glowing Fish Lanterns Aquarium Decor Ideas useful.
To start, it is essential to understand the materials needed for this project. Using basic craft supplies ensures that anyone can join in the fun. You will need clear jars, glitter or paint, battery-powered candles, and a few decorative elements. The magic unfolds when the light shines through the translucent surfaces, creating a sparkling effect. This DIY project becomes more than just a craft; it transforms ordinary materials into a captivating decoration. You may also find Bioplastic Suncatchers Cozy Decor useful.
You can check out other creative DIY projects for inspiration, such as Colorful Crystal Mason Jar Lanterns.
What You End Up With
After completing your Snowy Wedding Lanterns, you’ll have a stunning addition that embodies warmth and festivity. The light glimmers through, creating playful reflections that dance in the surrounding space. This project can be customized, allowing different colors and designs to shine through. You may also find Clear Glue Suncatcher Home Decor useful.
Materials
Gather the following materials for your Snowy Wedding Lanterns: You may also find Coastal Decoration Seaside Beauty useful.
- Clear glass jars
- Glitter or white paint
- Battery-powered candles
- Decorative elements (e.g., twine, snowflakes)
- Adhesive (e.g., glue or tape)
Ensure that the glass jars are clean and dry before starting this project. You may also find Colorful Crystal Mason Jar Lantern Home Decor useful.

Steps
Prepare the Jars: Before beginning, ensure the jars are spotless. Any residue may affect how the adhesive sticks. If you decide to paint the jars, that step can lead to a beautiful cracked ice effect on the surface once it dries.
Apply Adhesive: Use glue or tape to attach glitter or paint to the inside or outside of the jars. The shine will enhance each jar’s ability to reflect light. Pay attention to where the glue goes; a thin, even layer is more effective.
Add Decorative Elements: You can use twine to wrap around the neck of the jar or attach small snowflakes for added charm. This step allows you to customize your lanterns.
Insert Battery-Powered Candles: Finally, place the battery-operated candles inside each jar. This is a crucial step, as the light will transform everything into a glowing wonder when turned on.
Safety Check: Always use battery-operated candles to avoid any fire hazards. This project is safe and enjoyable, especially with children involved.
What Goes Wrong and How to Fix It
If you notice that the adhesive is not sticking well, try using a stronger adhesive for better results. Also, if the glitter doesn’t adhere properly, ensure the surface is clean and apply more adhesive where needed. Remember, it’s normal for the first attempt to require adjustments. Keeping an open mind makes the crafting process more enjoyable.
Where to Display It
These lanterns can transform any space in your home. Place them on a window sill where they can catch the light, or use them as centerpieces for your winter gatherings. Their soft glow can enhance a cozy evening atmosphere, making them perfect for relaxing evenings or festive celebrations.
You can also explore Coastal Decoration ideas for an alternative way to brighten your space.

Variations
Feel free to experiment with different materials. For instance, try using colored glitter for a unique twist, or incorporate natural elements like pinecones for a rustic feel.
FAQs
Can I use regular candles instead of battery-powered ones?
Using regular candles is not recommended due to fire hazards. Battery-powered candles provide a safe option for families and enhance the lantern’s glowing effect.
How long does it take for the adhesive to dry?
Most adhesives will dry within a few hours. However, allowing the jars to sit overnight ensures everything is securely attached.
Can younger children help with this project?
Younger children can help with decorating and applying adhesive, but be sure to supervise especially during parts involving sharp tools or small parts.
What if my lanterns don’t look shiny?
If the lanterns lack shine, consider adding another layer of glitter or paint. A fresh coat can revitalize the design and enhance the glow.
How do I clean the jars post-creation?
To clean them, gently wipe with a soft damp cloth. Avoid abrasive materials that could scratch the surface or remove the design.
Can I use different shapes of jars?
Certainly! Various jar shapes can make your designs unique. Mix and match to create an interesting display.
Conclusion
Creating Snowy Wedding Lanterns is a delightful way to bring light into your winter decor. These projects are perfect for family bonding and foster creativity. For more ideas, consider checking out this DIY Winter Terrarium Home Decor Idea or exploring 20 Enchanting Winter Wedding Aisle Decor Ideas We Love!. Enjoy your crafting!
Follow me on social for more recipe ideas & inspiration!
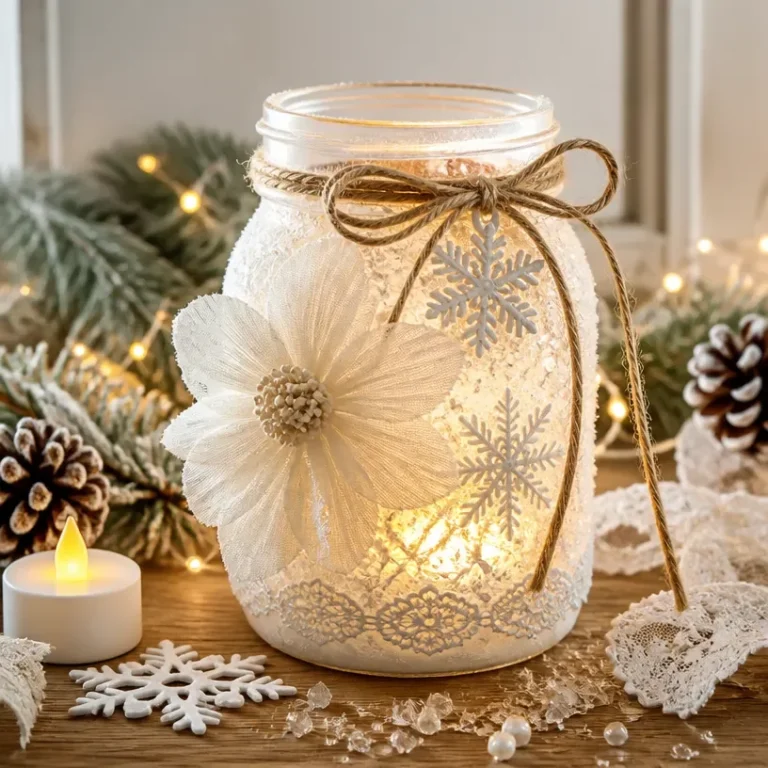
Snowy Wedding Lanterns
Would you like to save this recipe?
By submitting you agree to receive this recipe and occasional emails. Unsubscribe anytime.
Materials
Materials
- 5 pieces Clear glass jars Ensure jars are clean and dry.
- 1 bottle Glitter or white paint For decorating the jars.
- 5 pieces Battery-powered candles Use these for safety.
- to taste various Decorative elements (e.g., twine, snowflakes) Customize the lanterns.
- 1 bottle Adhesive (e.g., glue or tape) For applying glitter or paint.
Instructions
Preparation
- Prepare the jars by cleaning them thoroughly to ensure residue does not affect adhesive quality.
- If painting, apply paint to the jars and allow to dry for a cracked ice effect.
Decoration
- Apply adhesive using a thin, even layer to the inside or outside of the jars.
- Add glitter or paint to the adhesive-coated areas for reflected light.
- Decorate with twine around the neck of the jar and attach small snowflakes for added charm.
Assembly
- Insert the battery-operated candles inside each jar once decorations are complete.
- Ensure the candles are turned on to create the glowing wonder effect.
Finalize
- Conduct a safety check to confirm all candles are battery-powered to avoid fire hazards.
Last Step: Don’t forget to leave a rating and comment below! It helps other readers find the best recipes — and it helps us too!
Tips & Notes:
Nutrition Information: Serving: 1 | Calories: | Carbohydrates: | Protein: | Fat: | Sodium: | Fiber: | Sugar:
Nutritional information is provided as a courtesy and calculated automatically. Values can vary depending on the brands and ingredients you use, so if you’re tracking closely, I recommend calculating with your own preferred tool.